Two Wiksten Unfolding Jackets

4 Comments

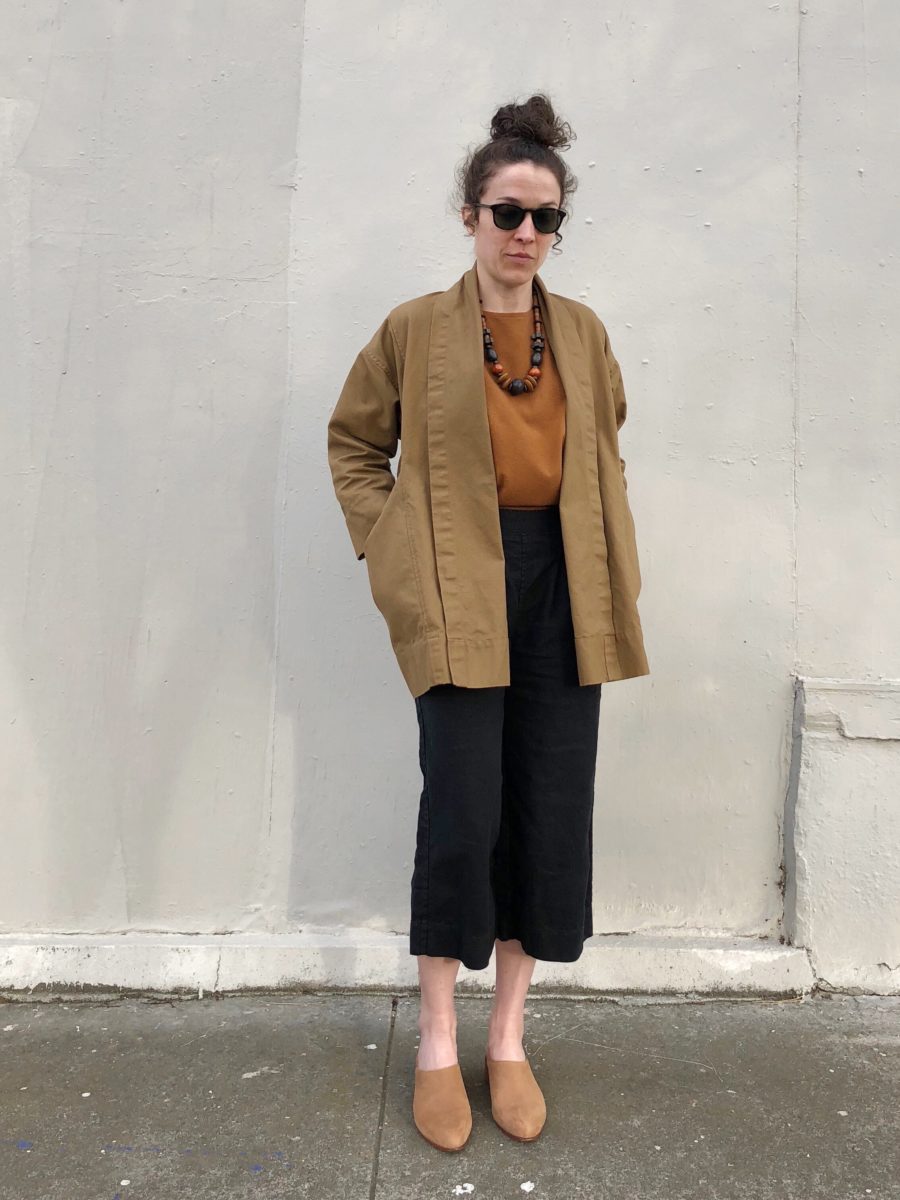
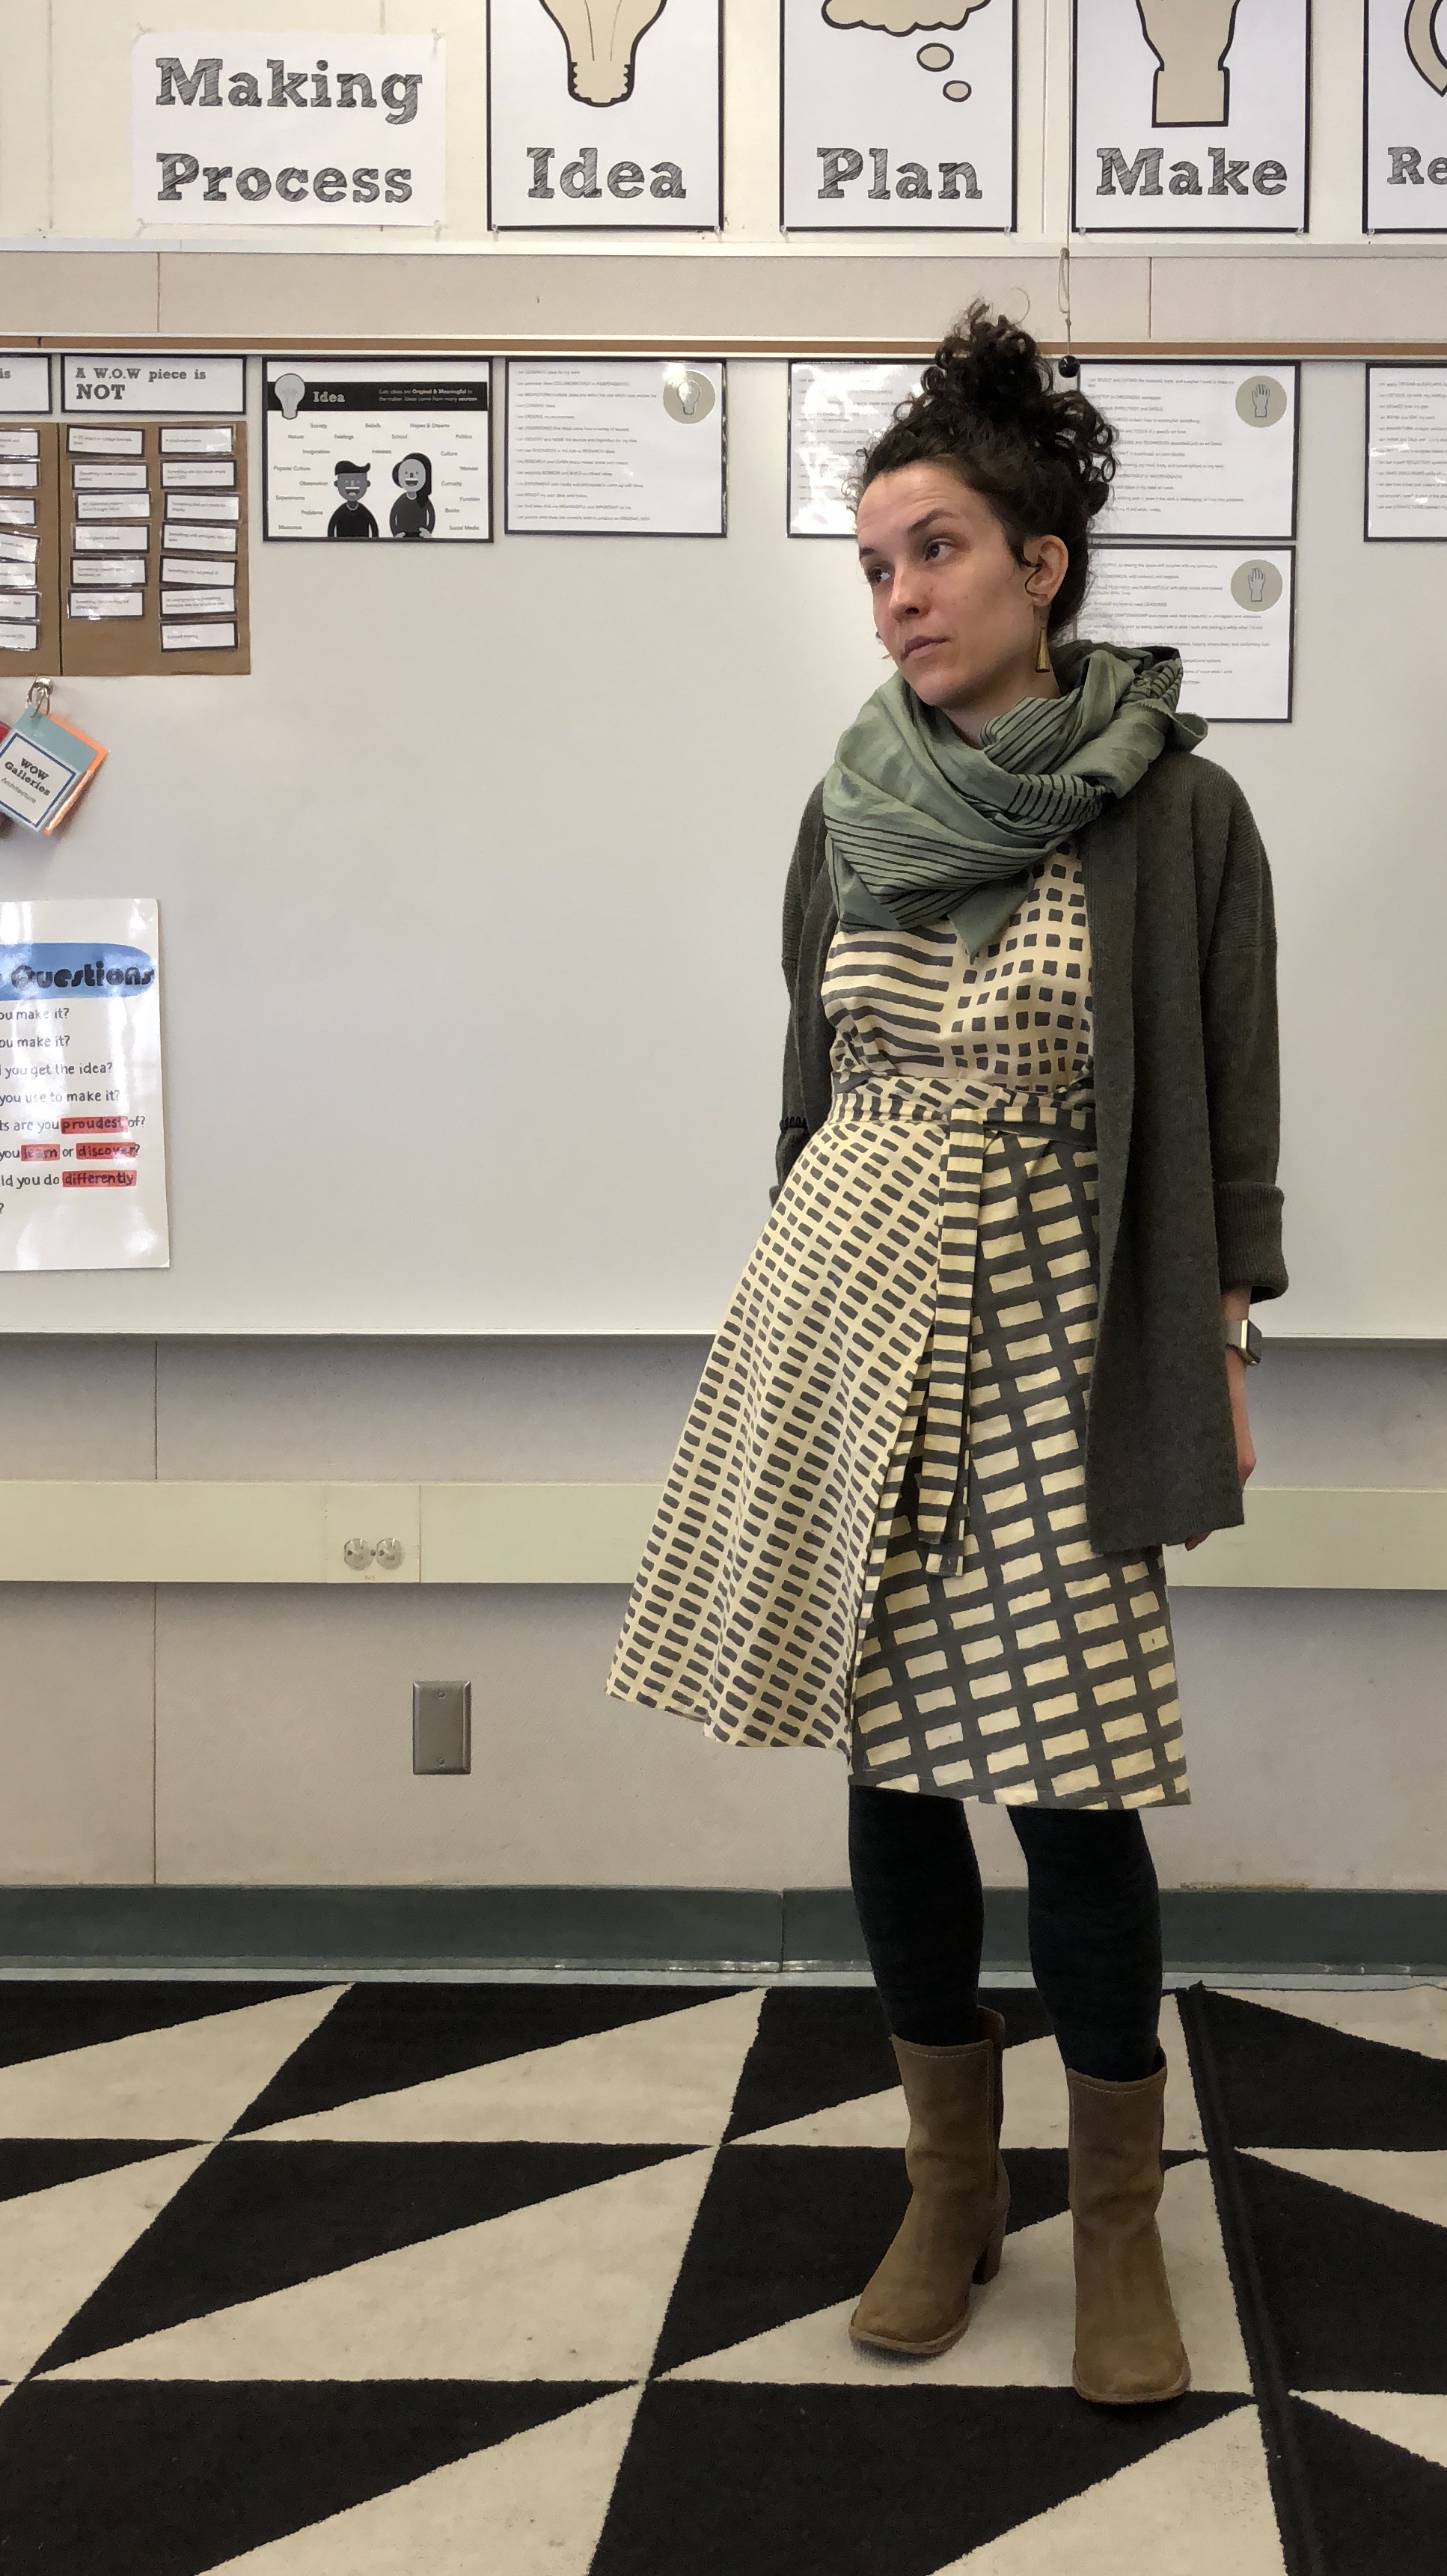
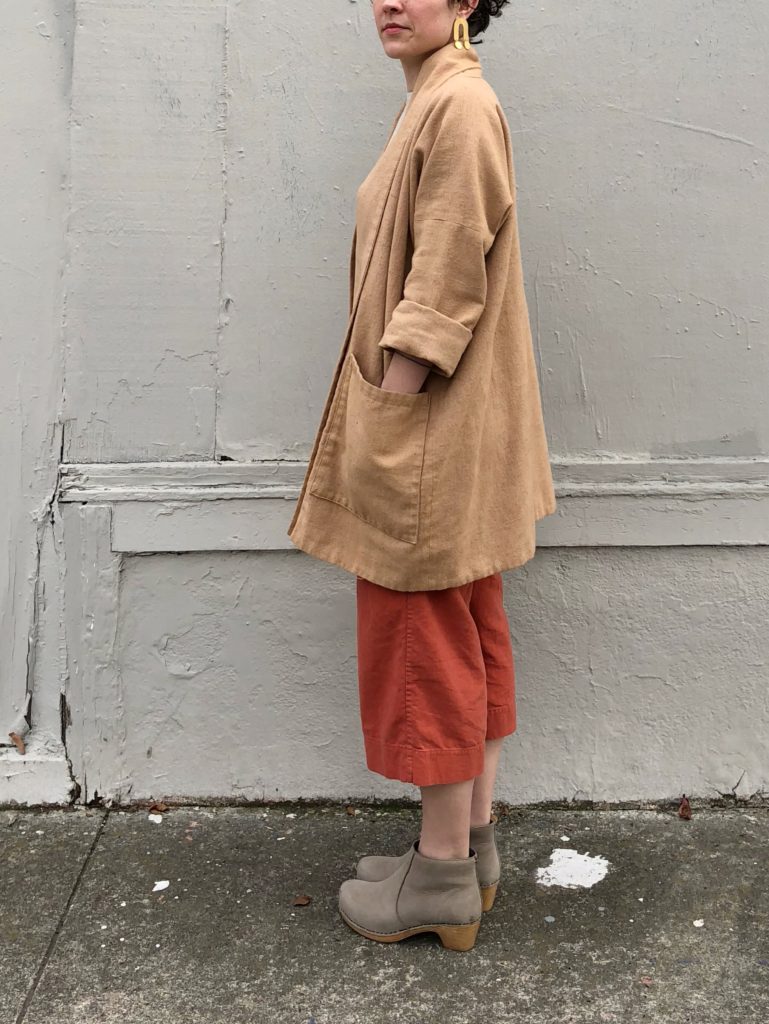
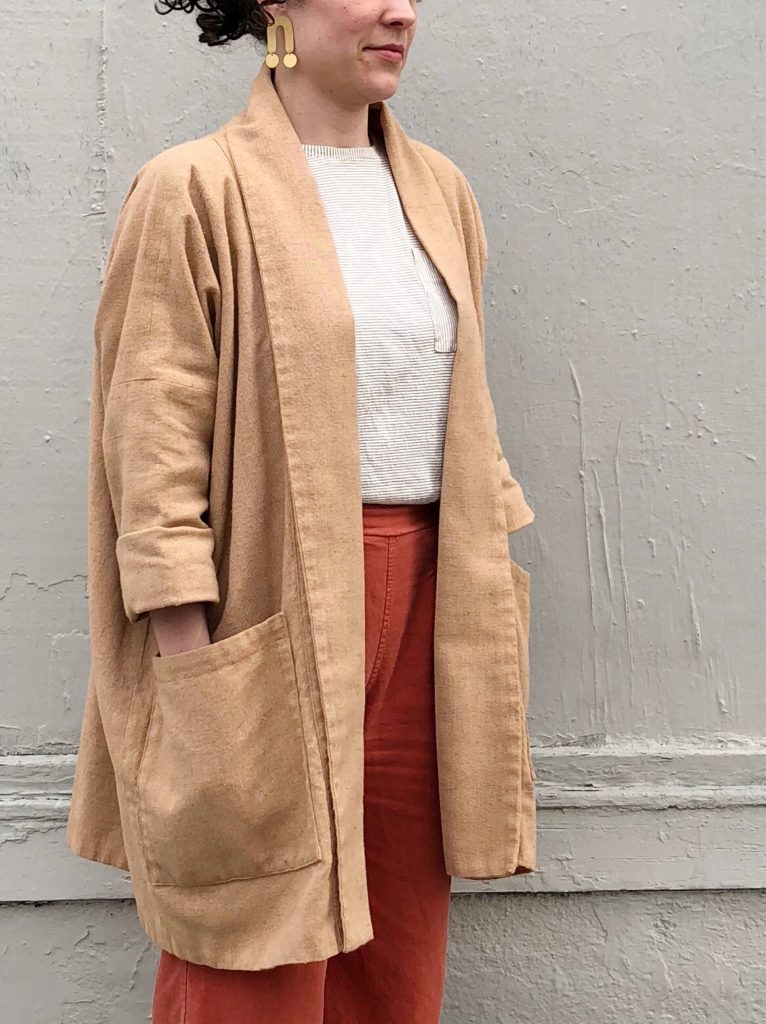
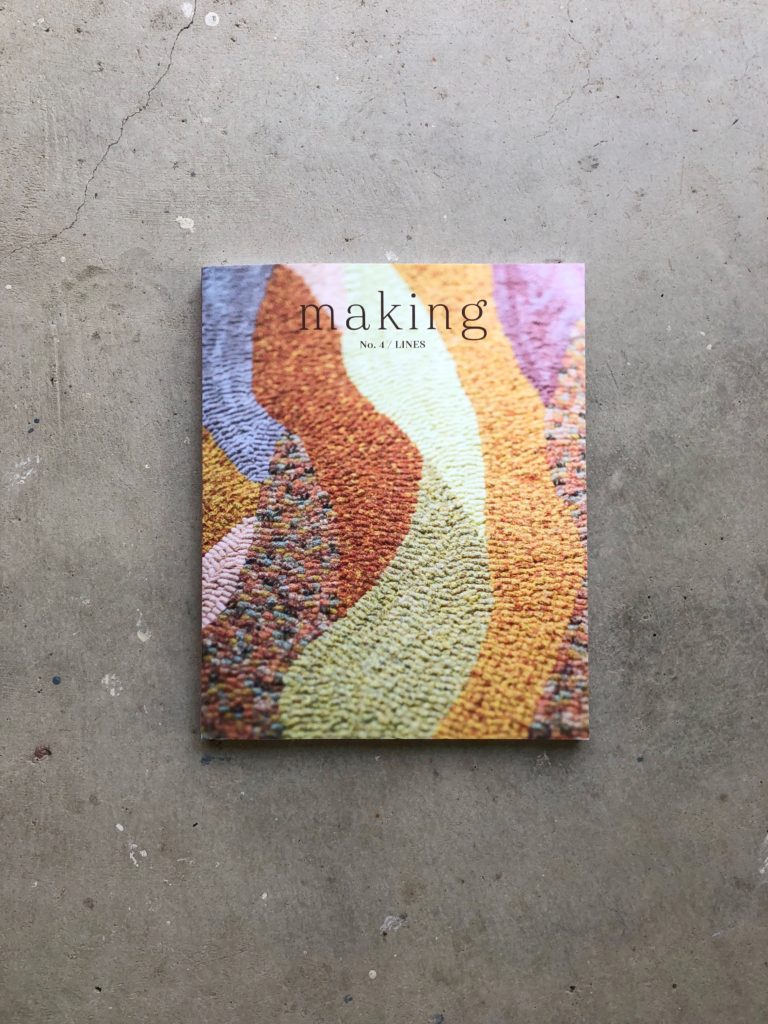
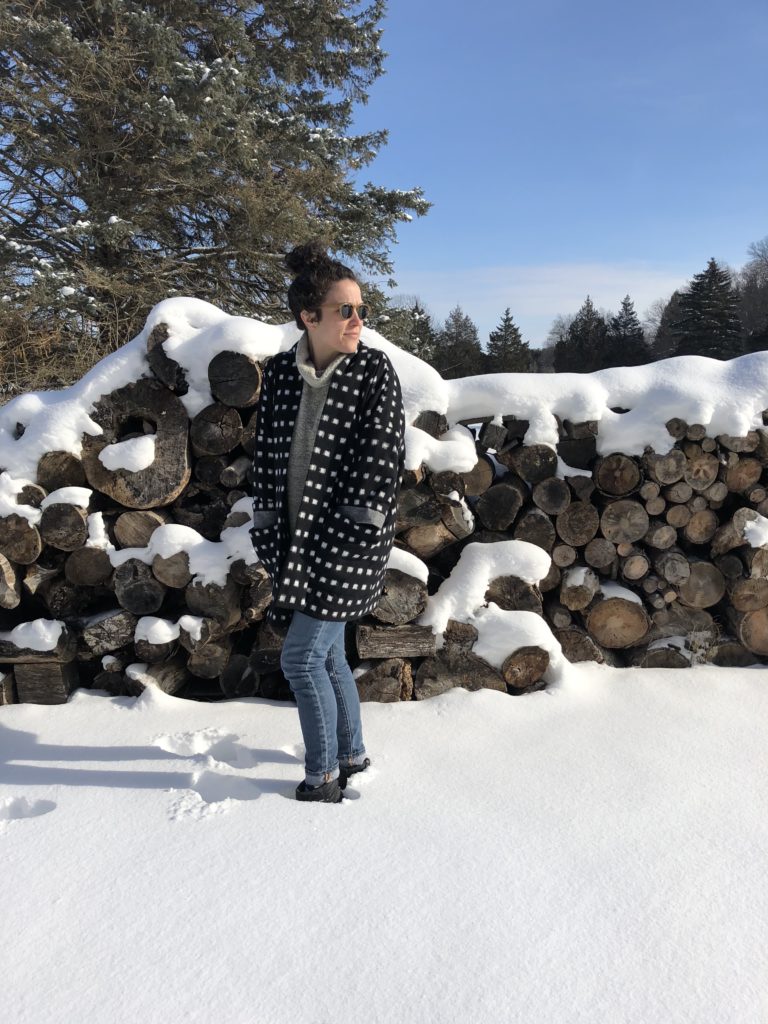
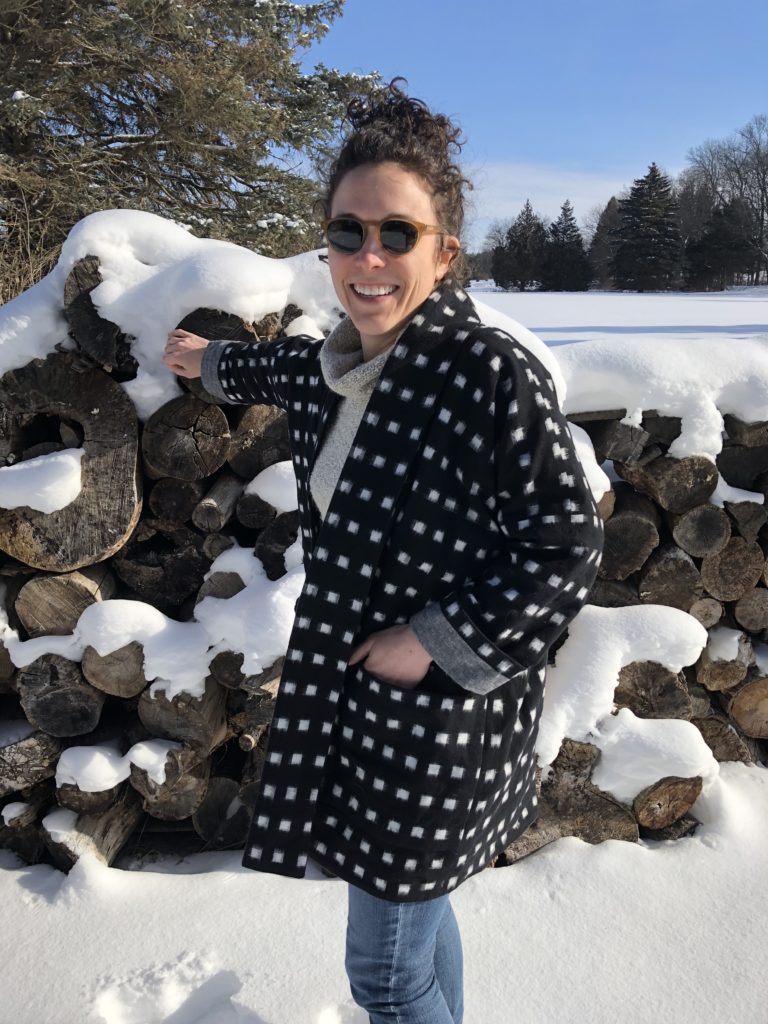
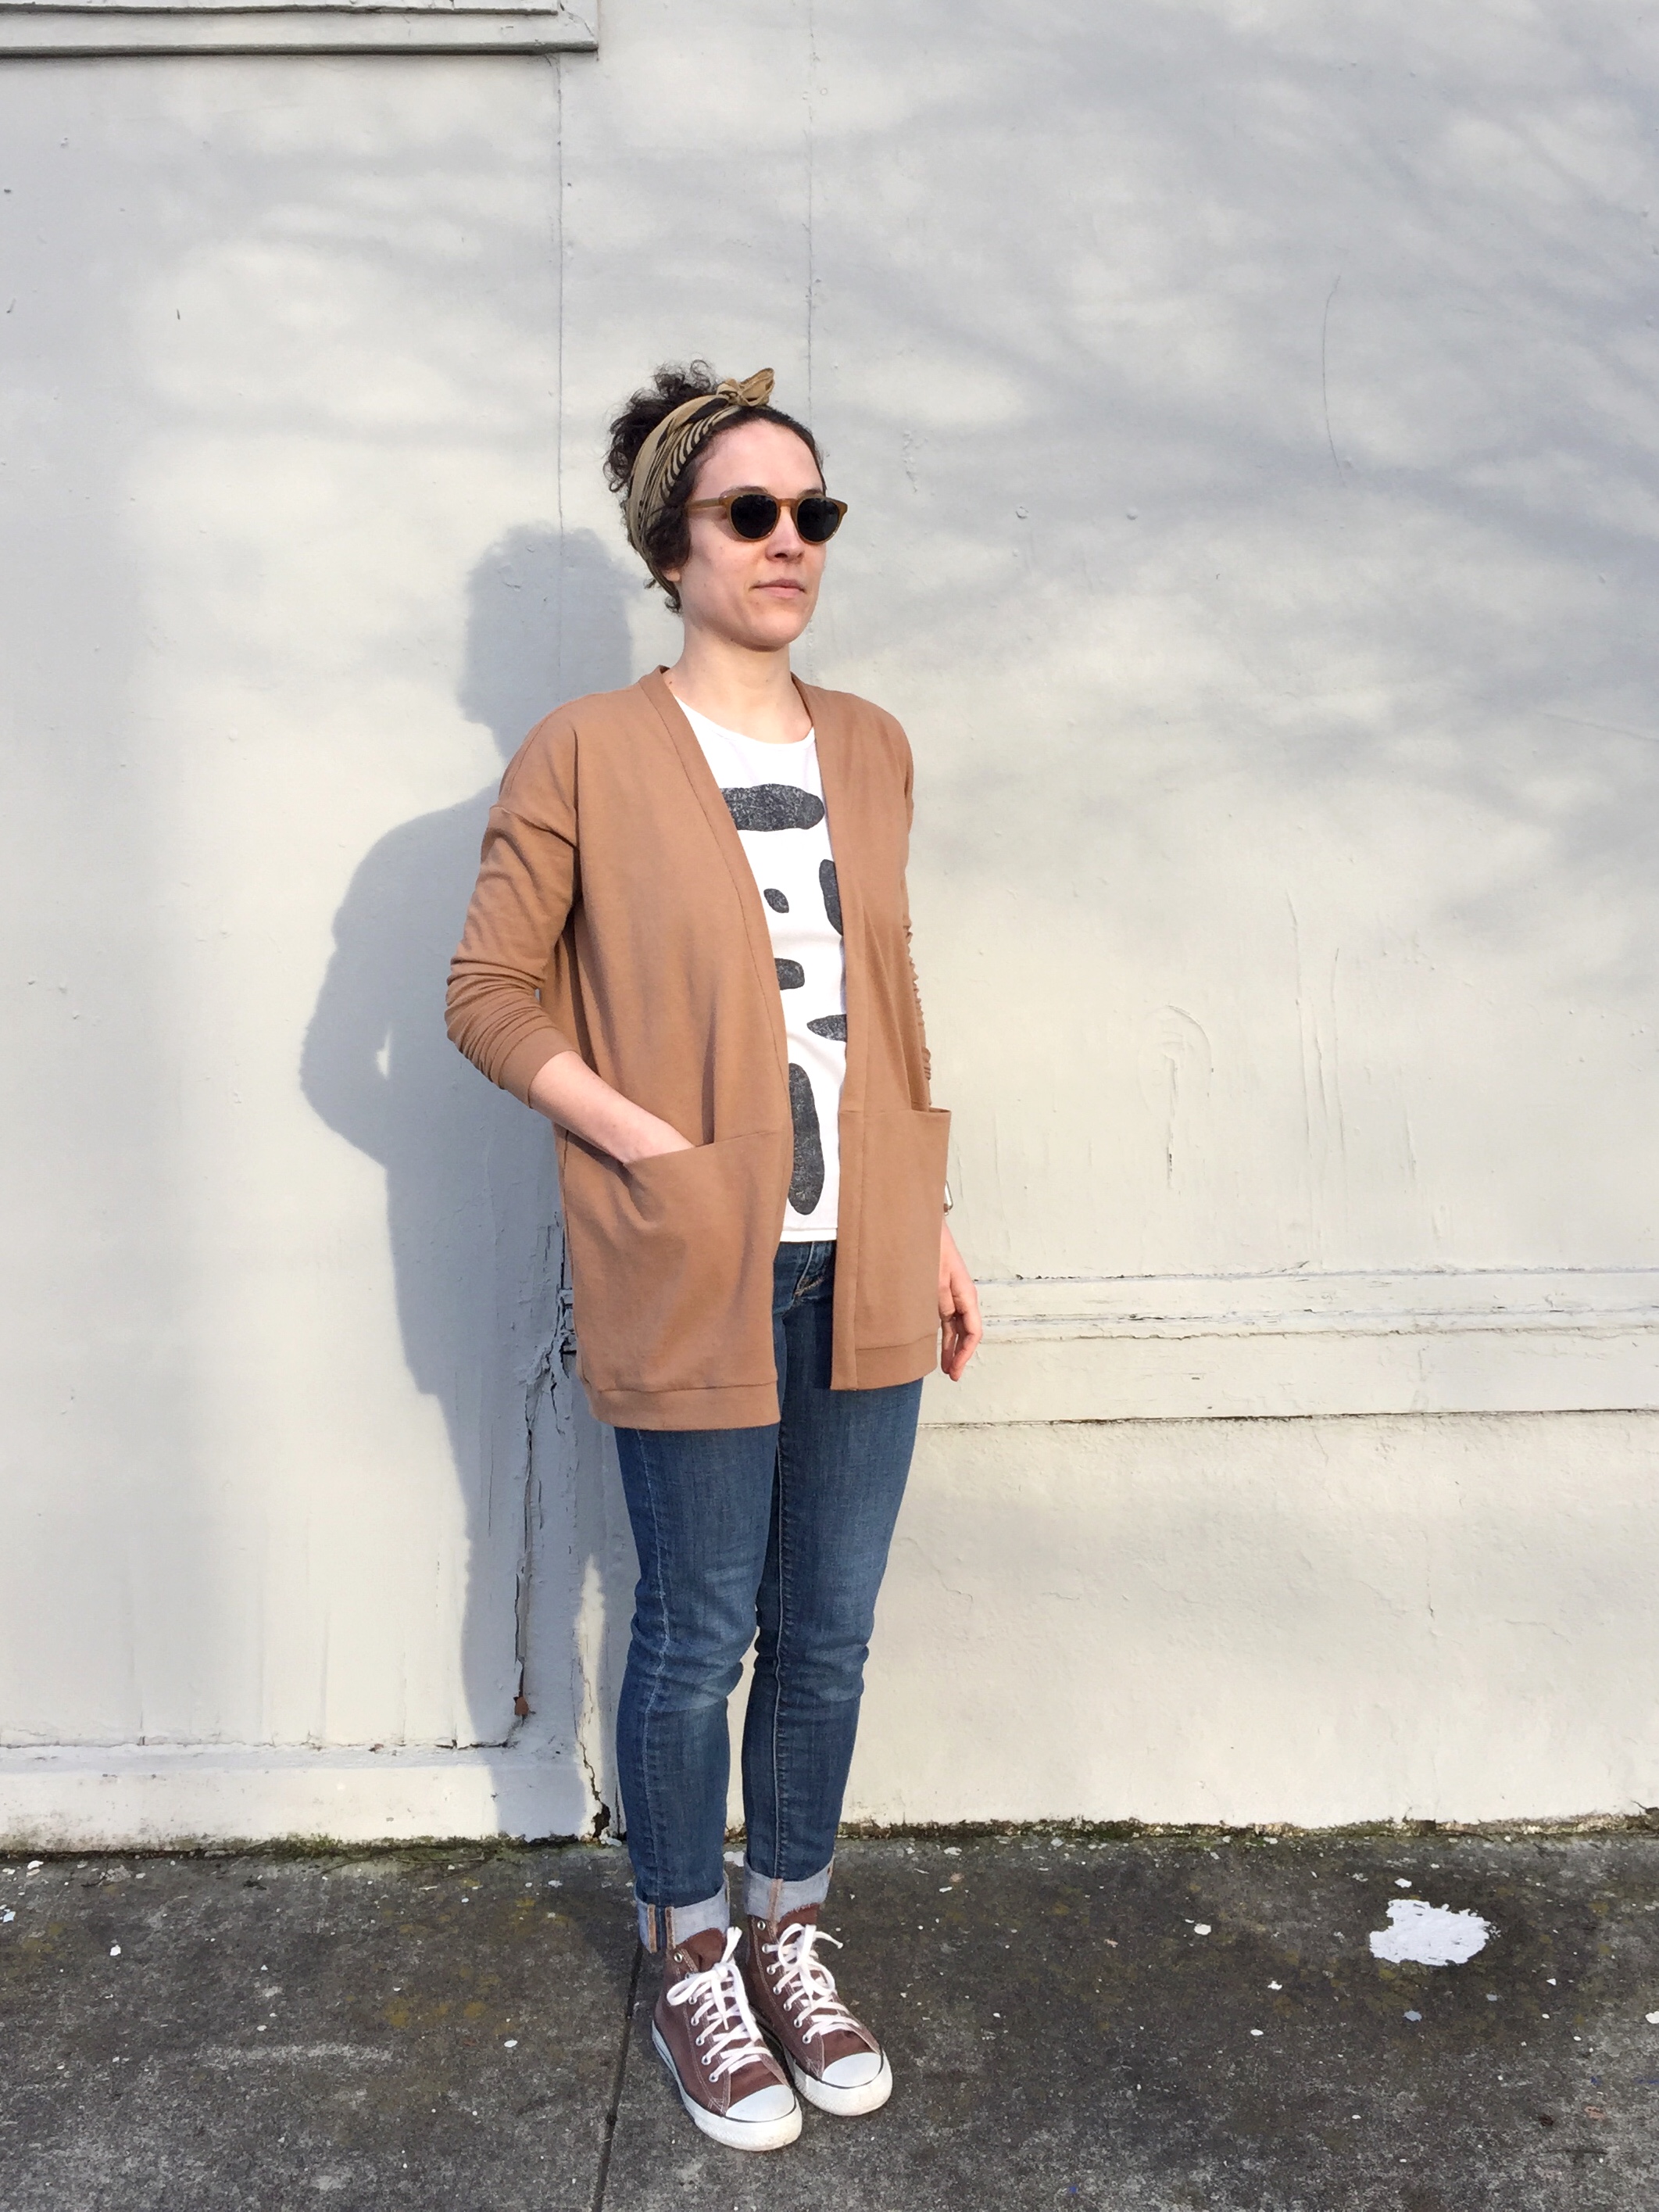
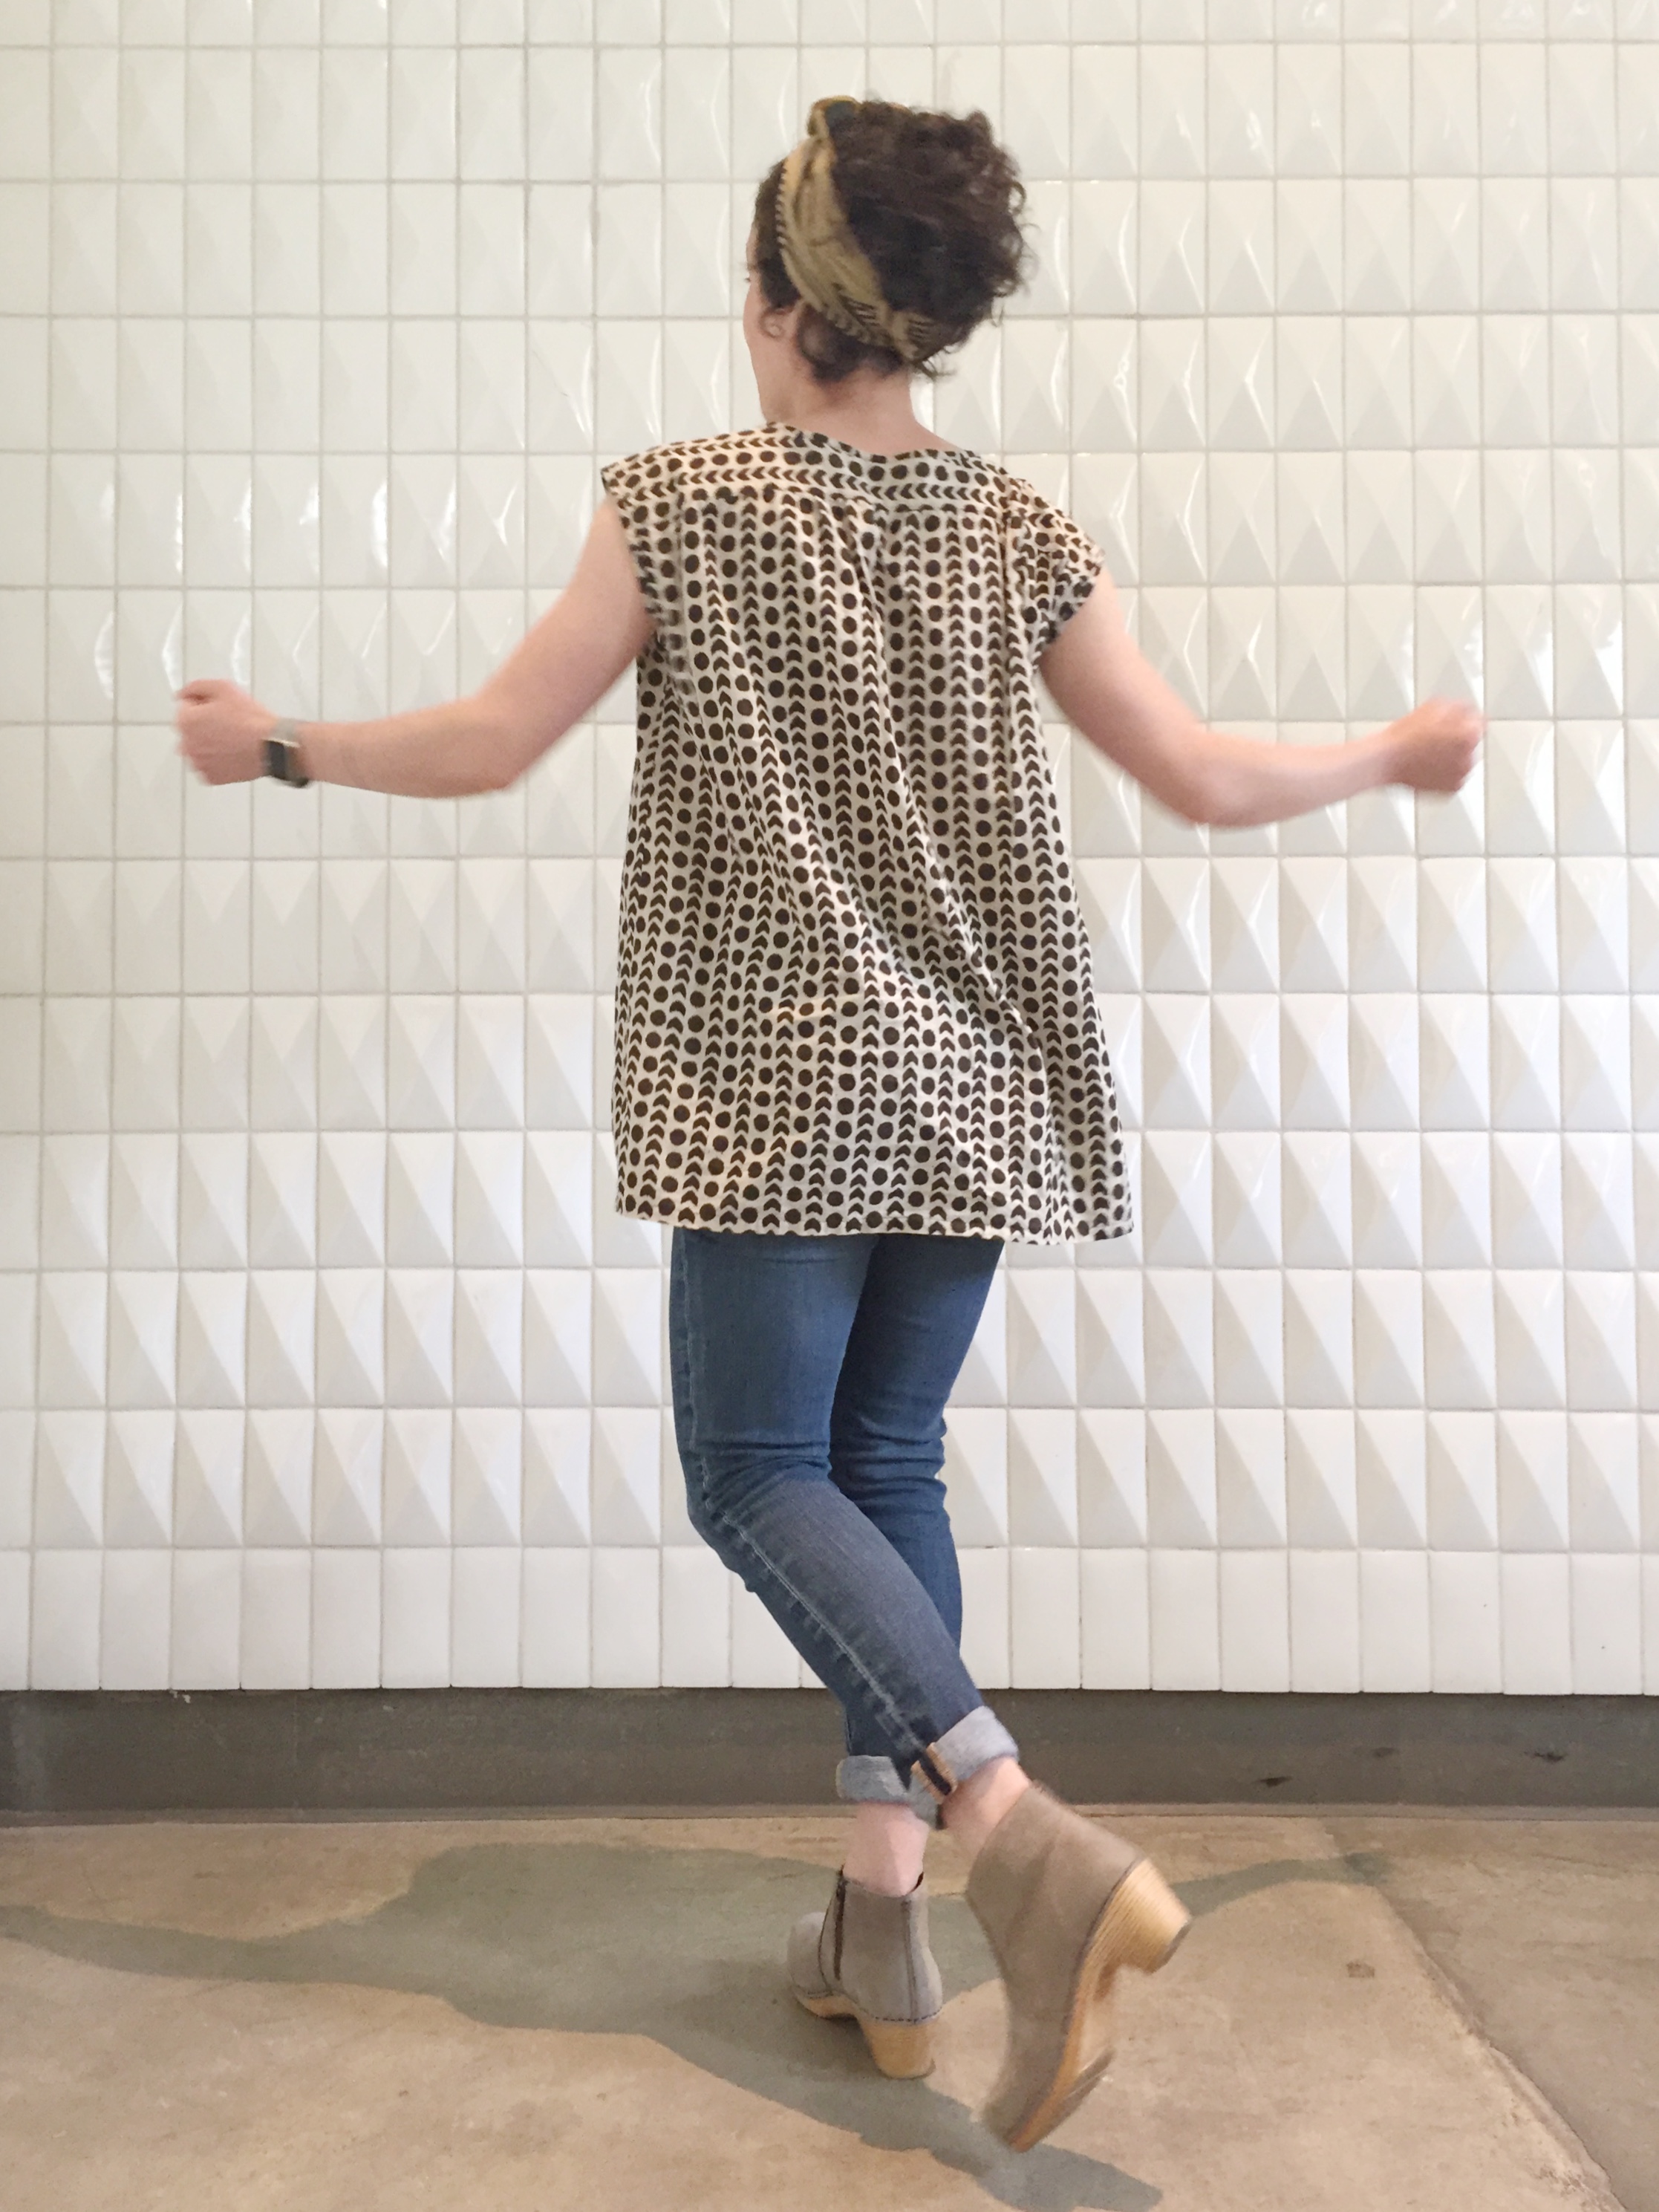
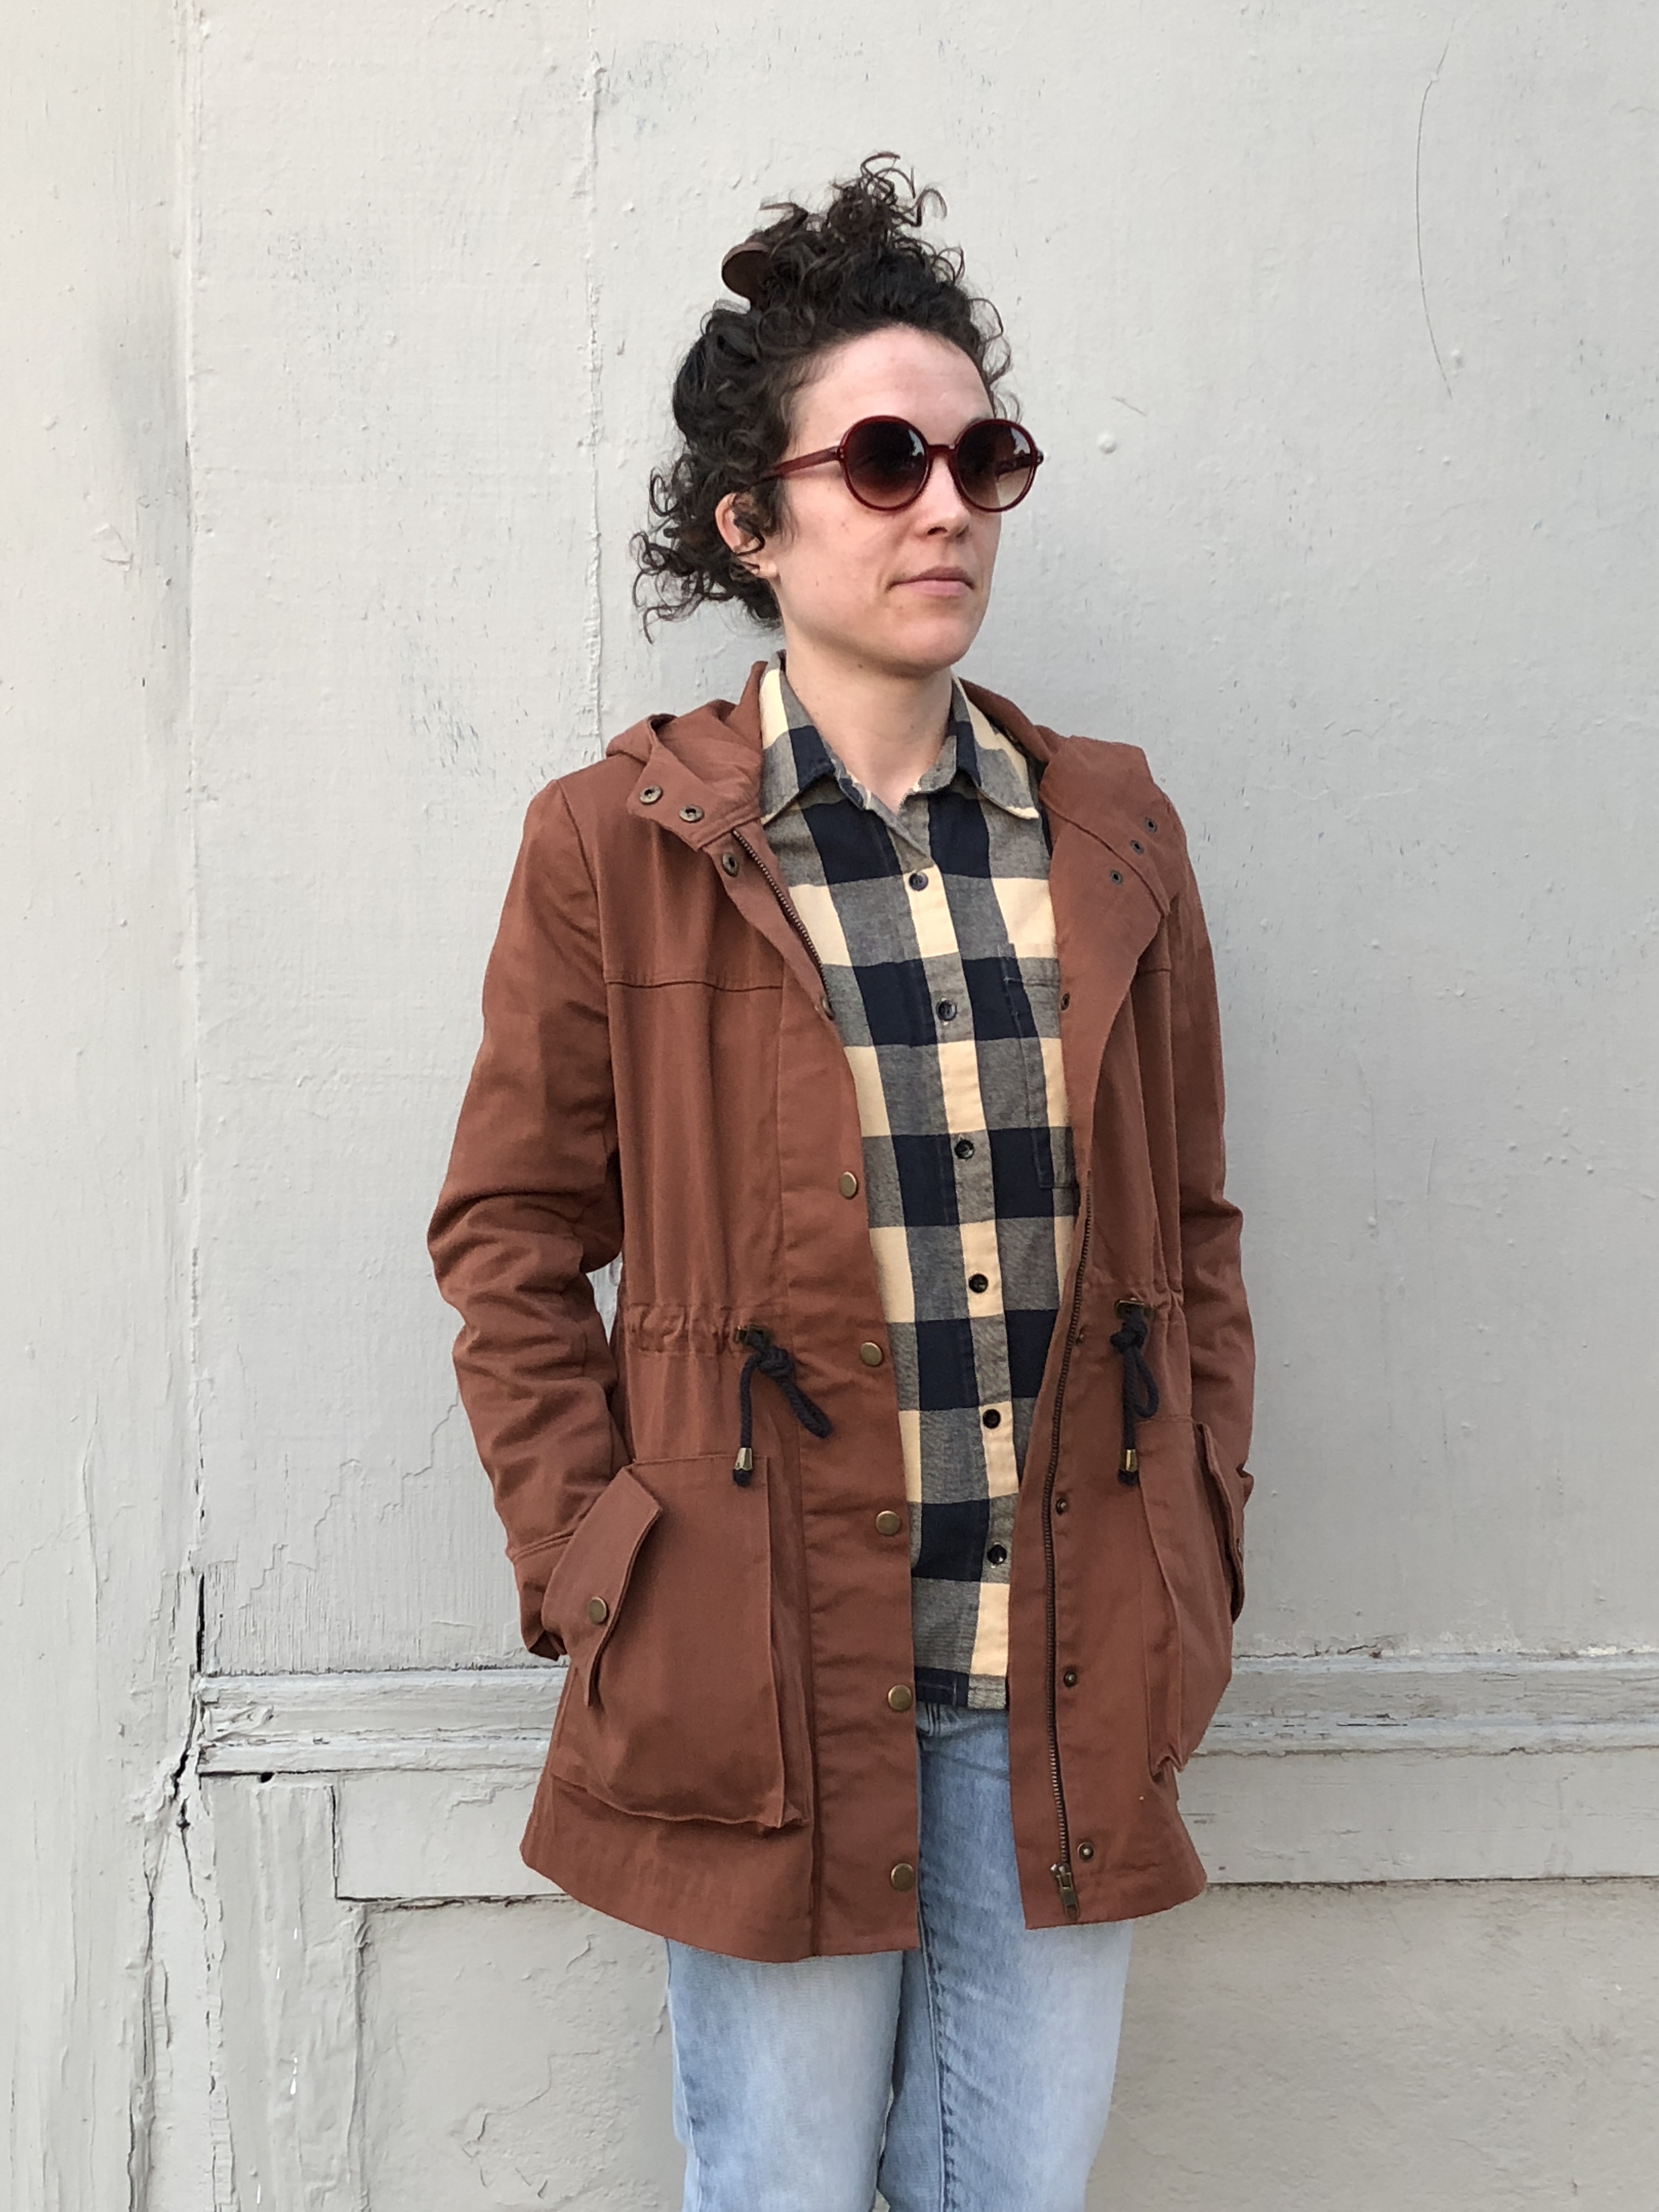
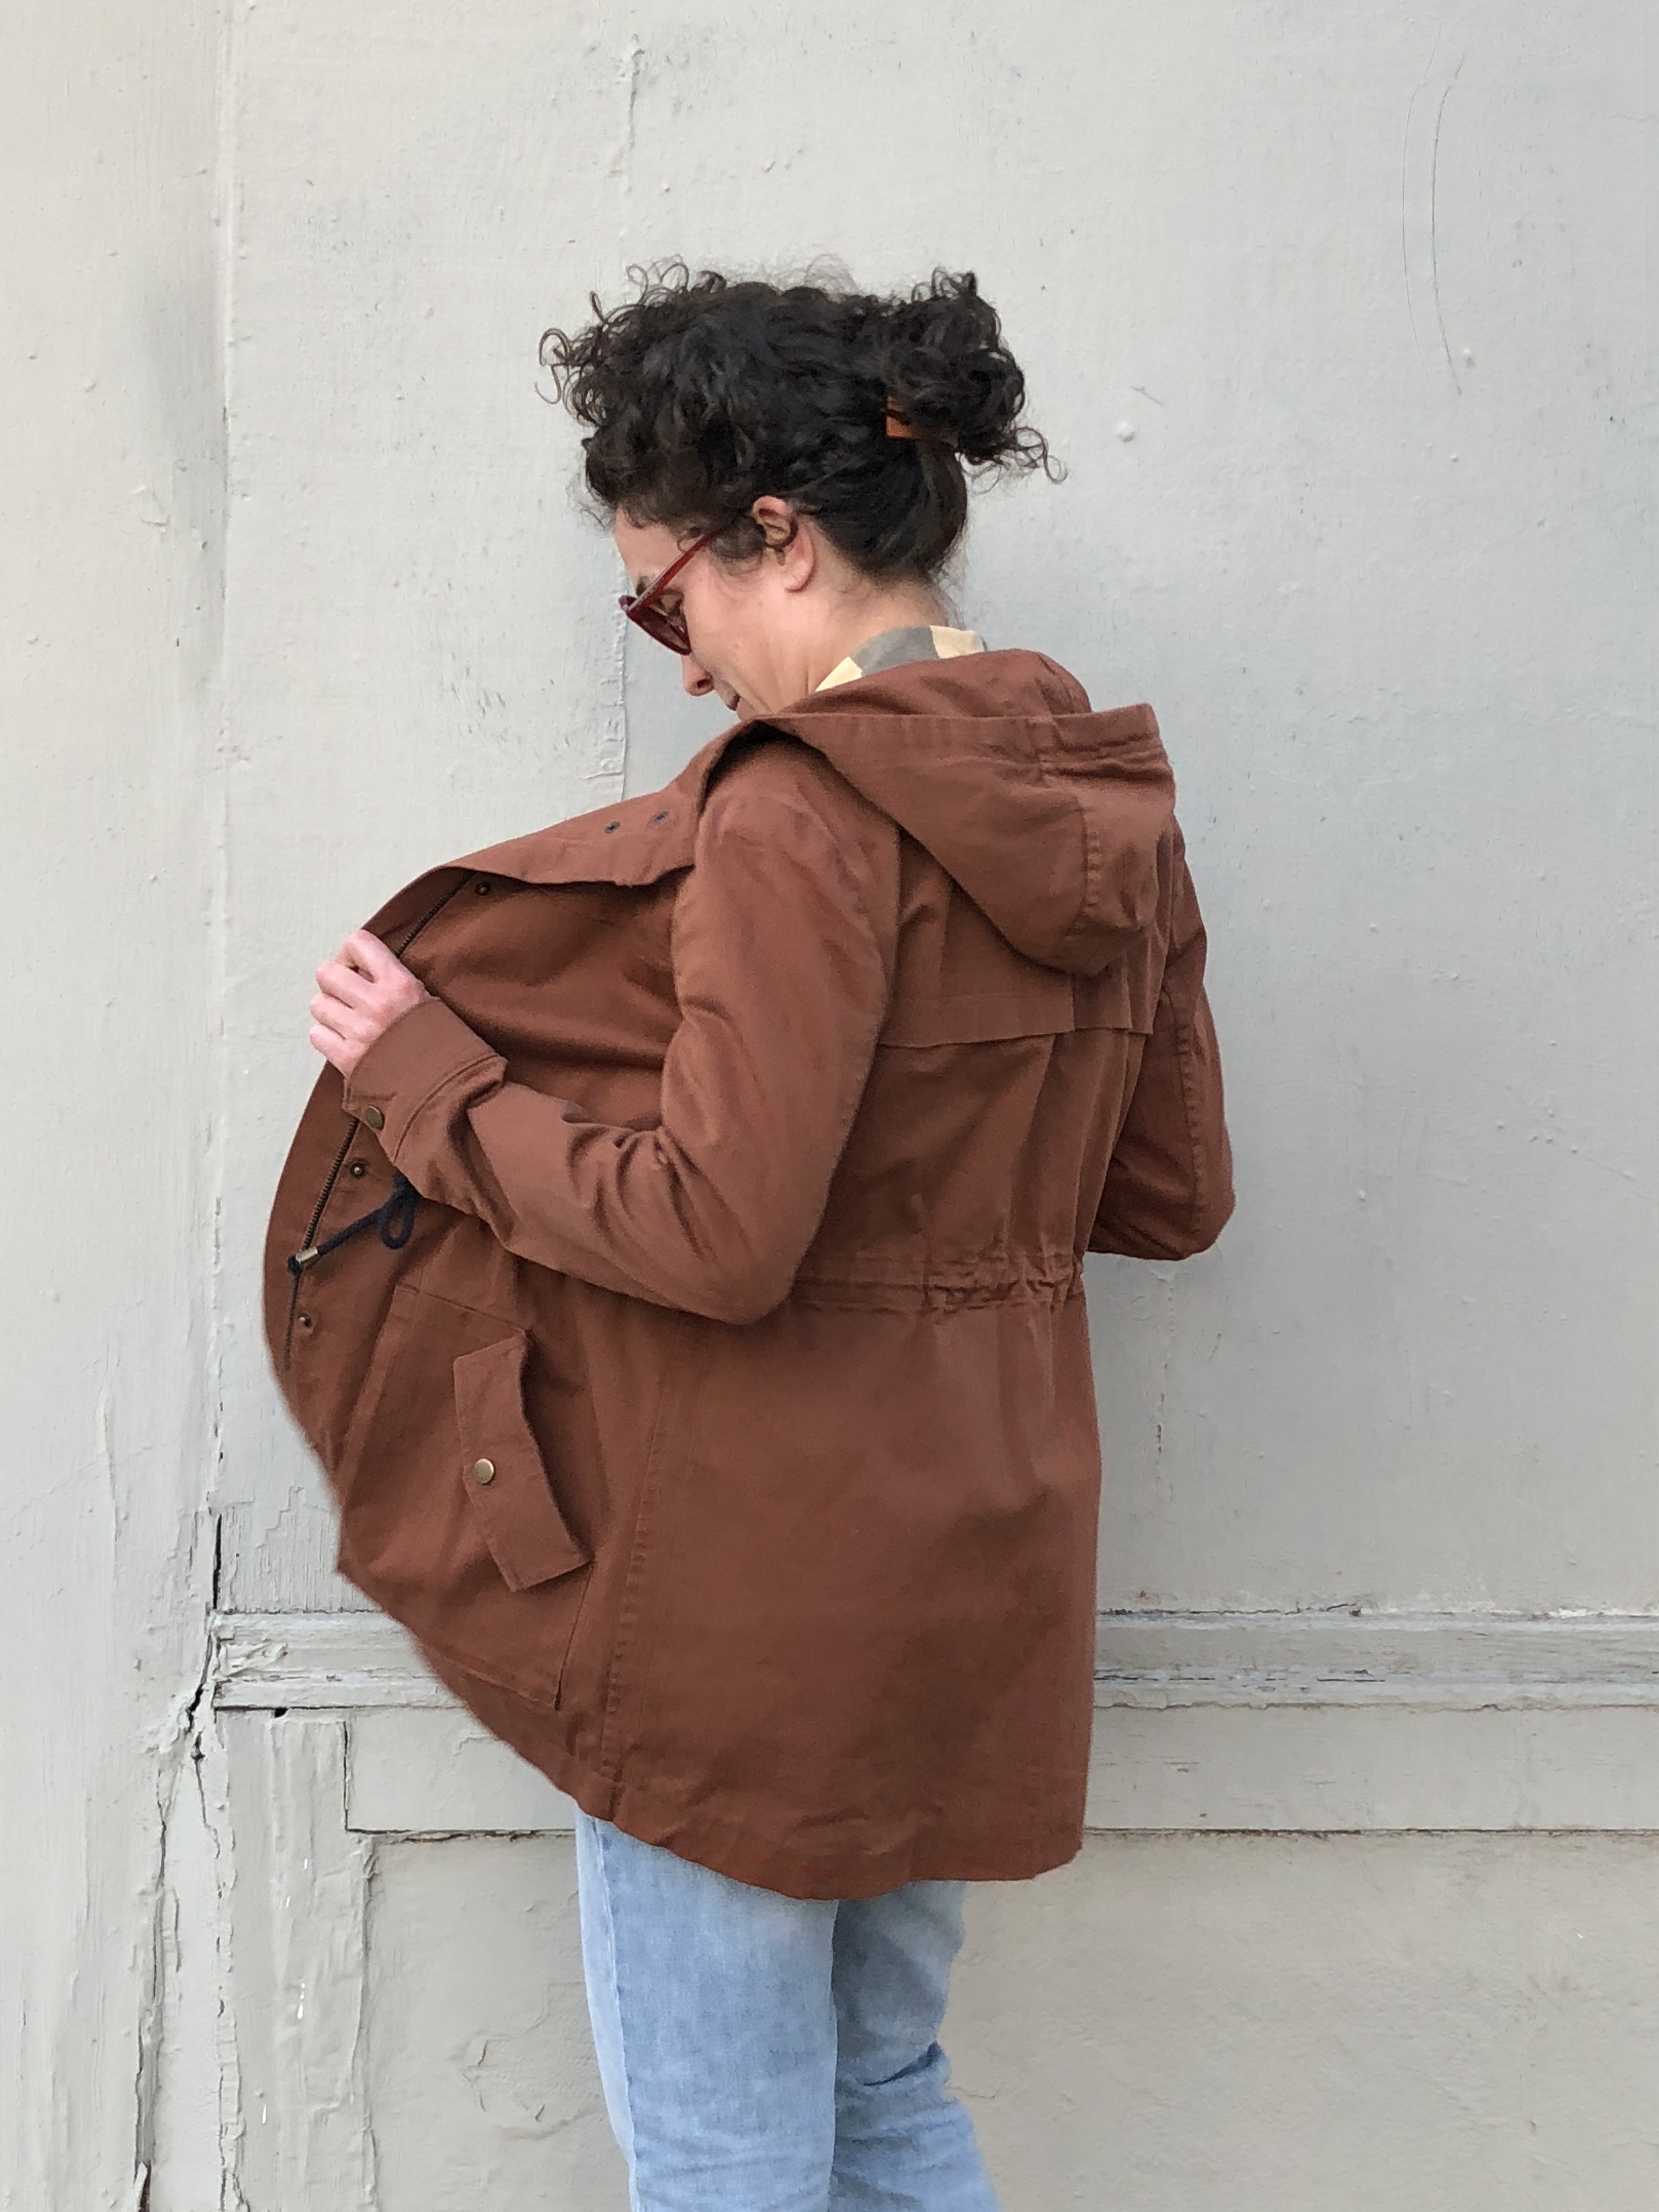
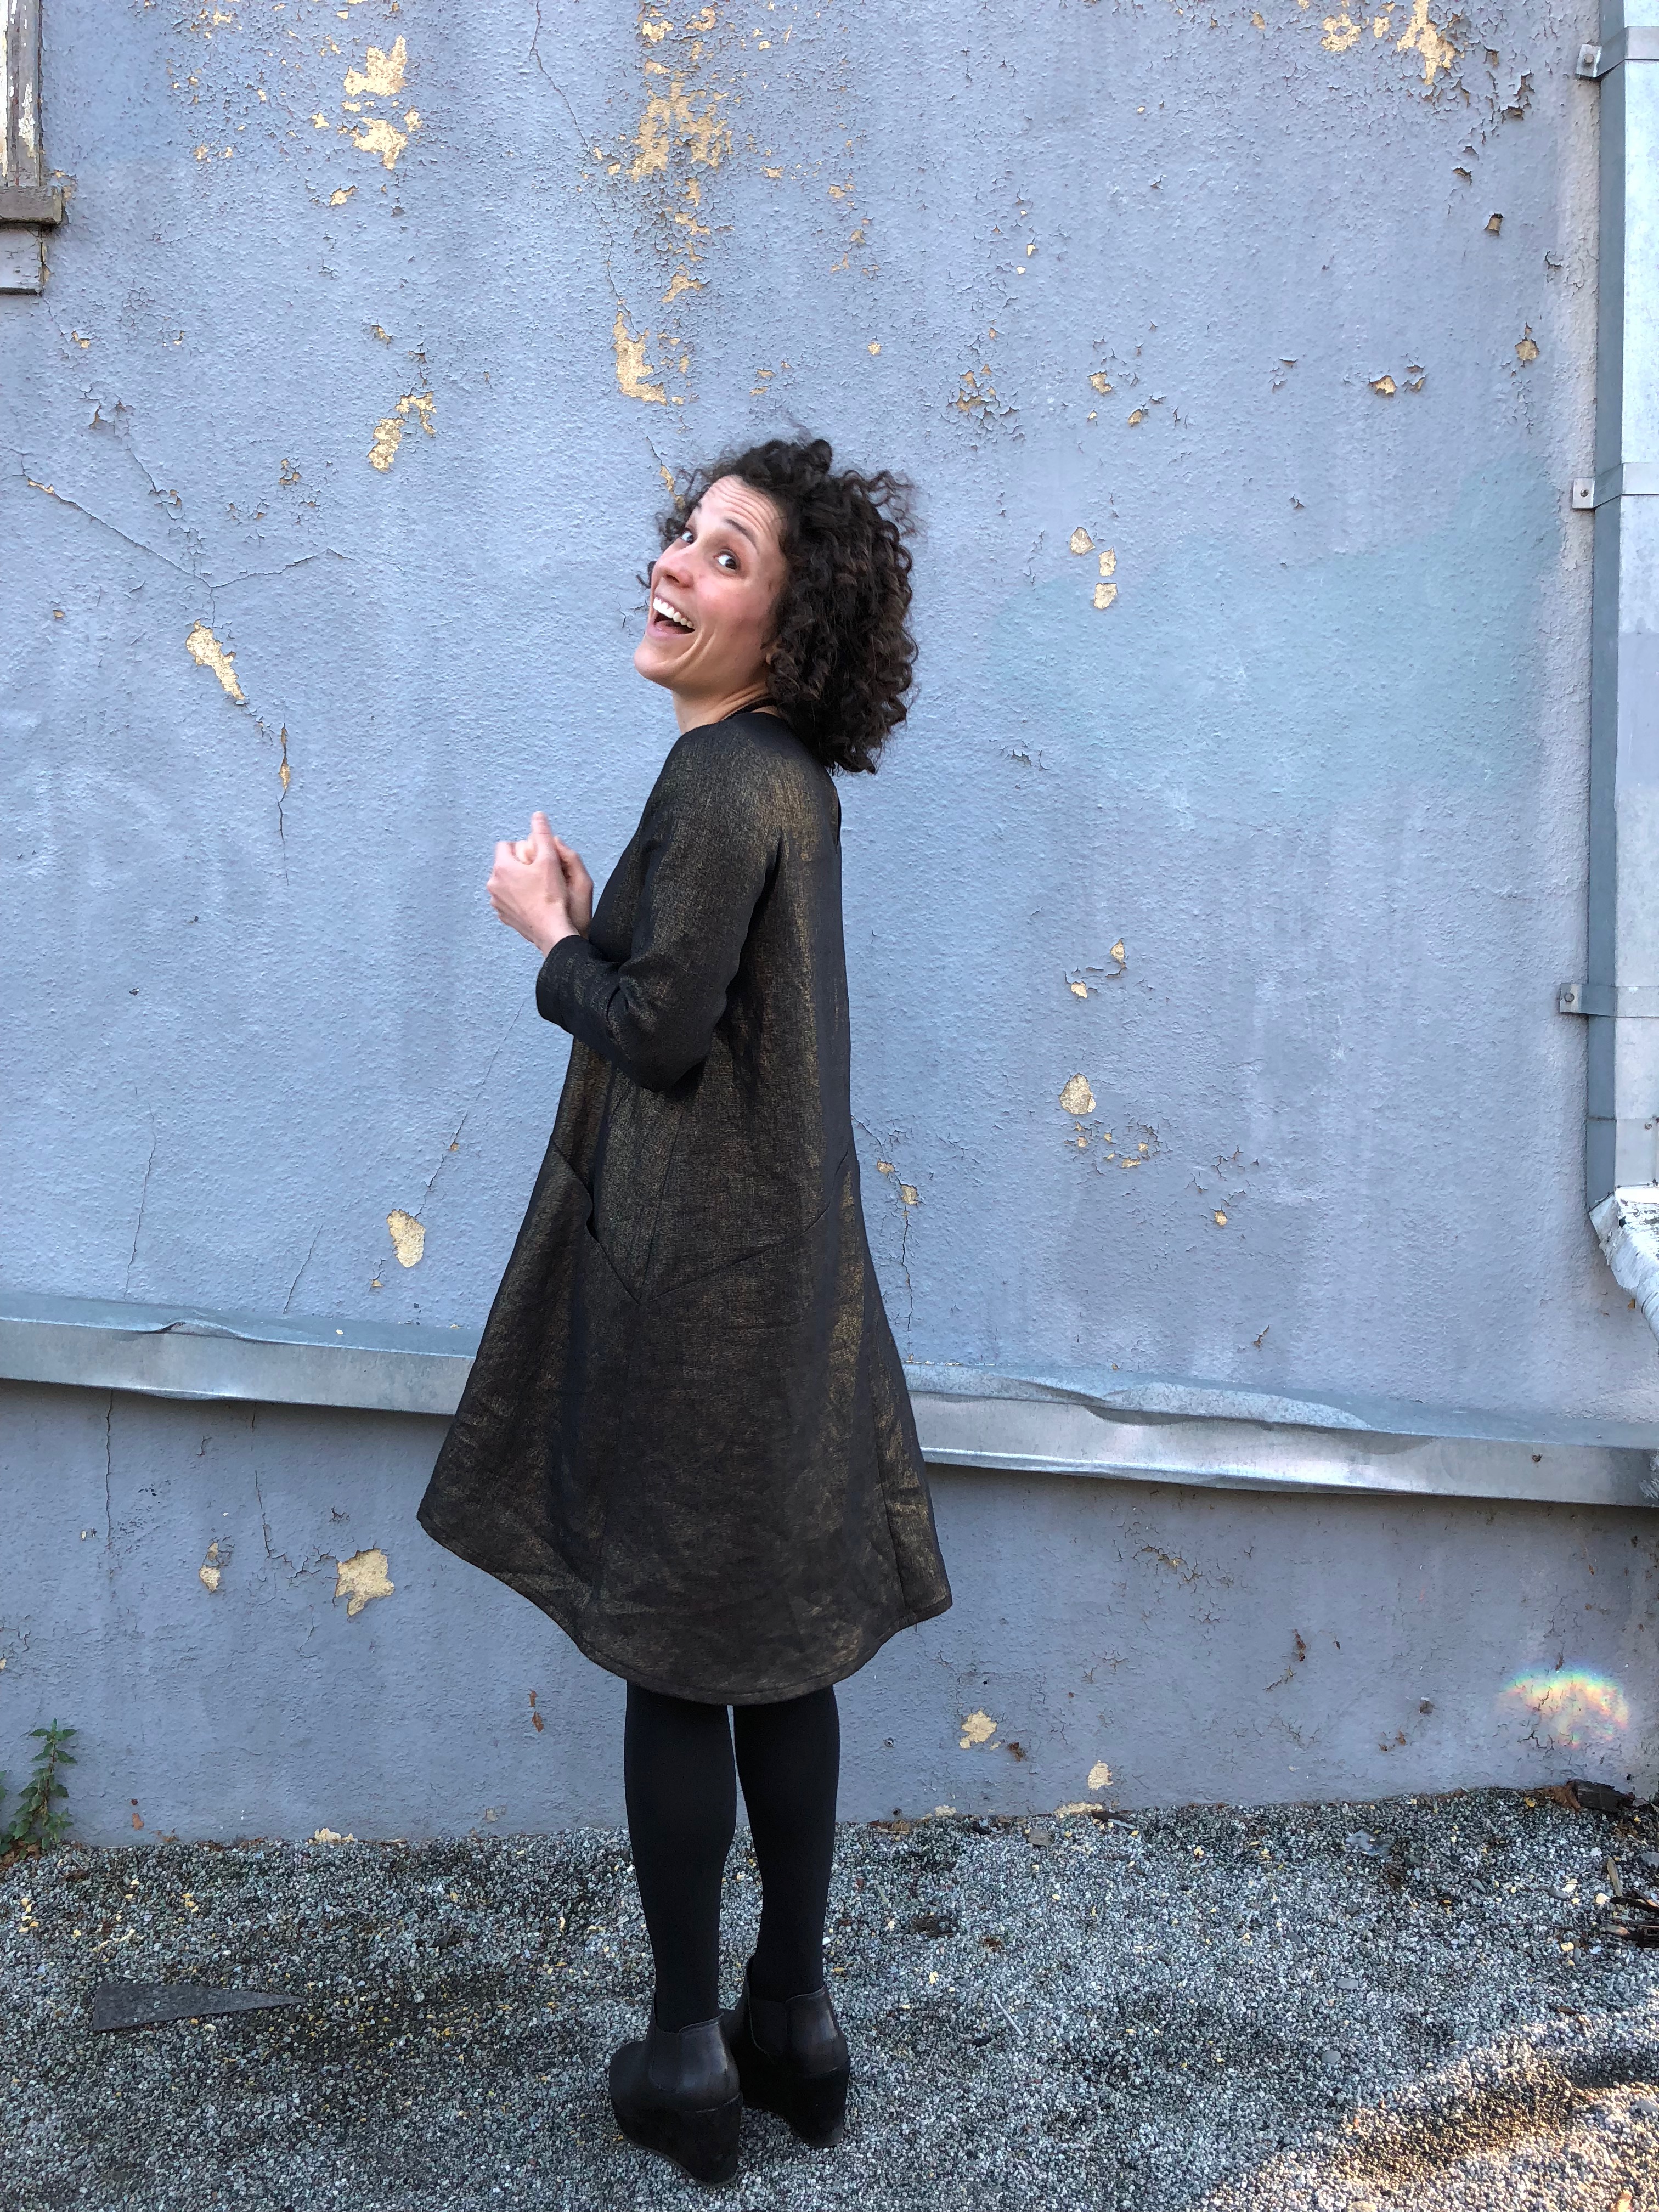
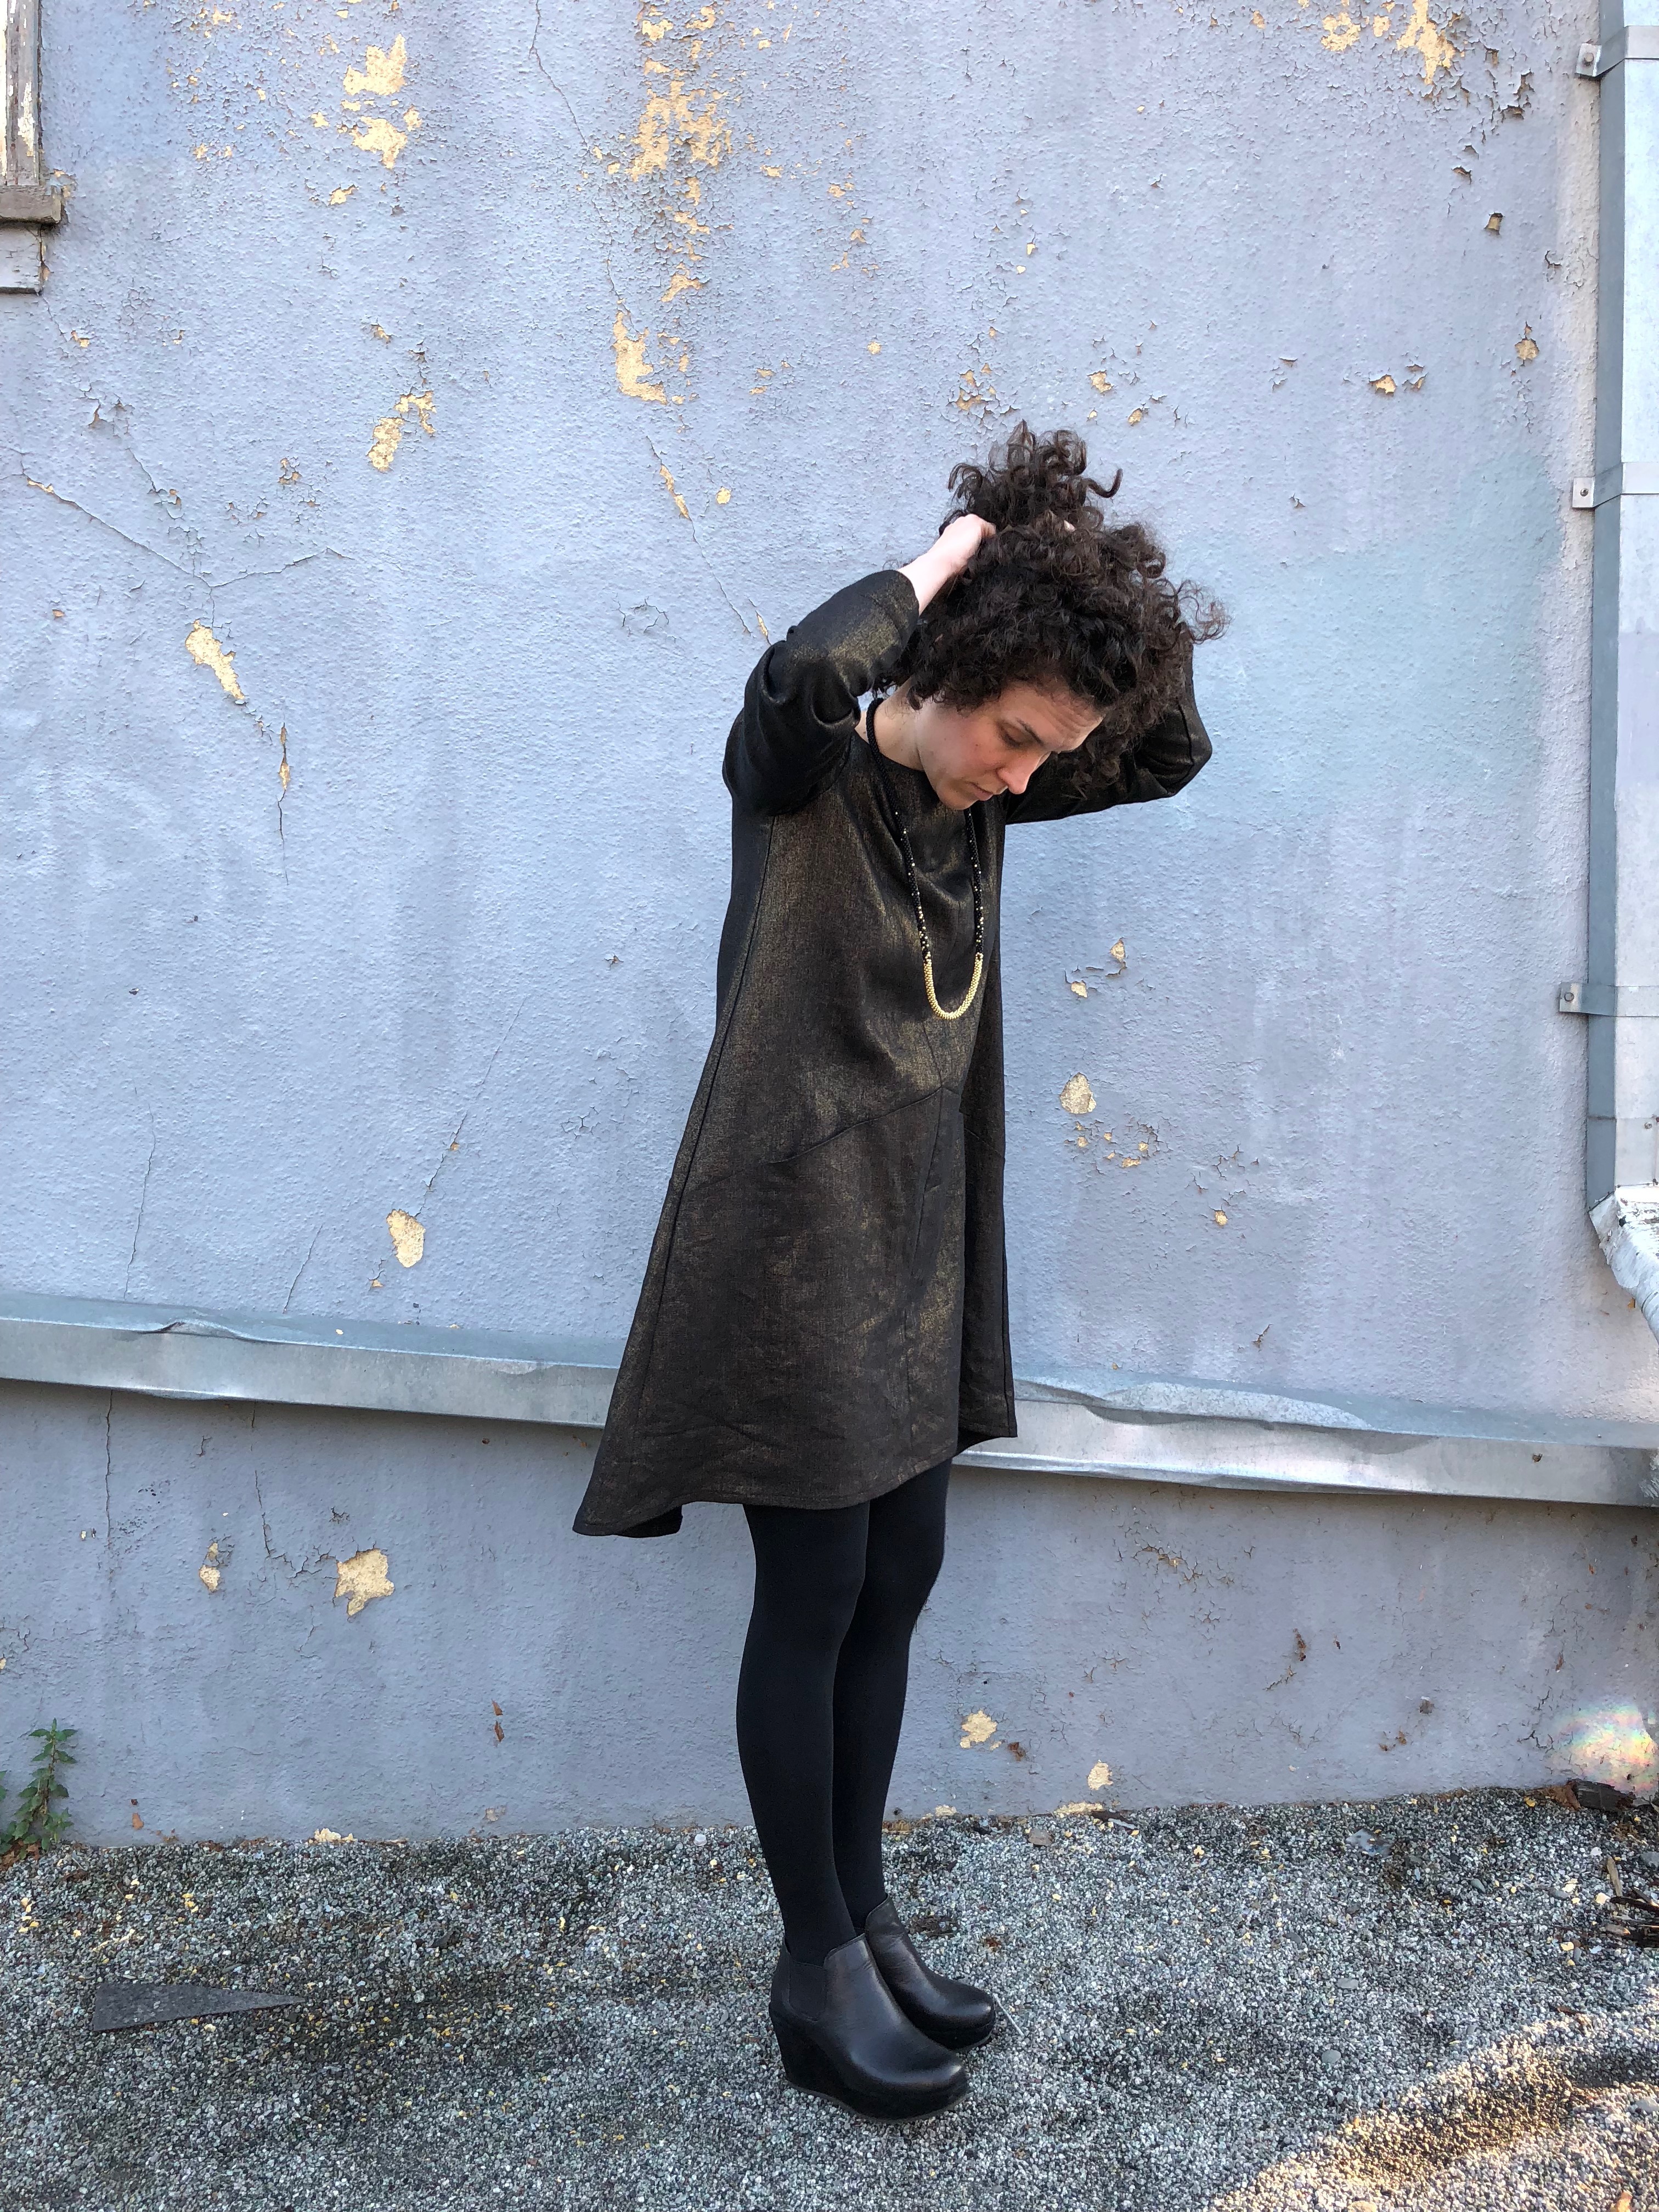
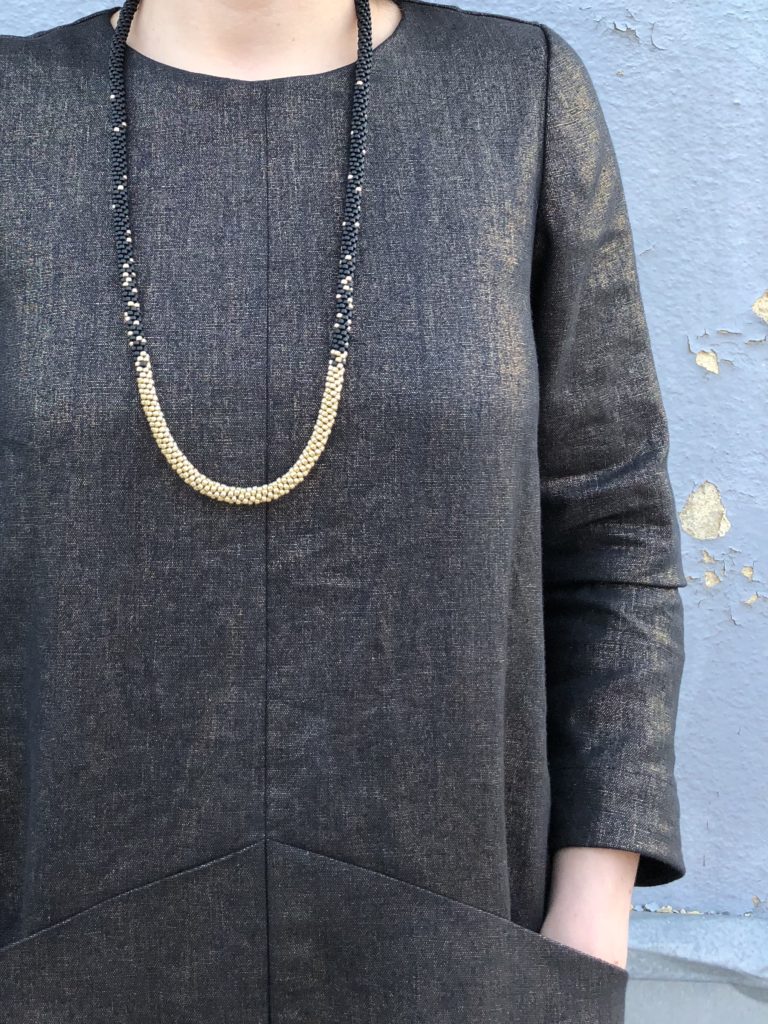
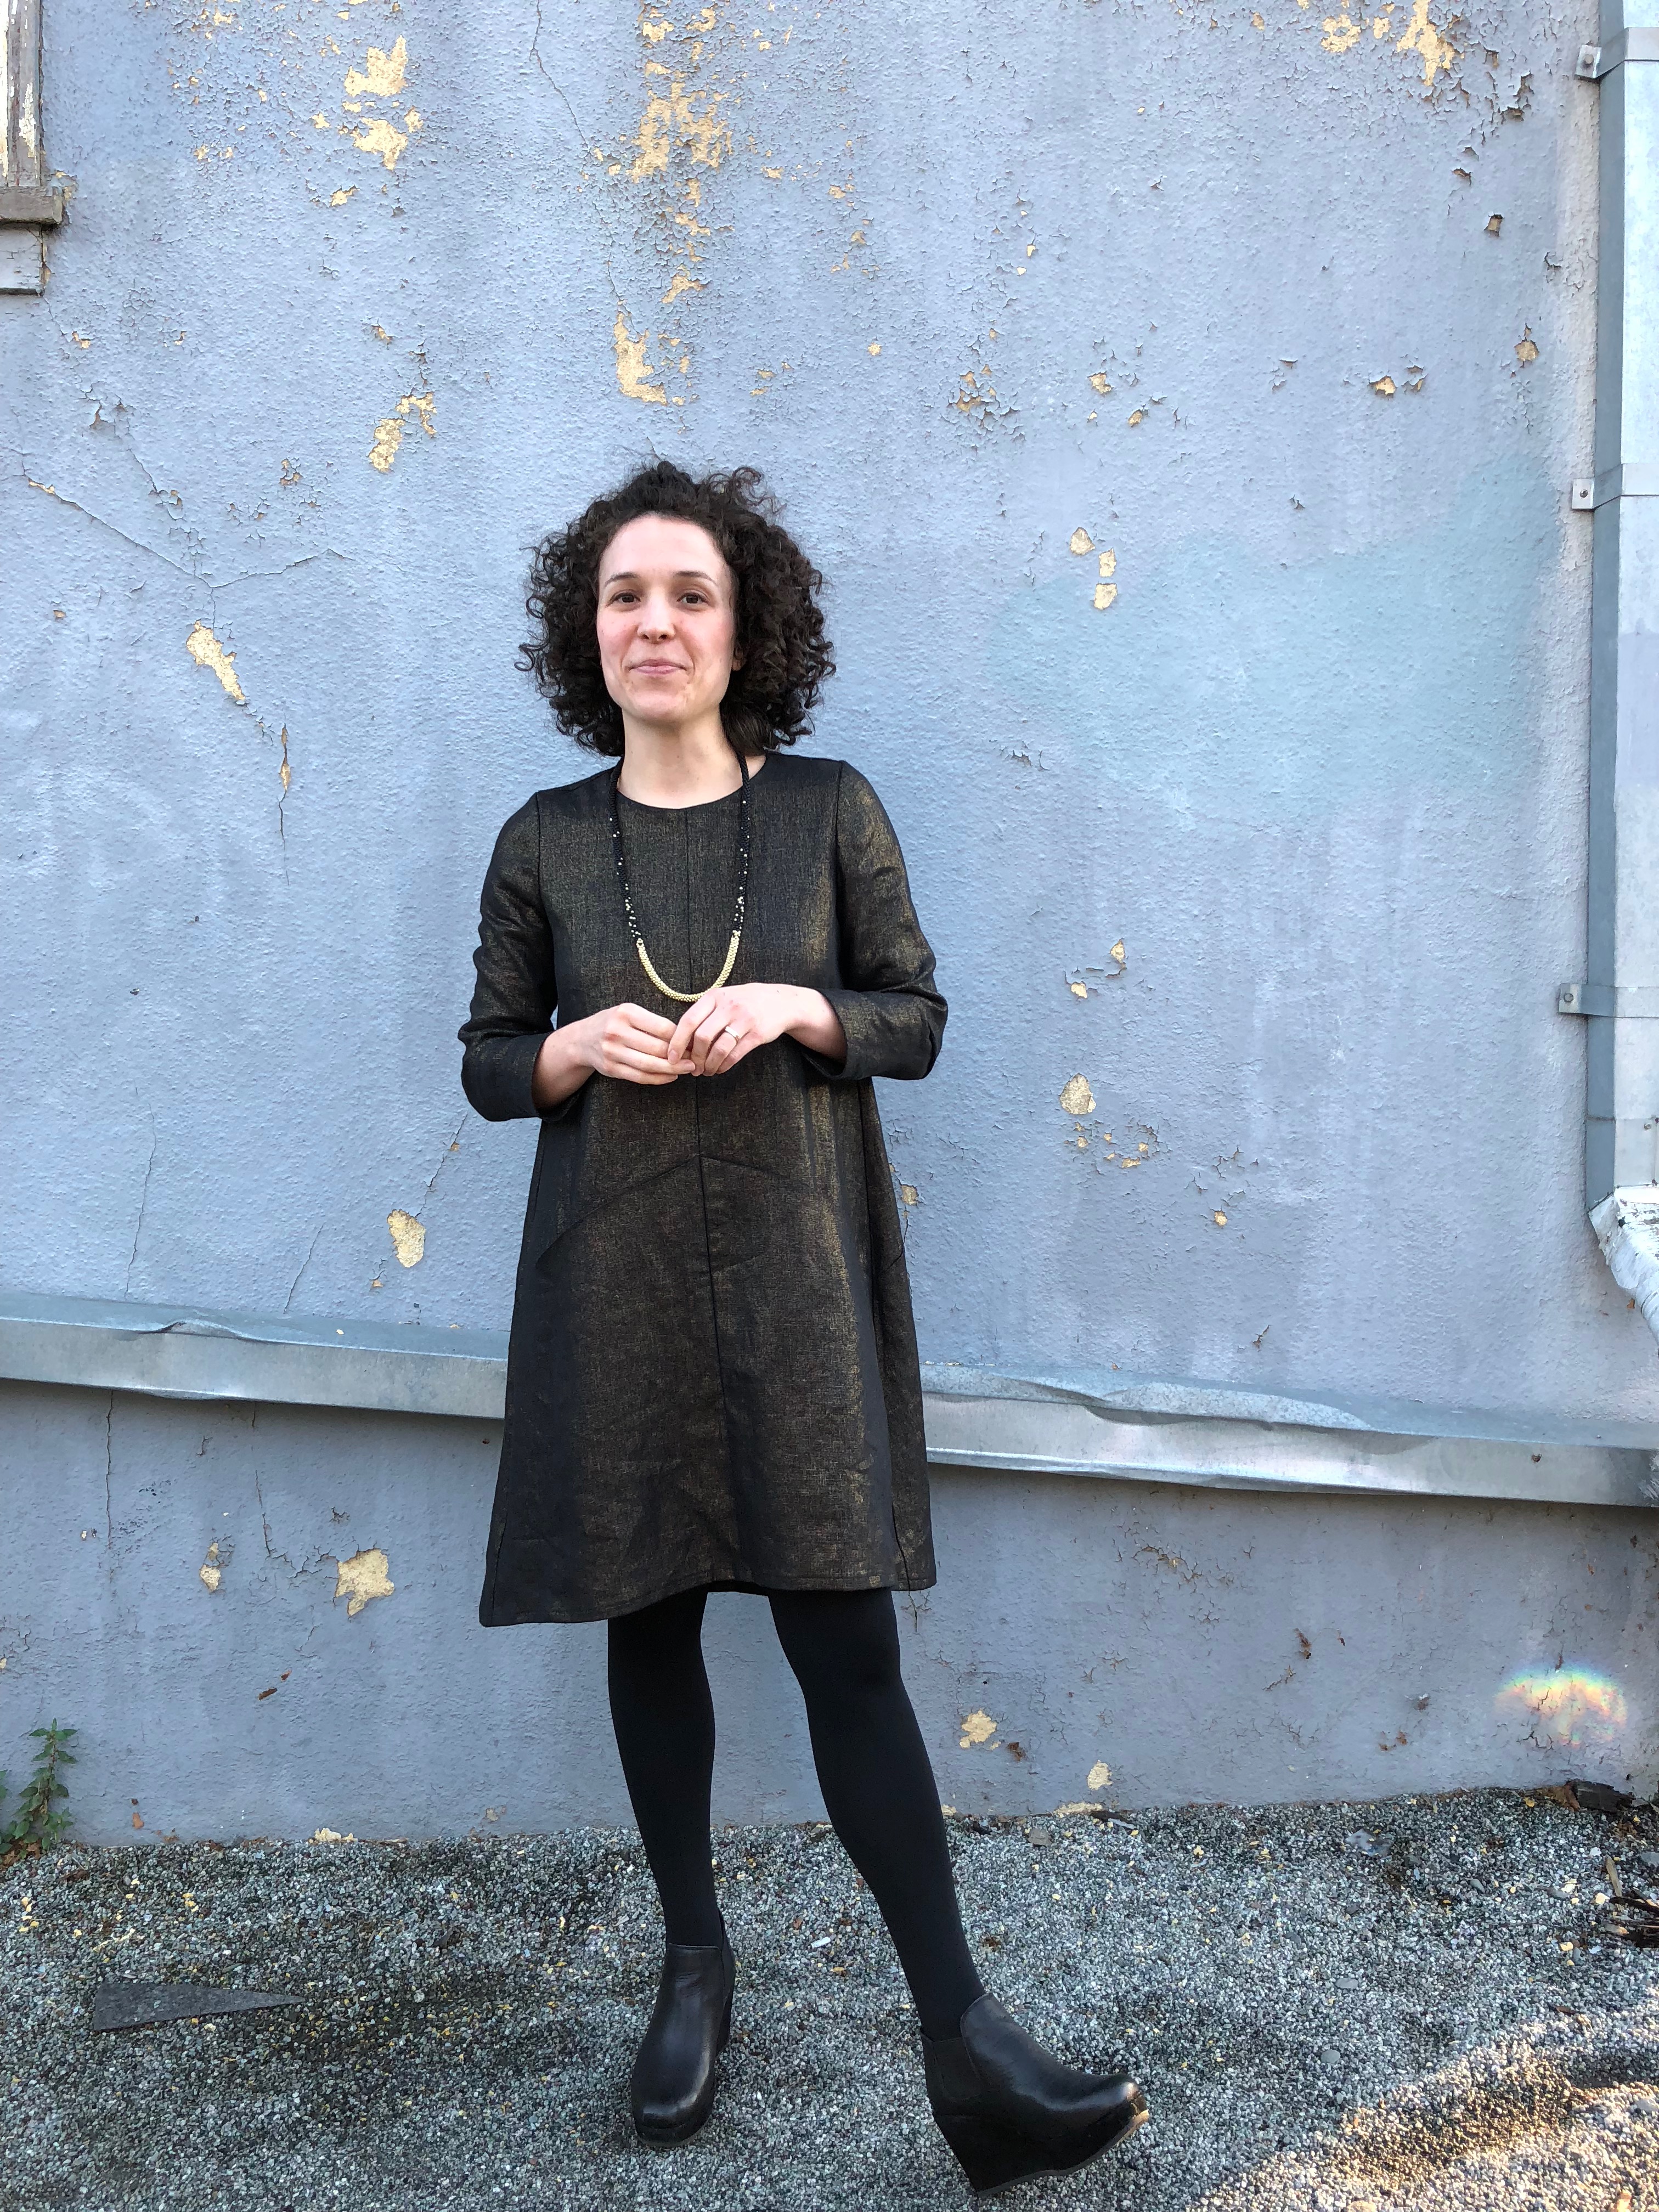
I had the immense pleasure of pattern testing the new Wiksten Unfolding Jacket, which first appeared in Making Magazine No. 4 / Lines. The updated, standalone pattern will be released by Wiksten, hopefully next month.

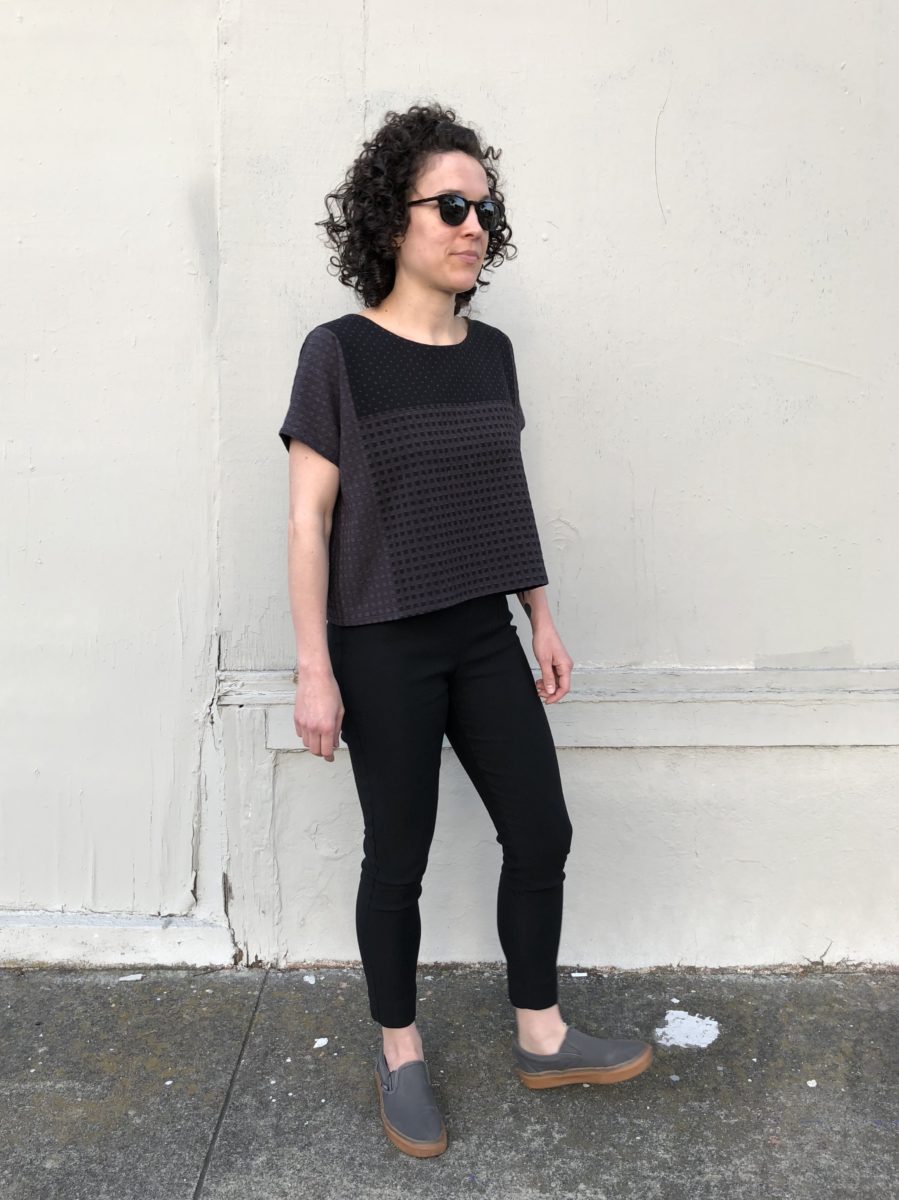
In the Making version, I made a size XS. The new pattern includes a larger range of sizes and after comparing the pattern pieces, I made a size S here.

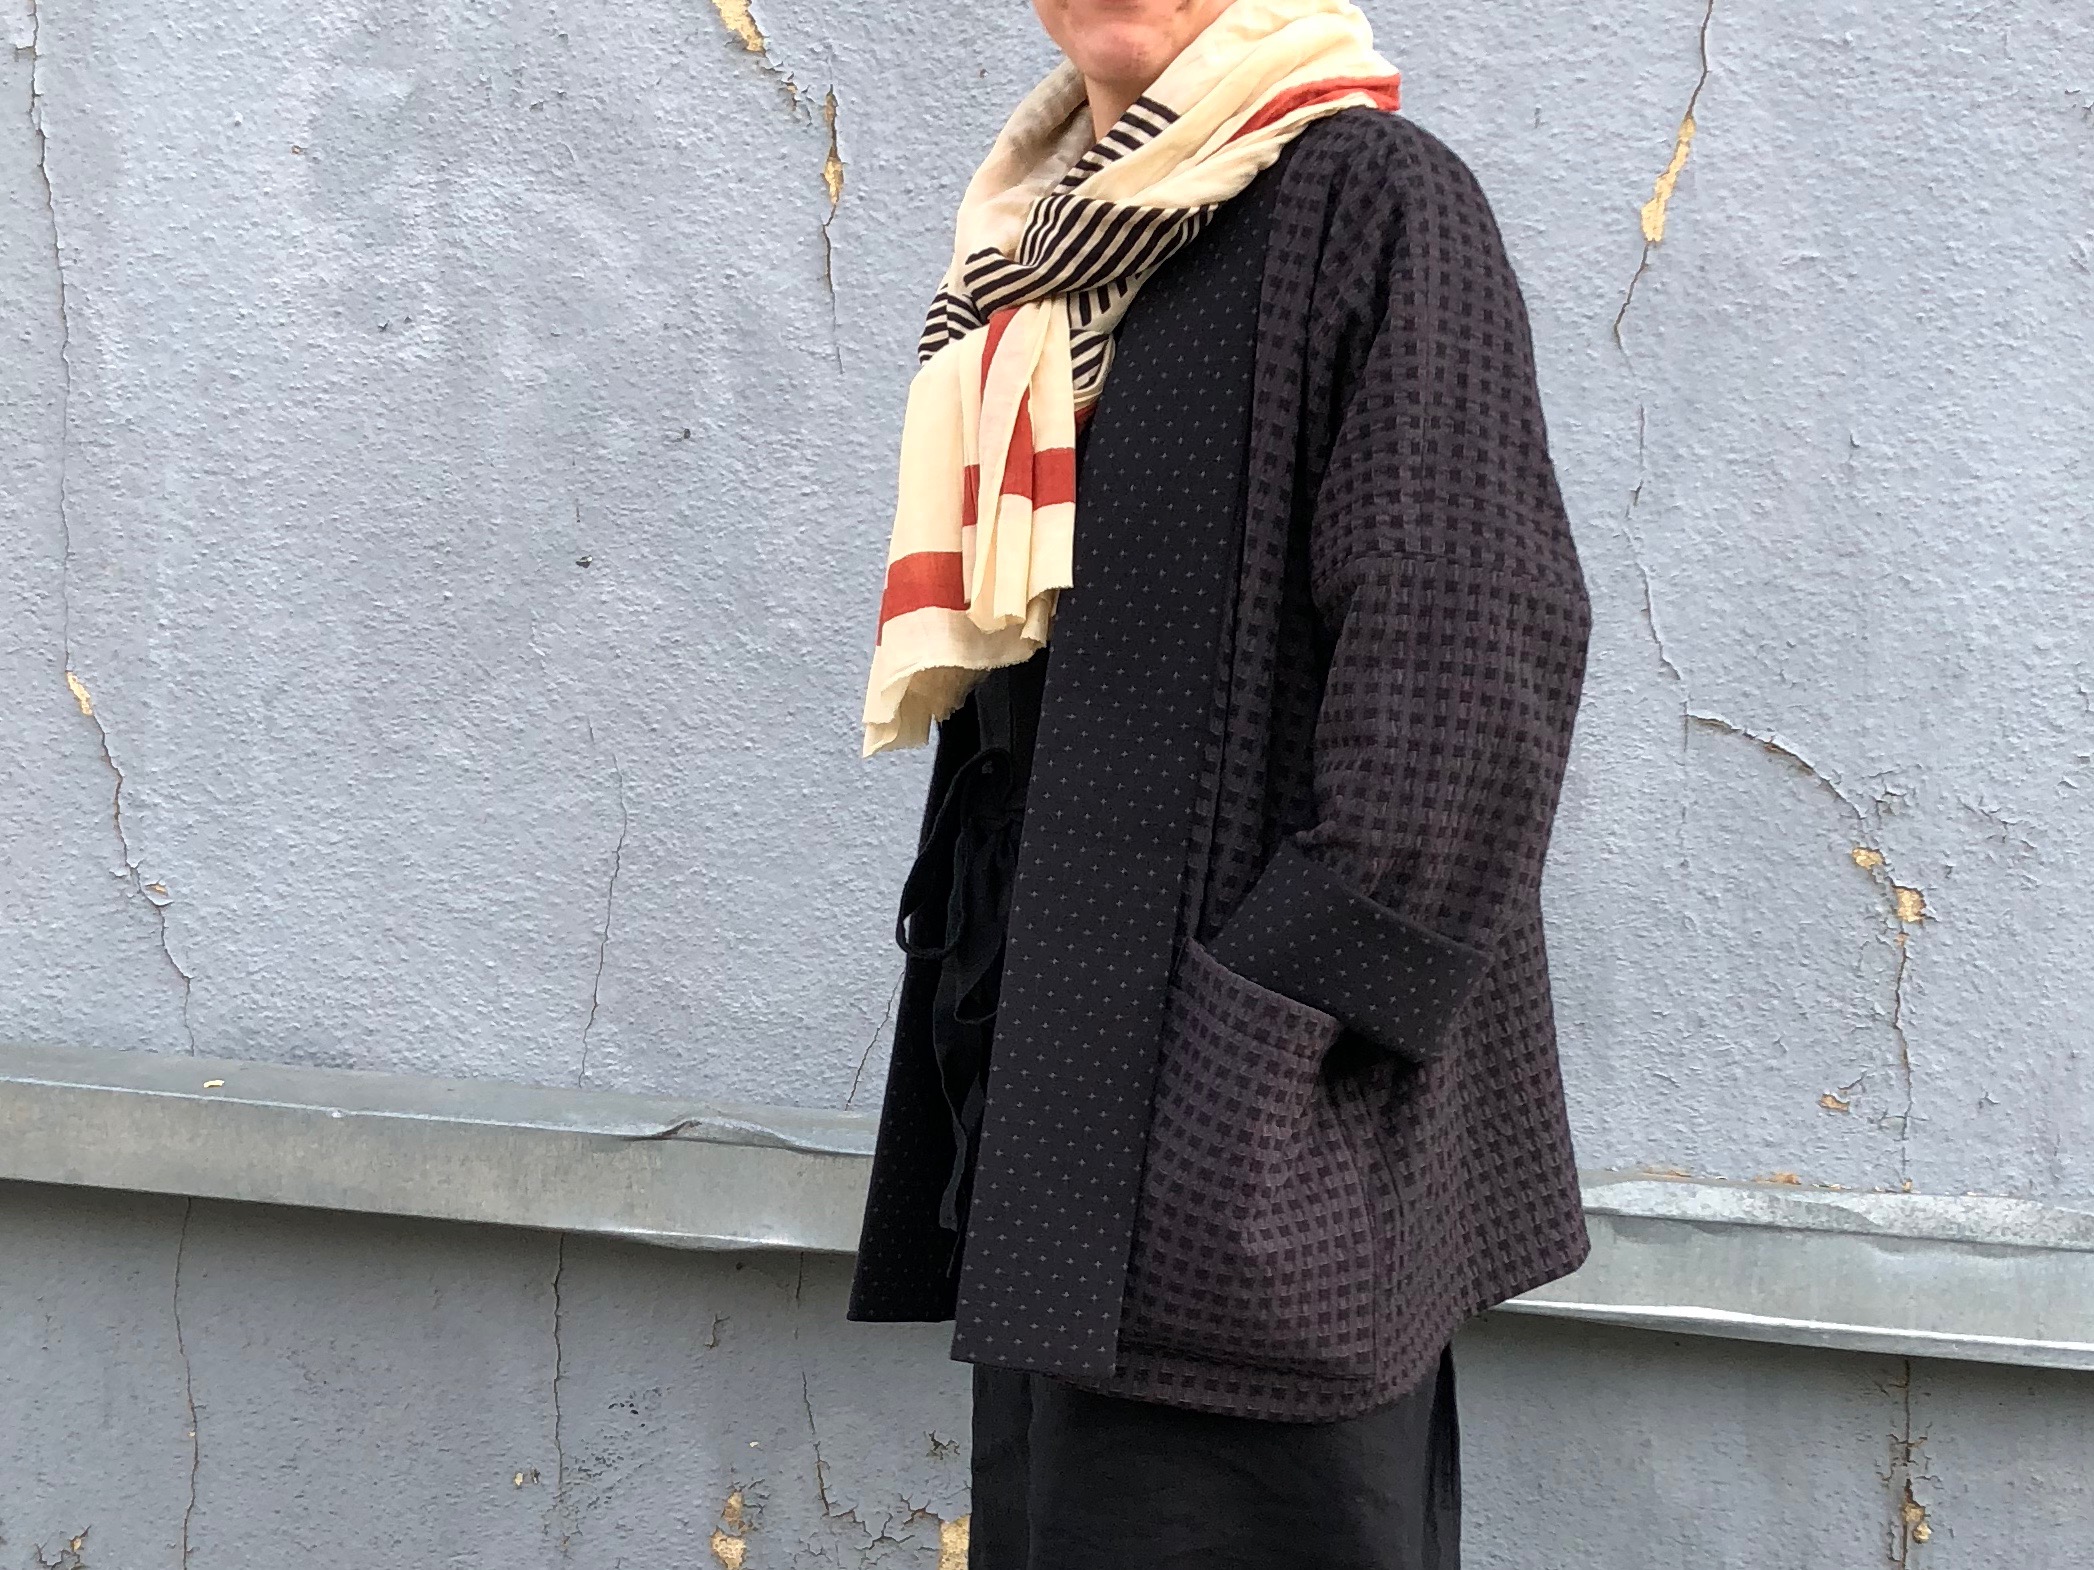
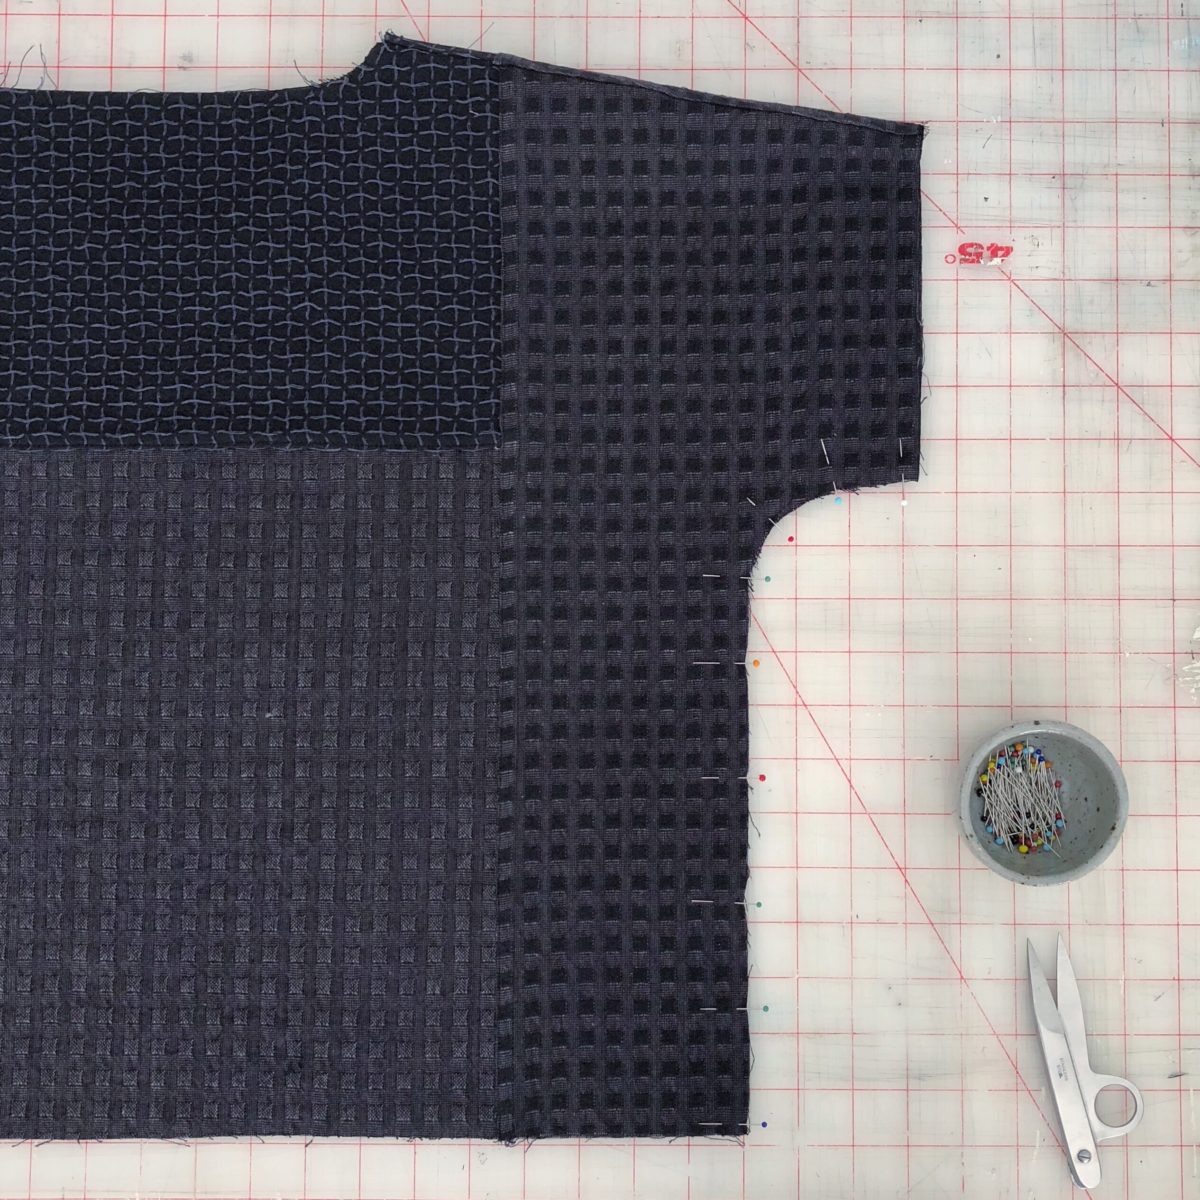
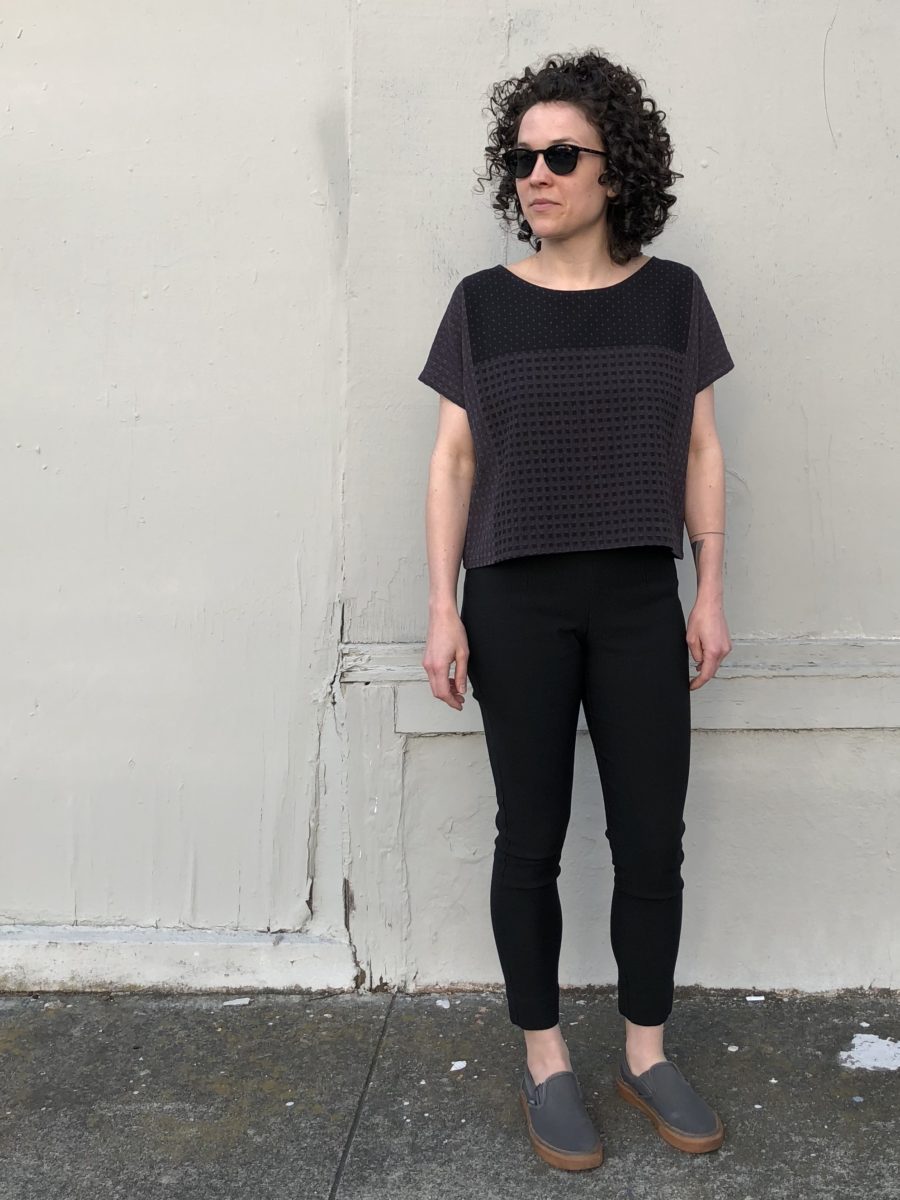
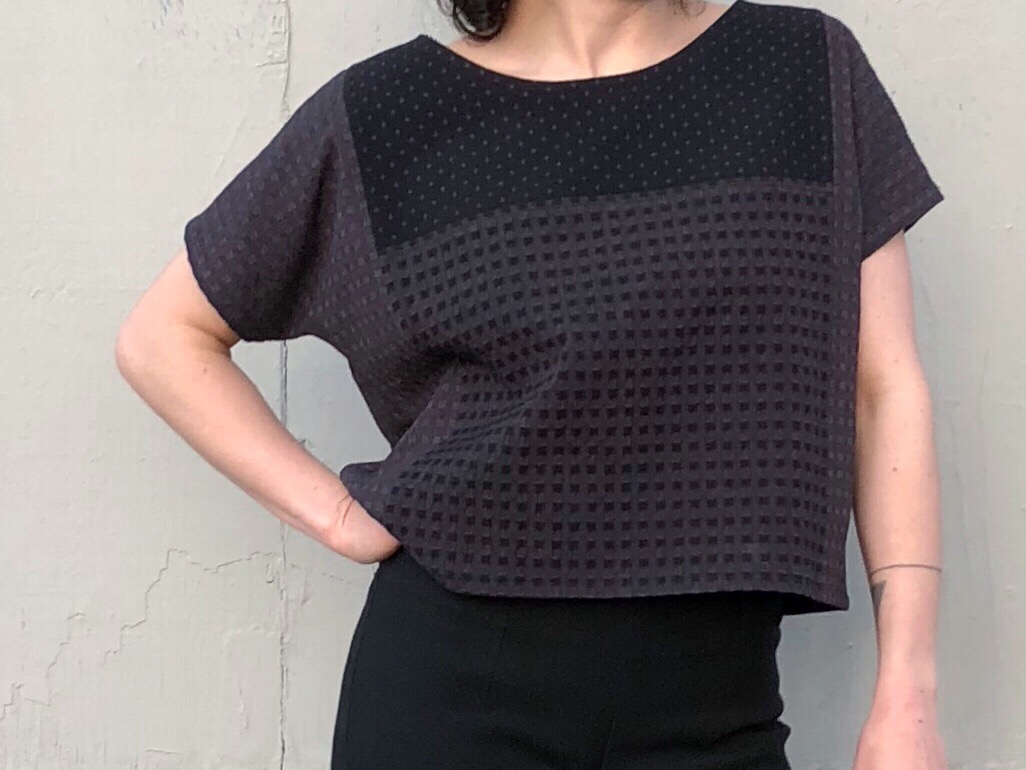
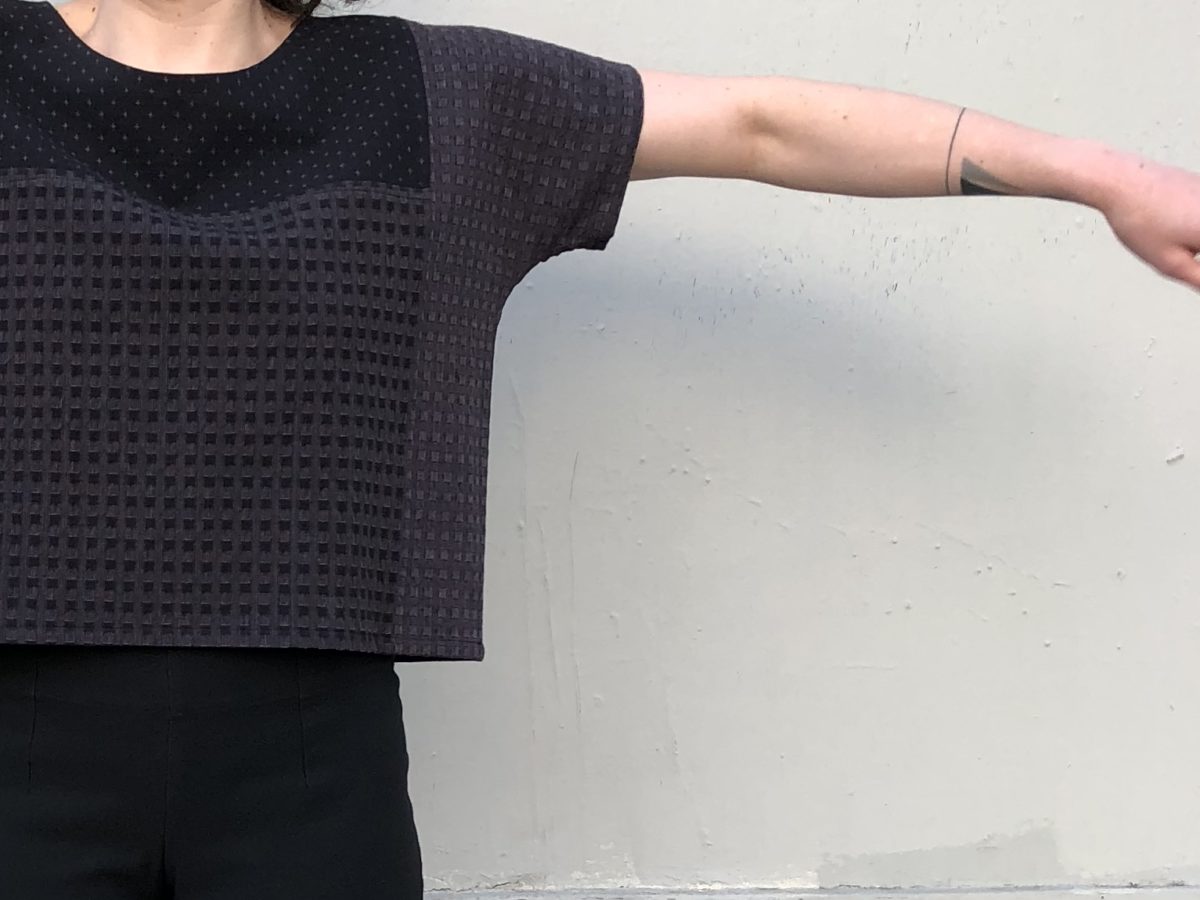
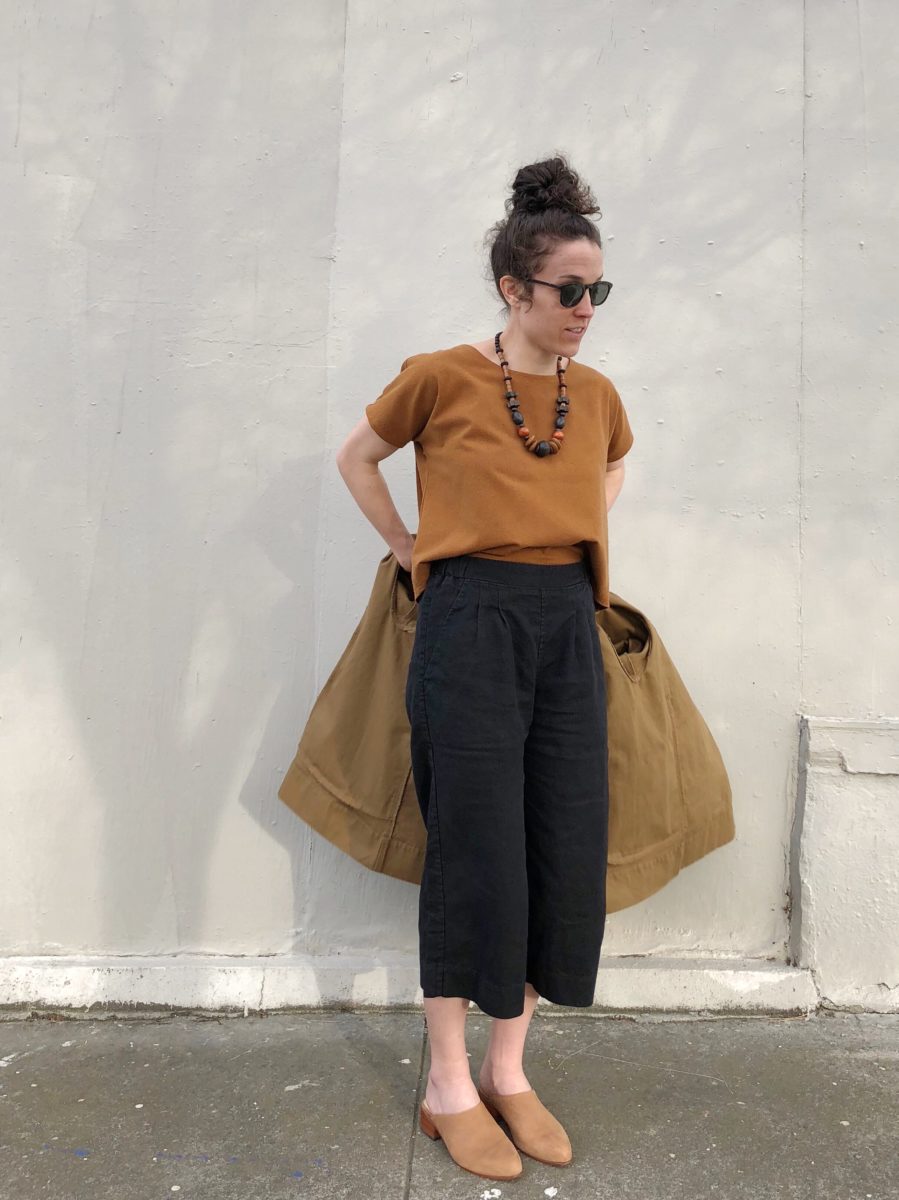
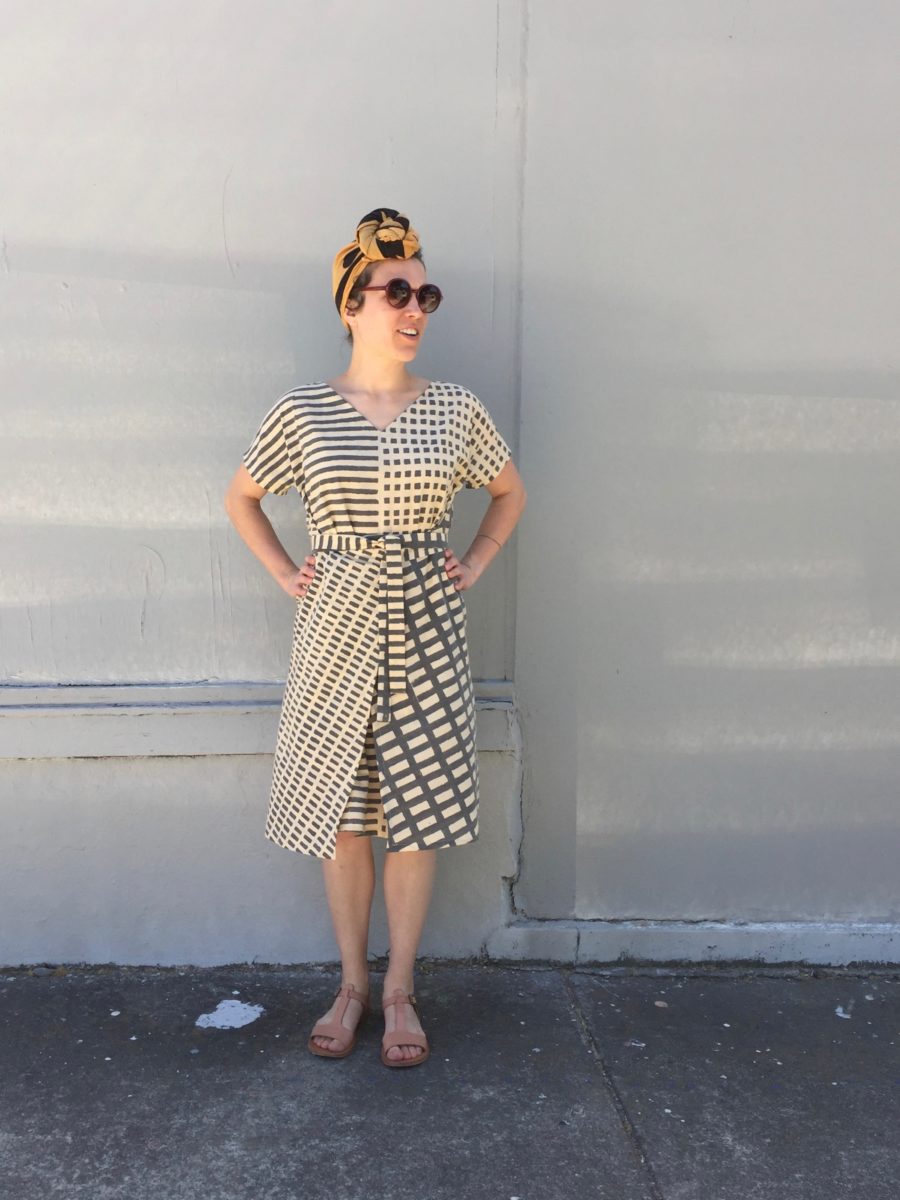
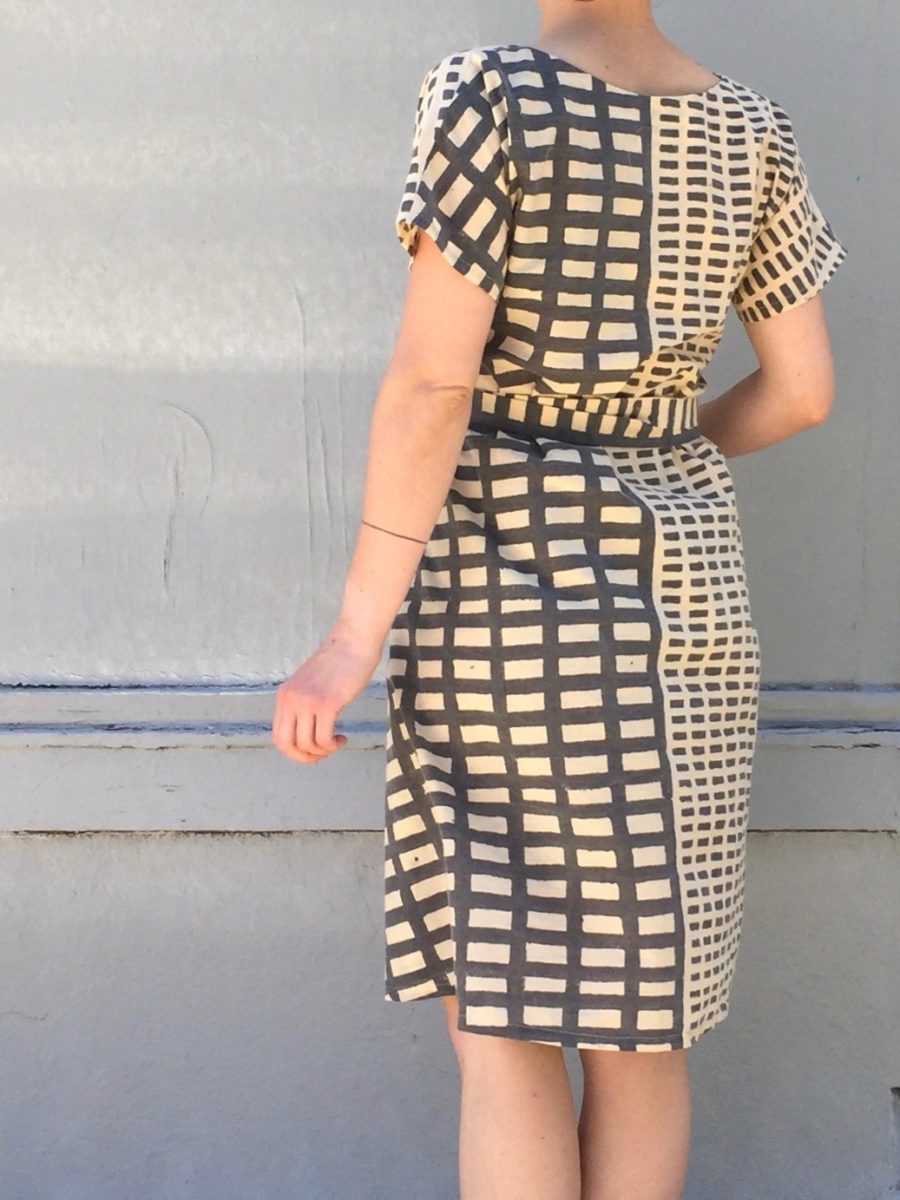
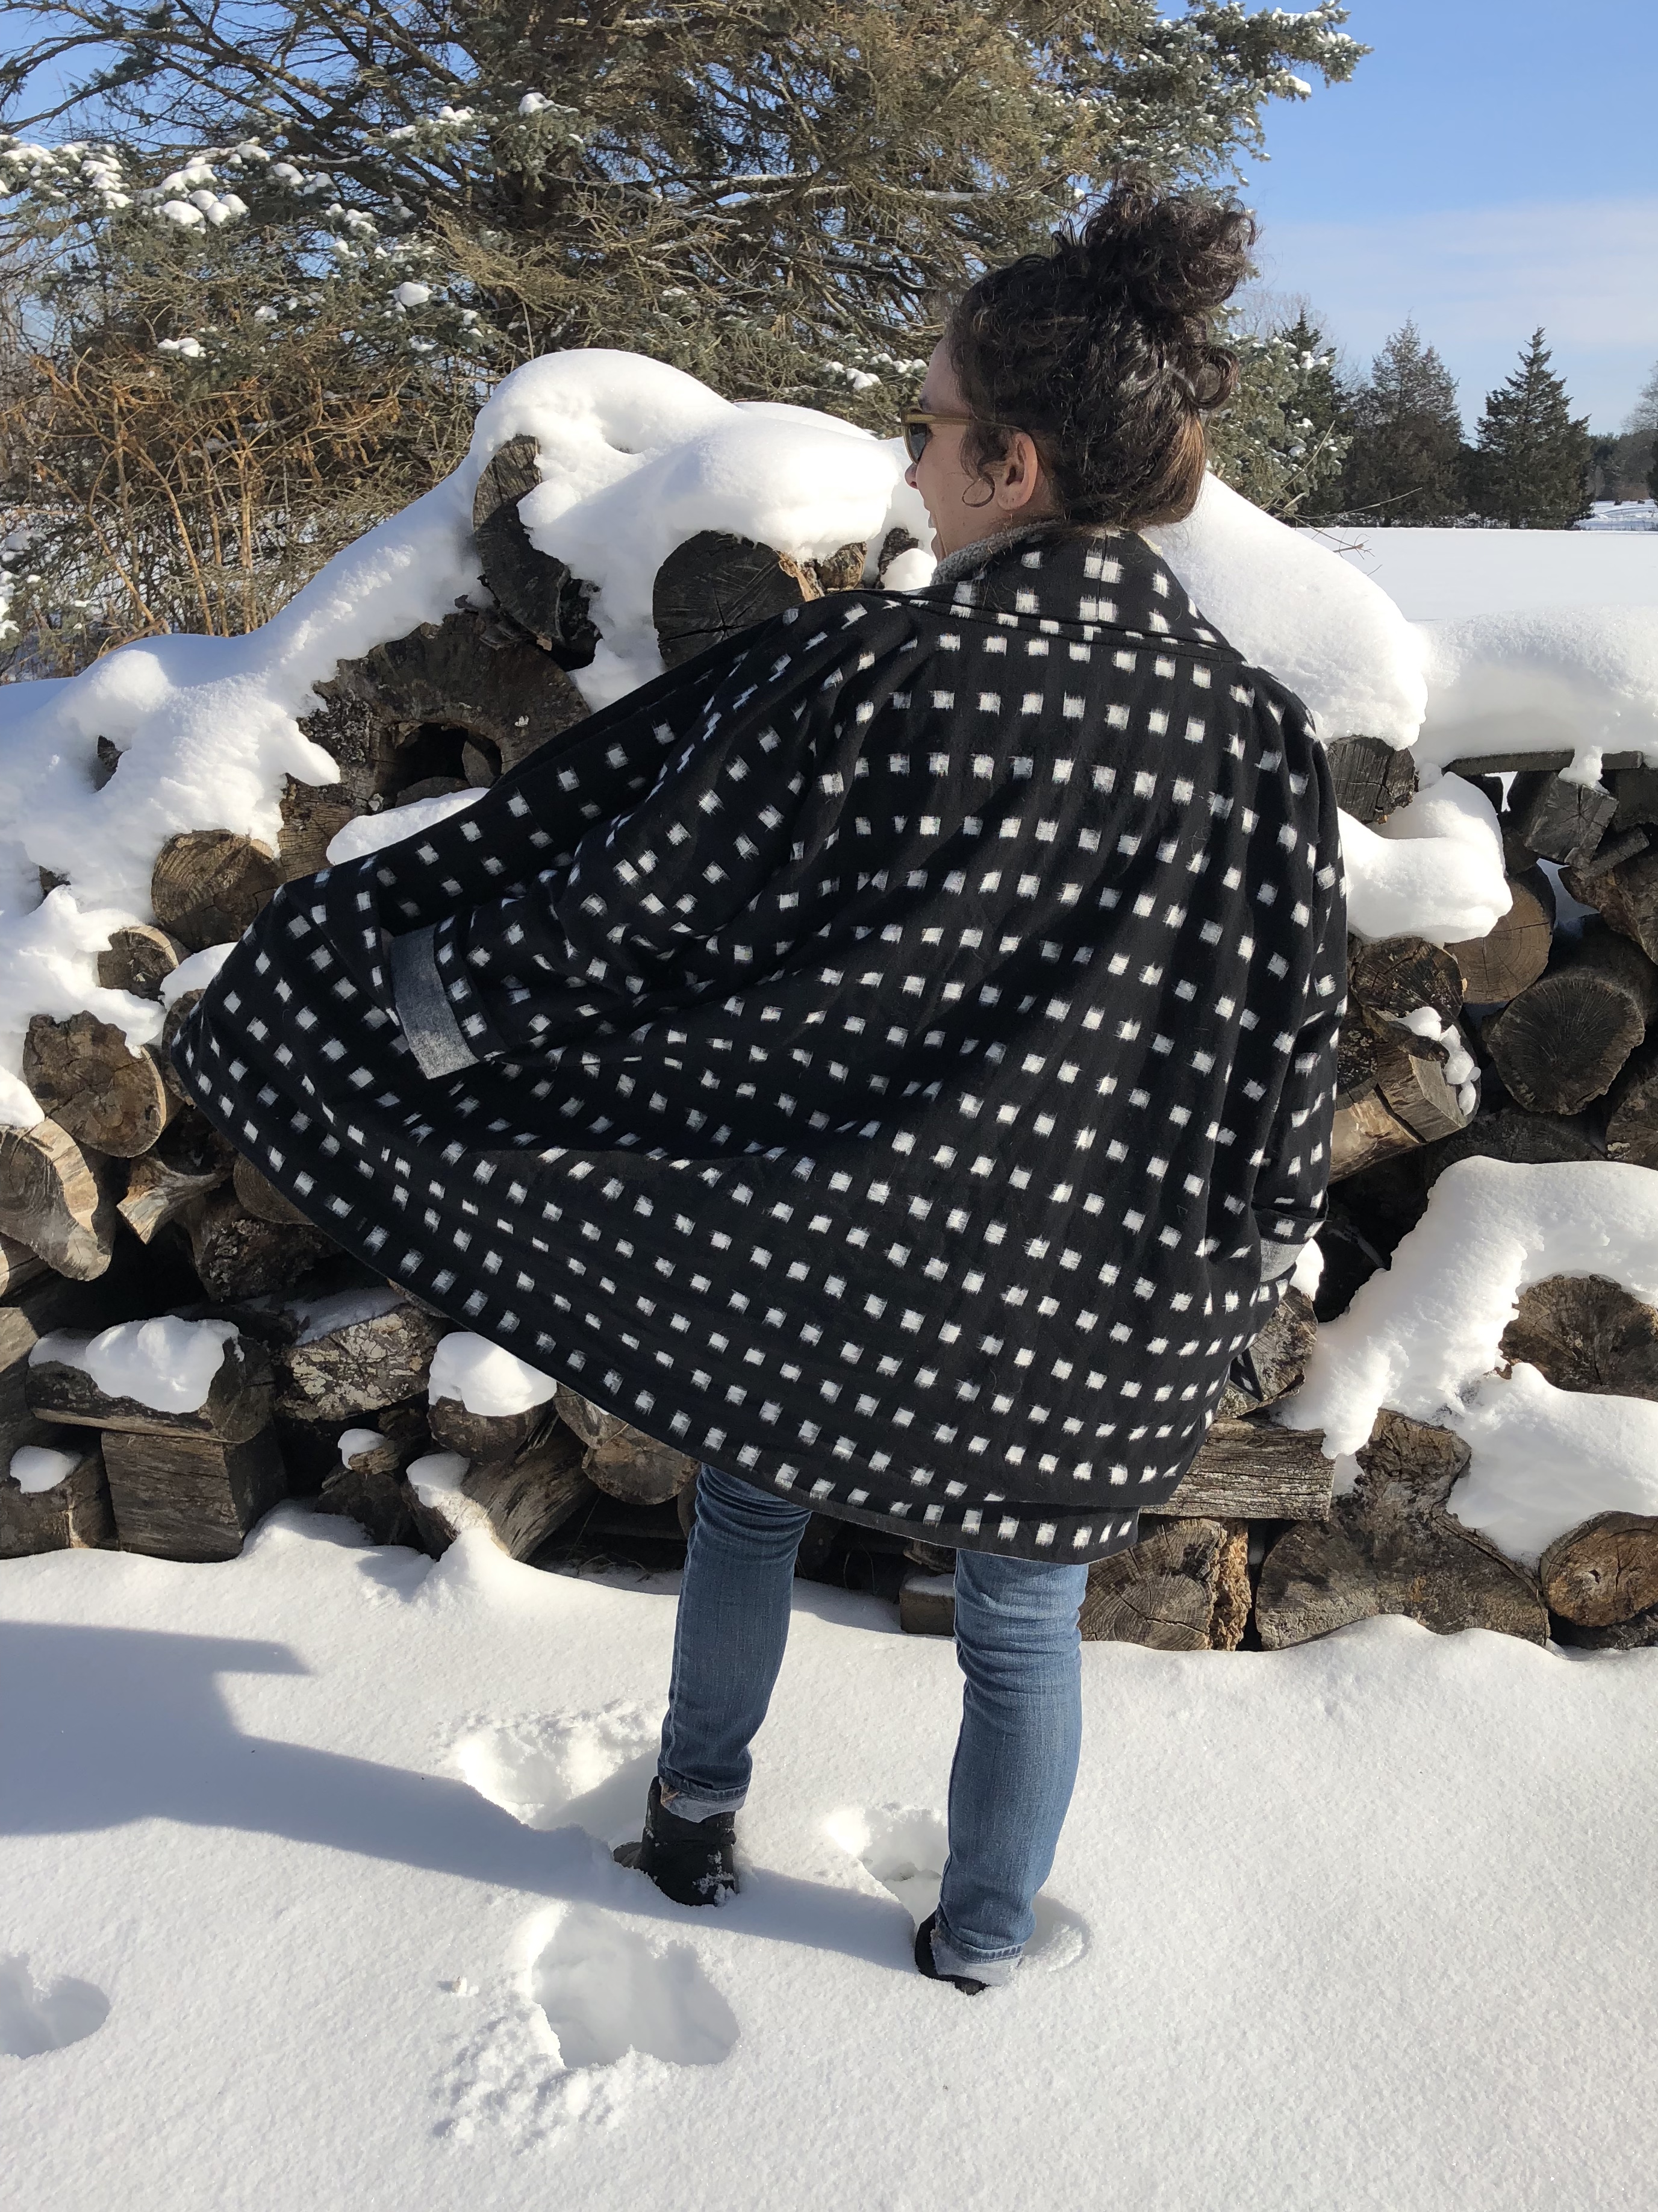
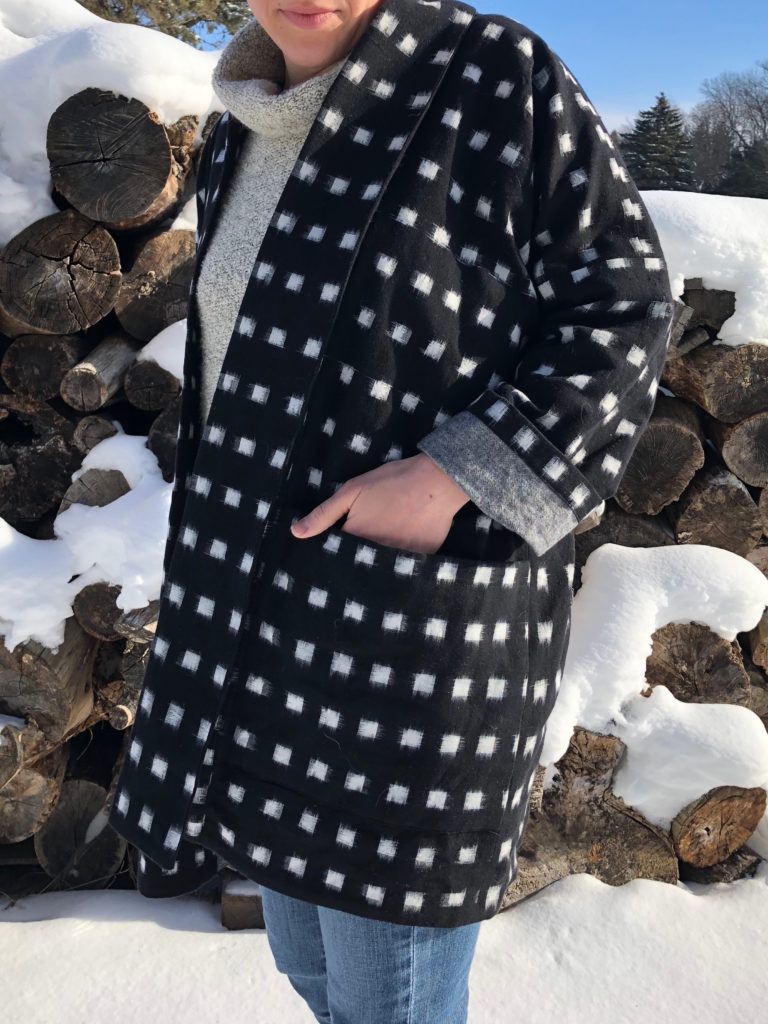
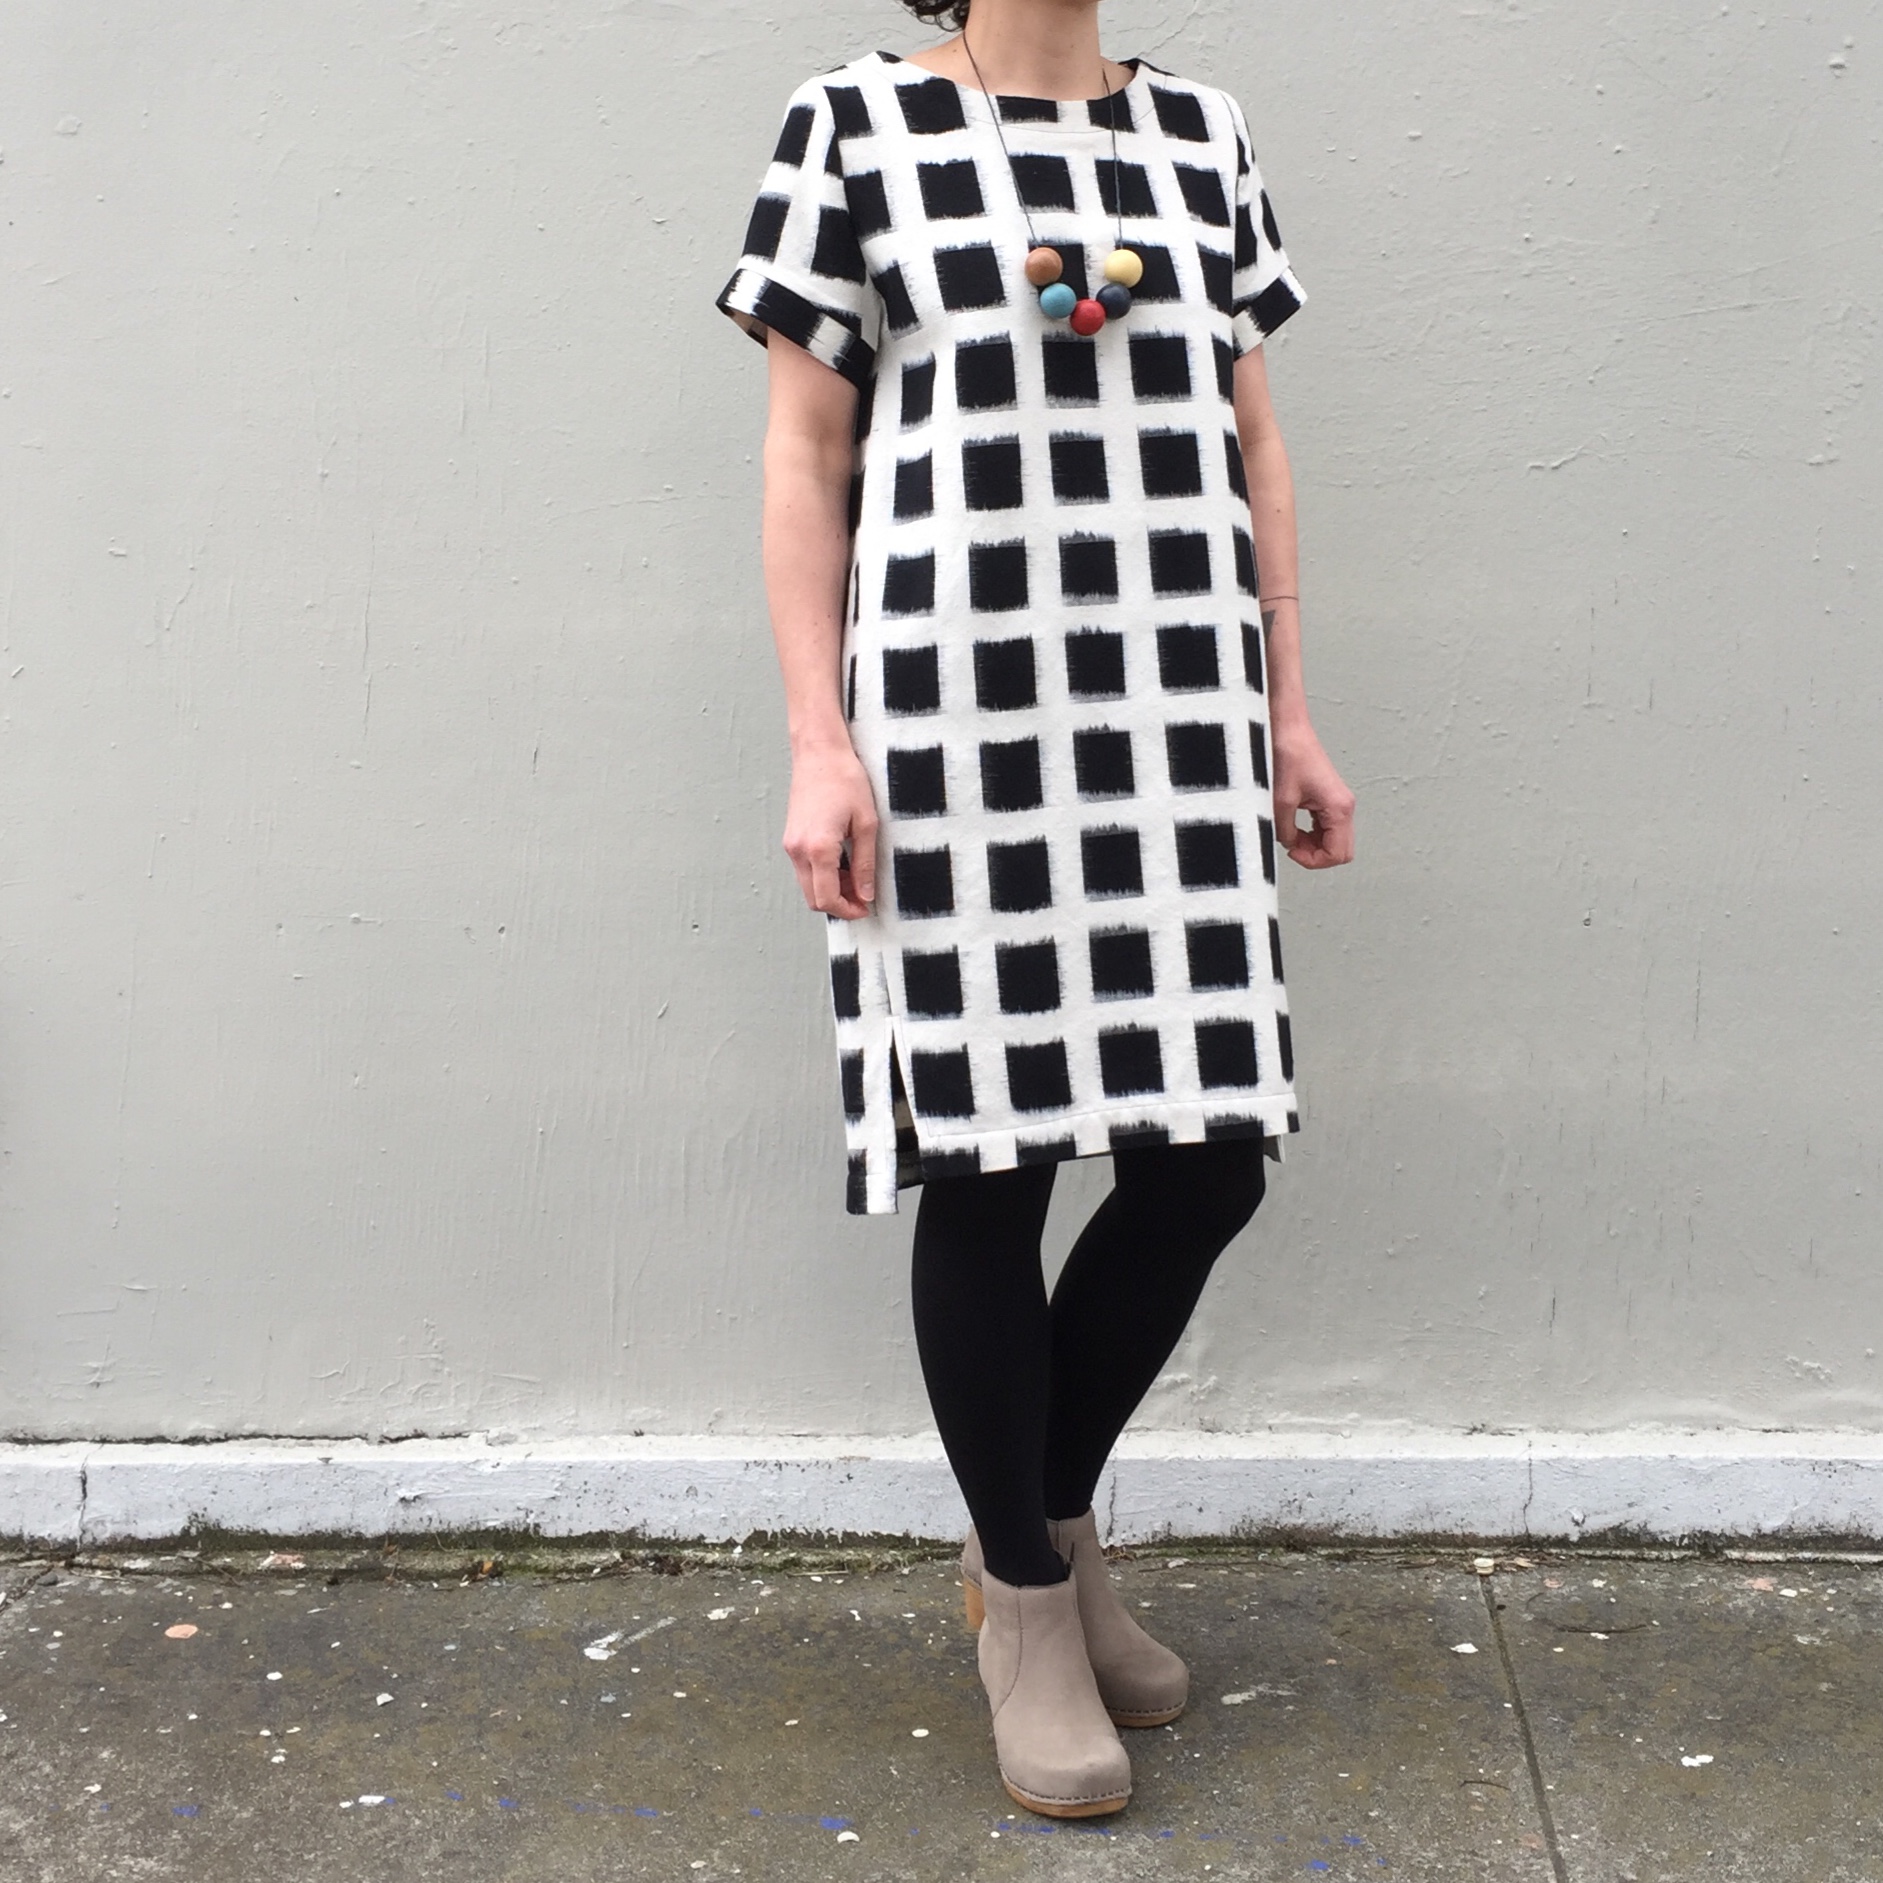
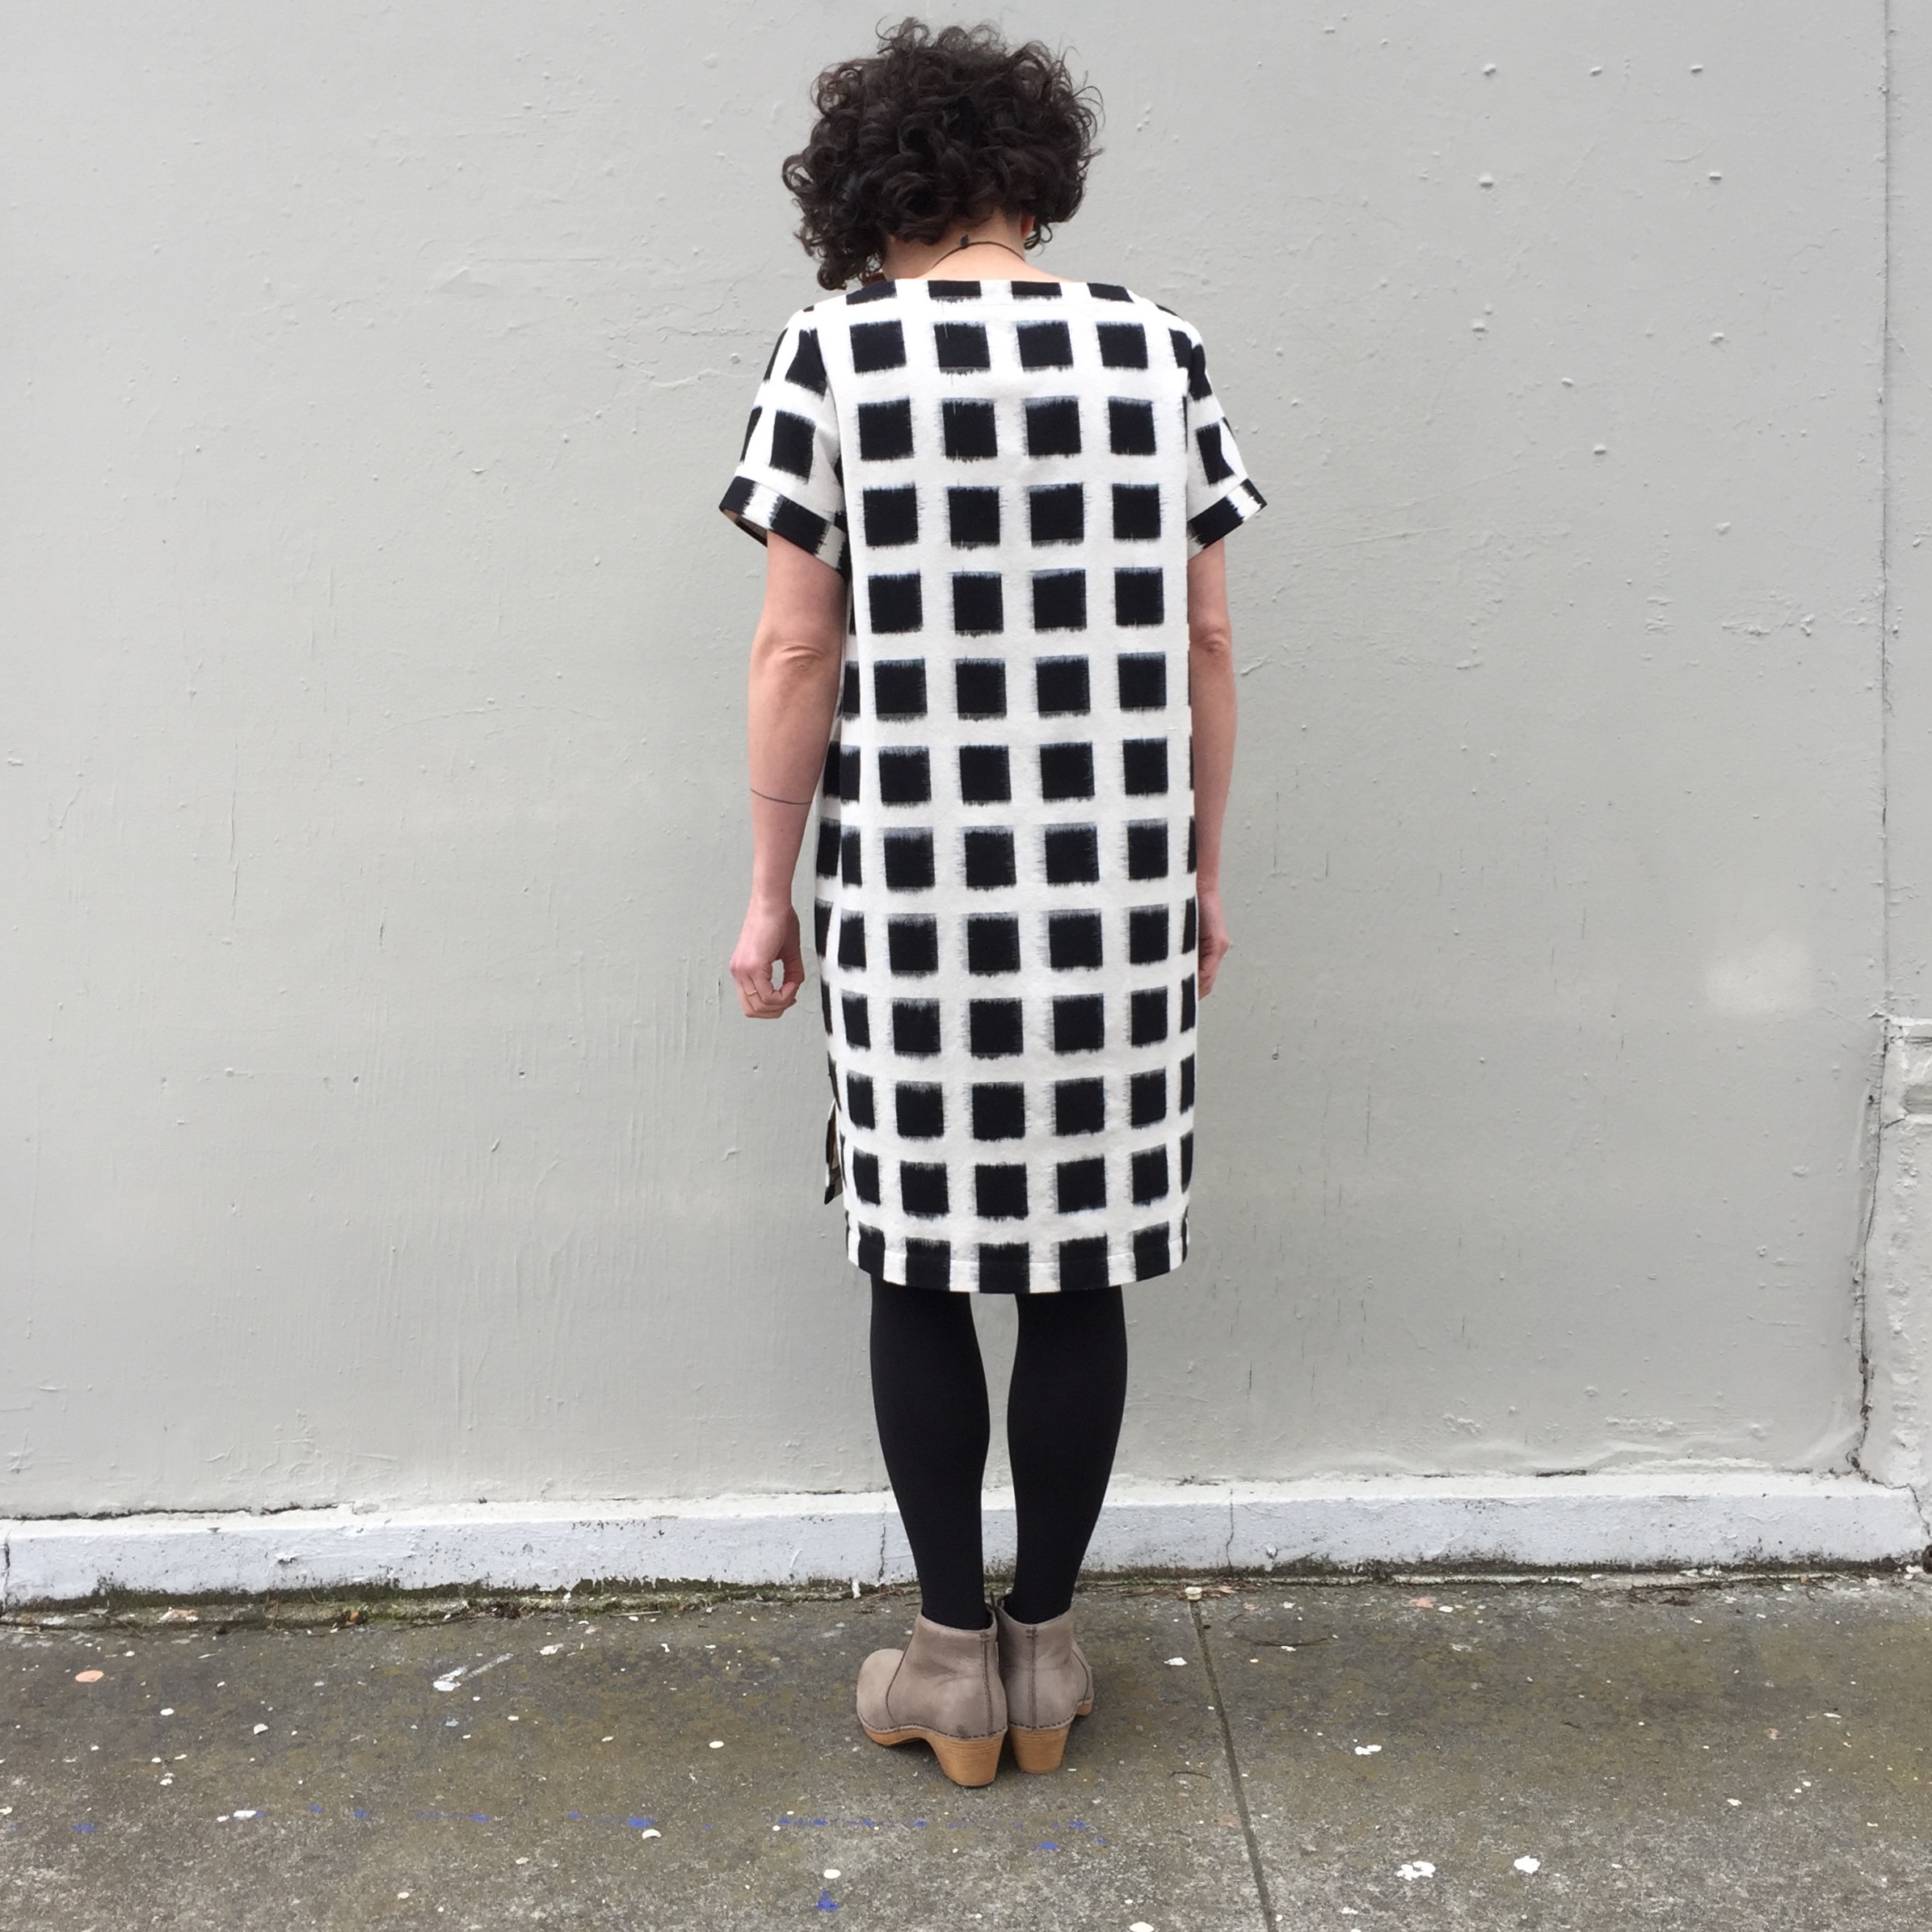
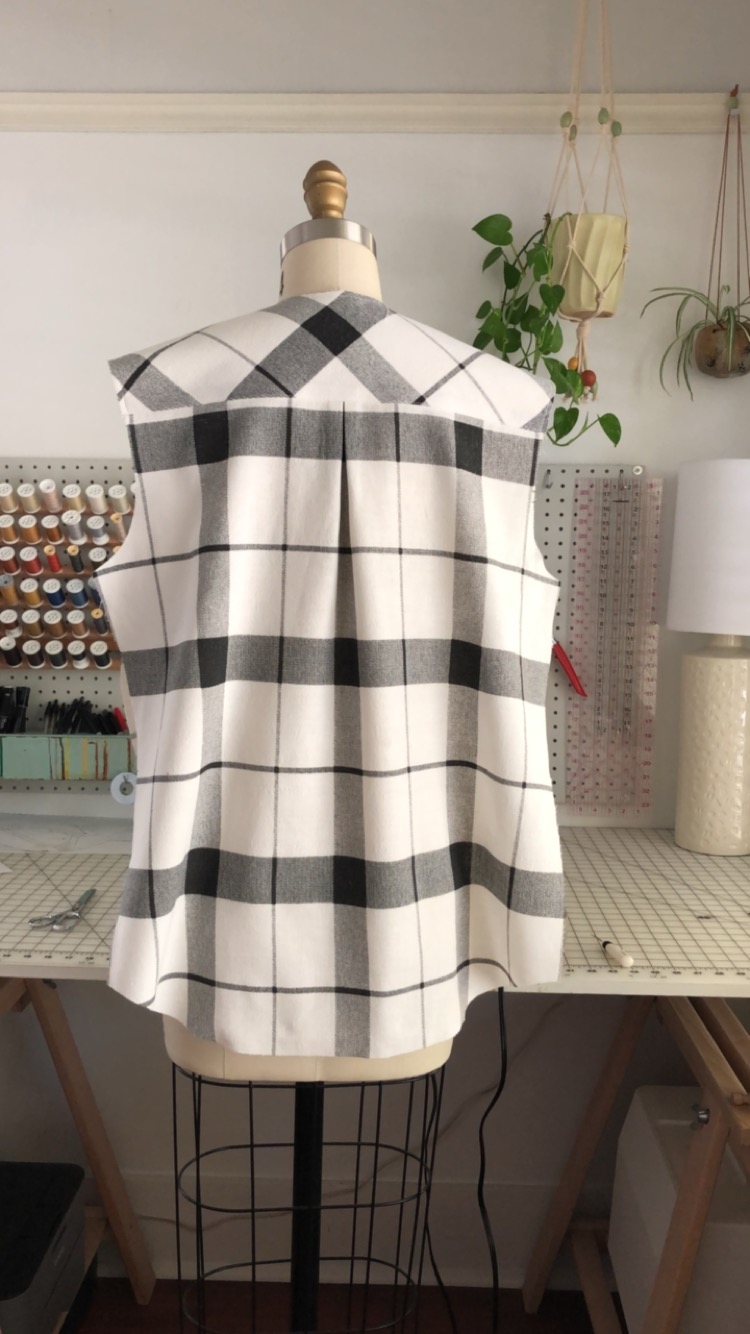
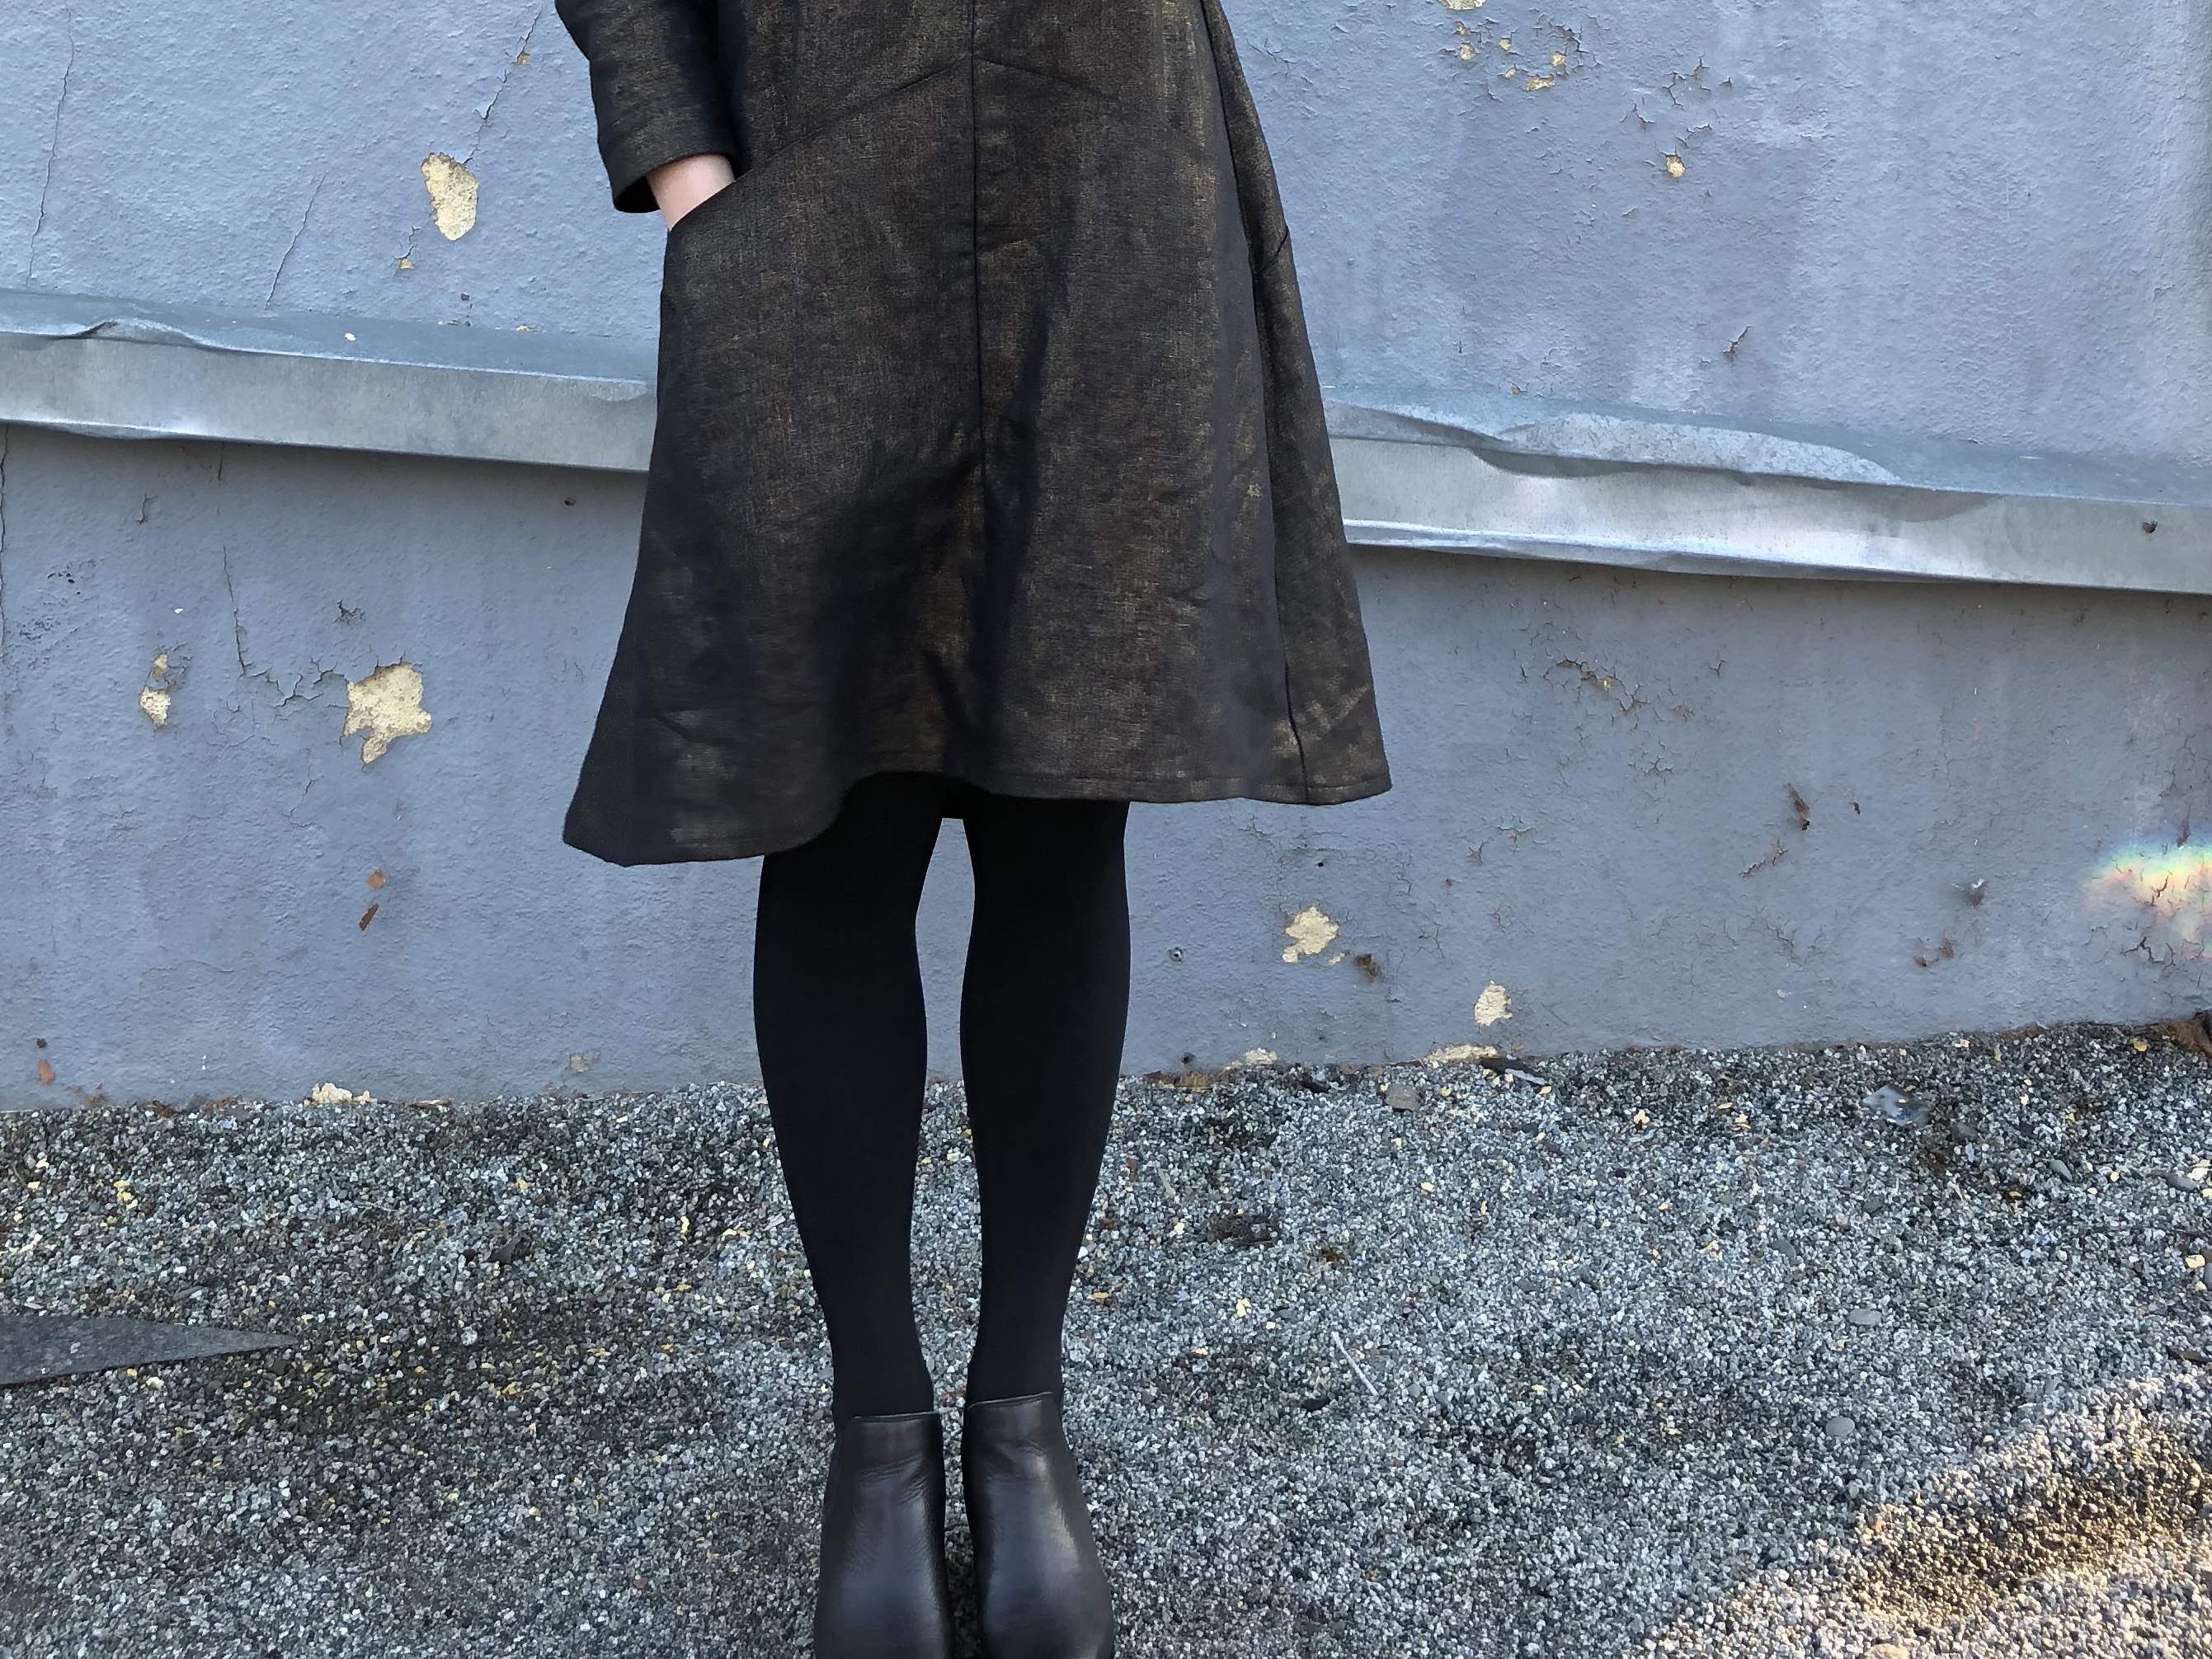
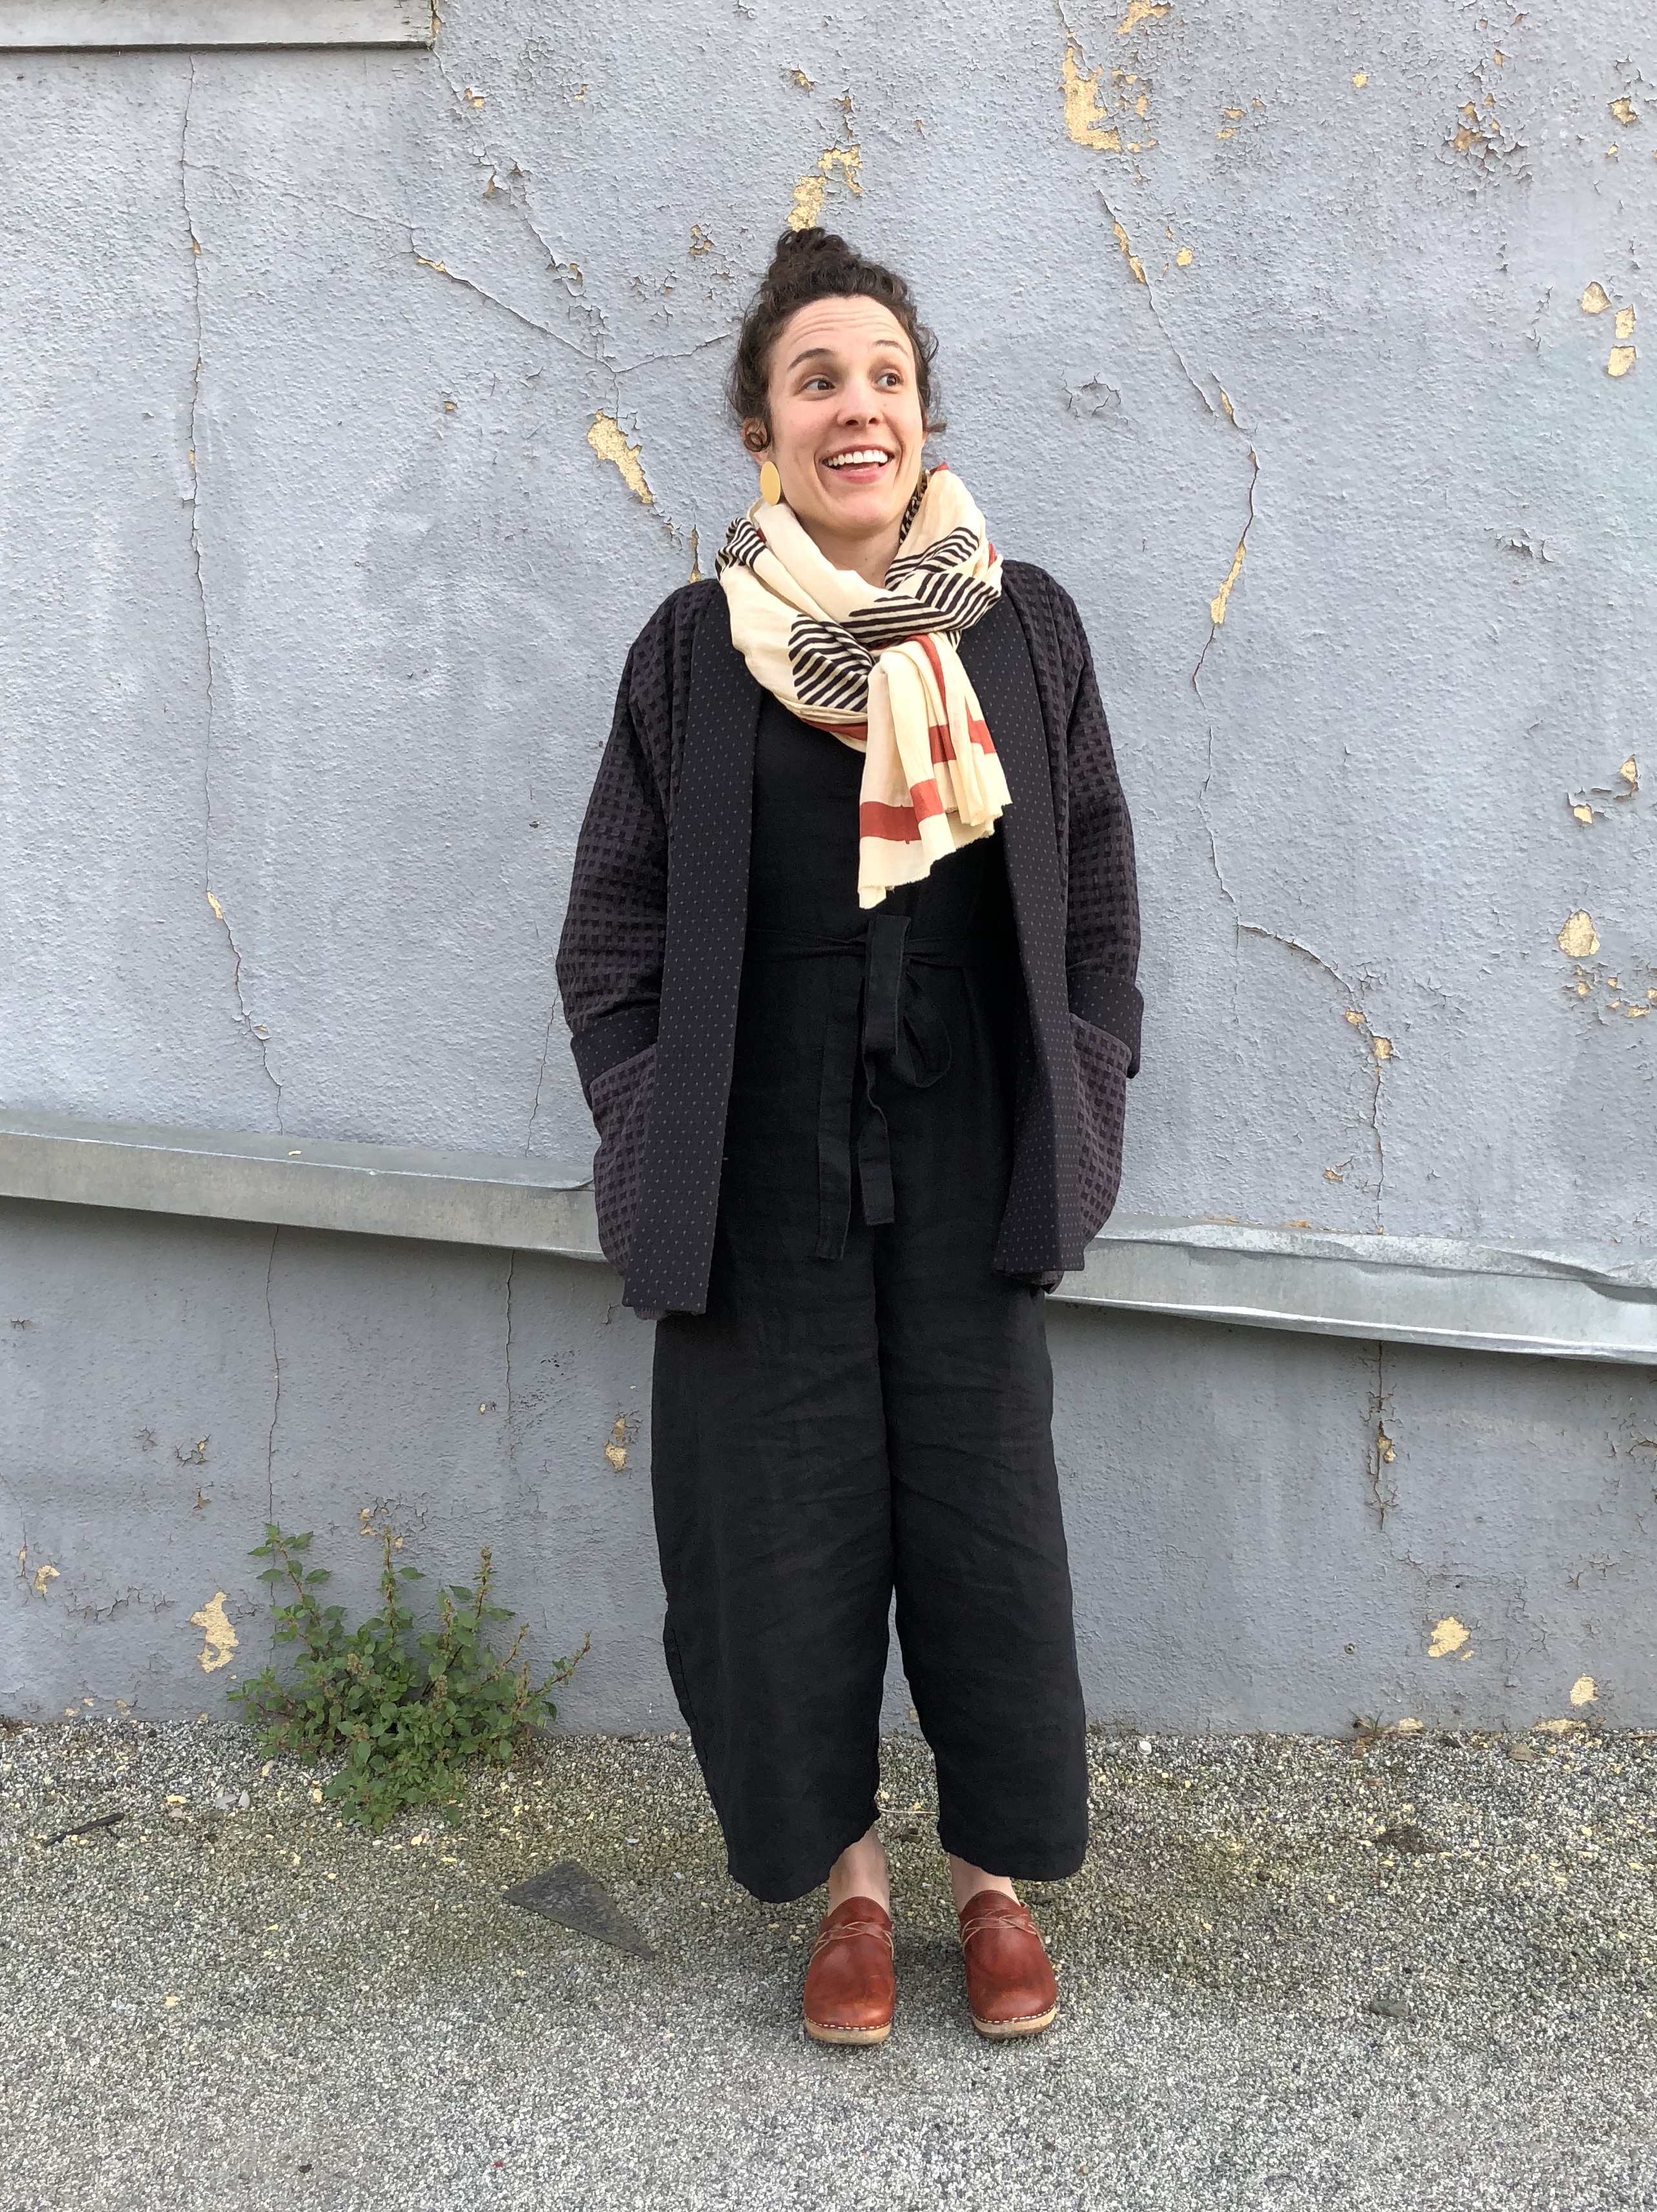
The fabric is also from Wiksten and I think it’s a perfect pairing. Because the black square is a kind of squishy weave I had a hell of time getting the patch pockets pattern to line up. They ended up not, but oh well.

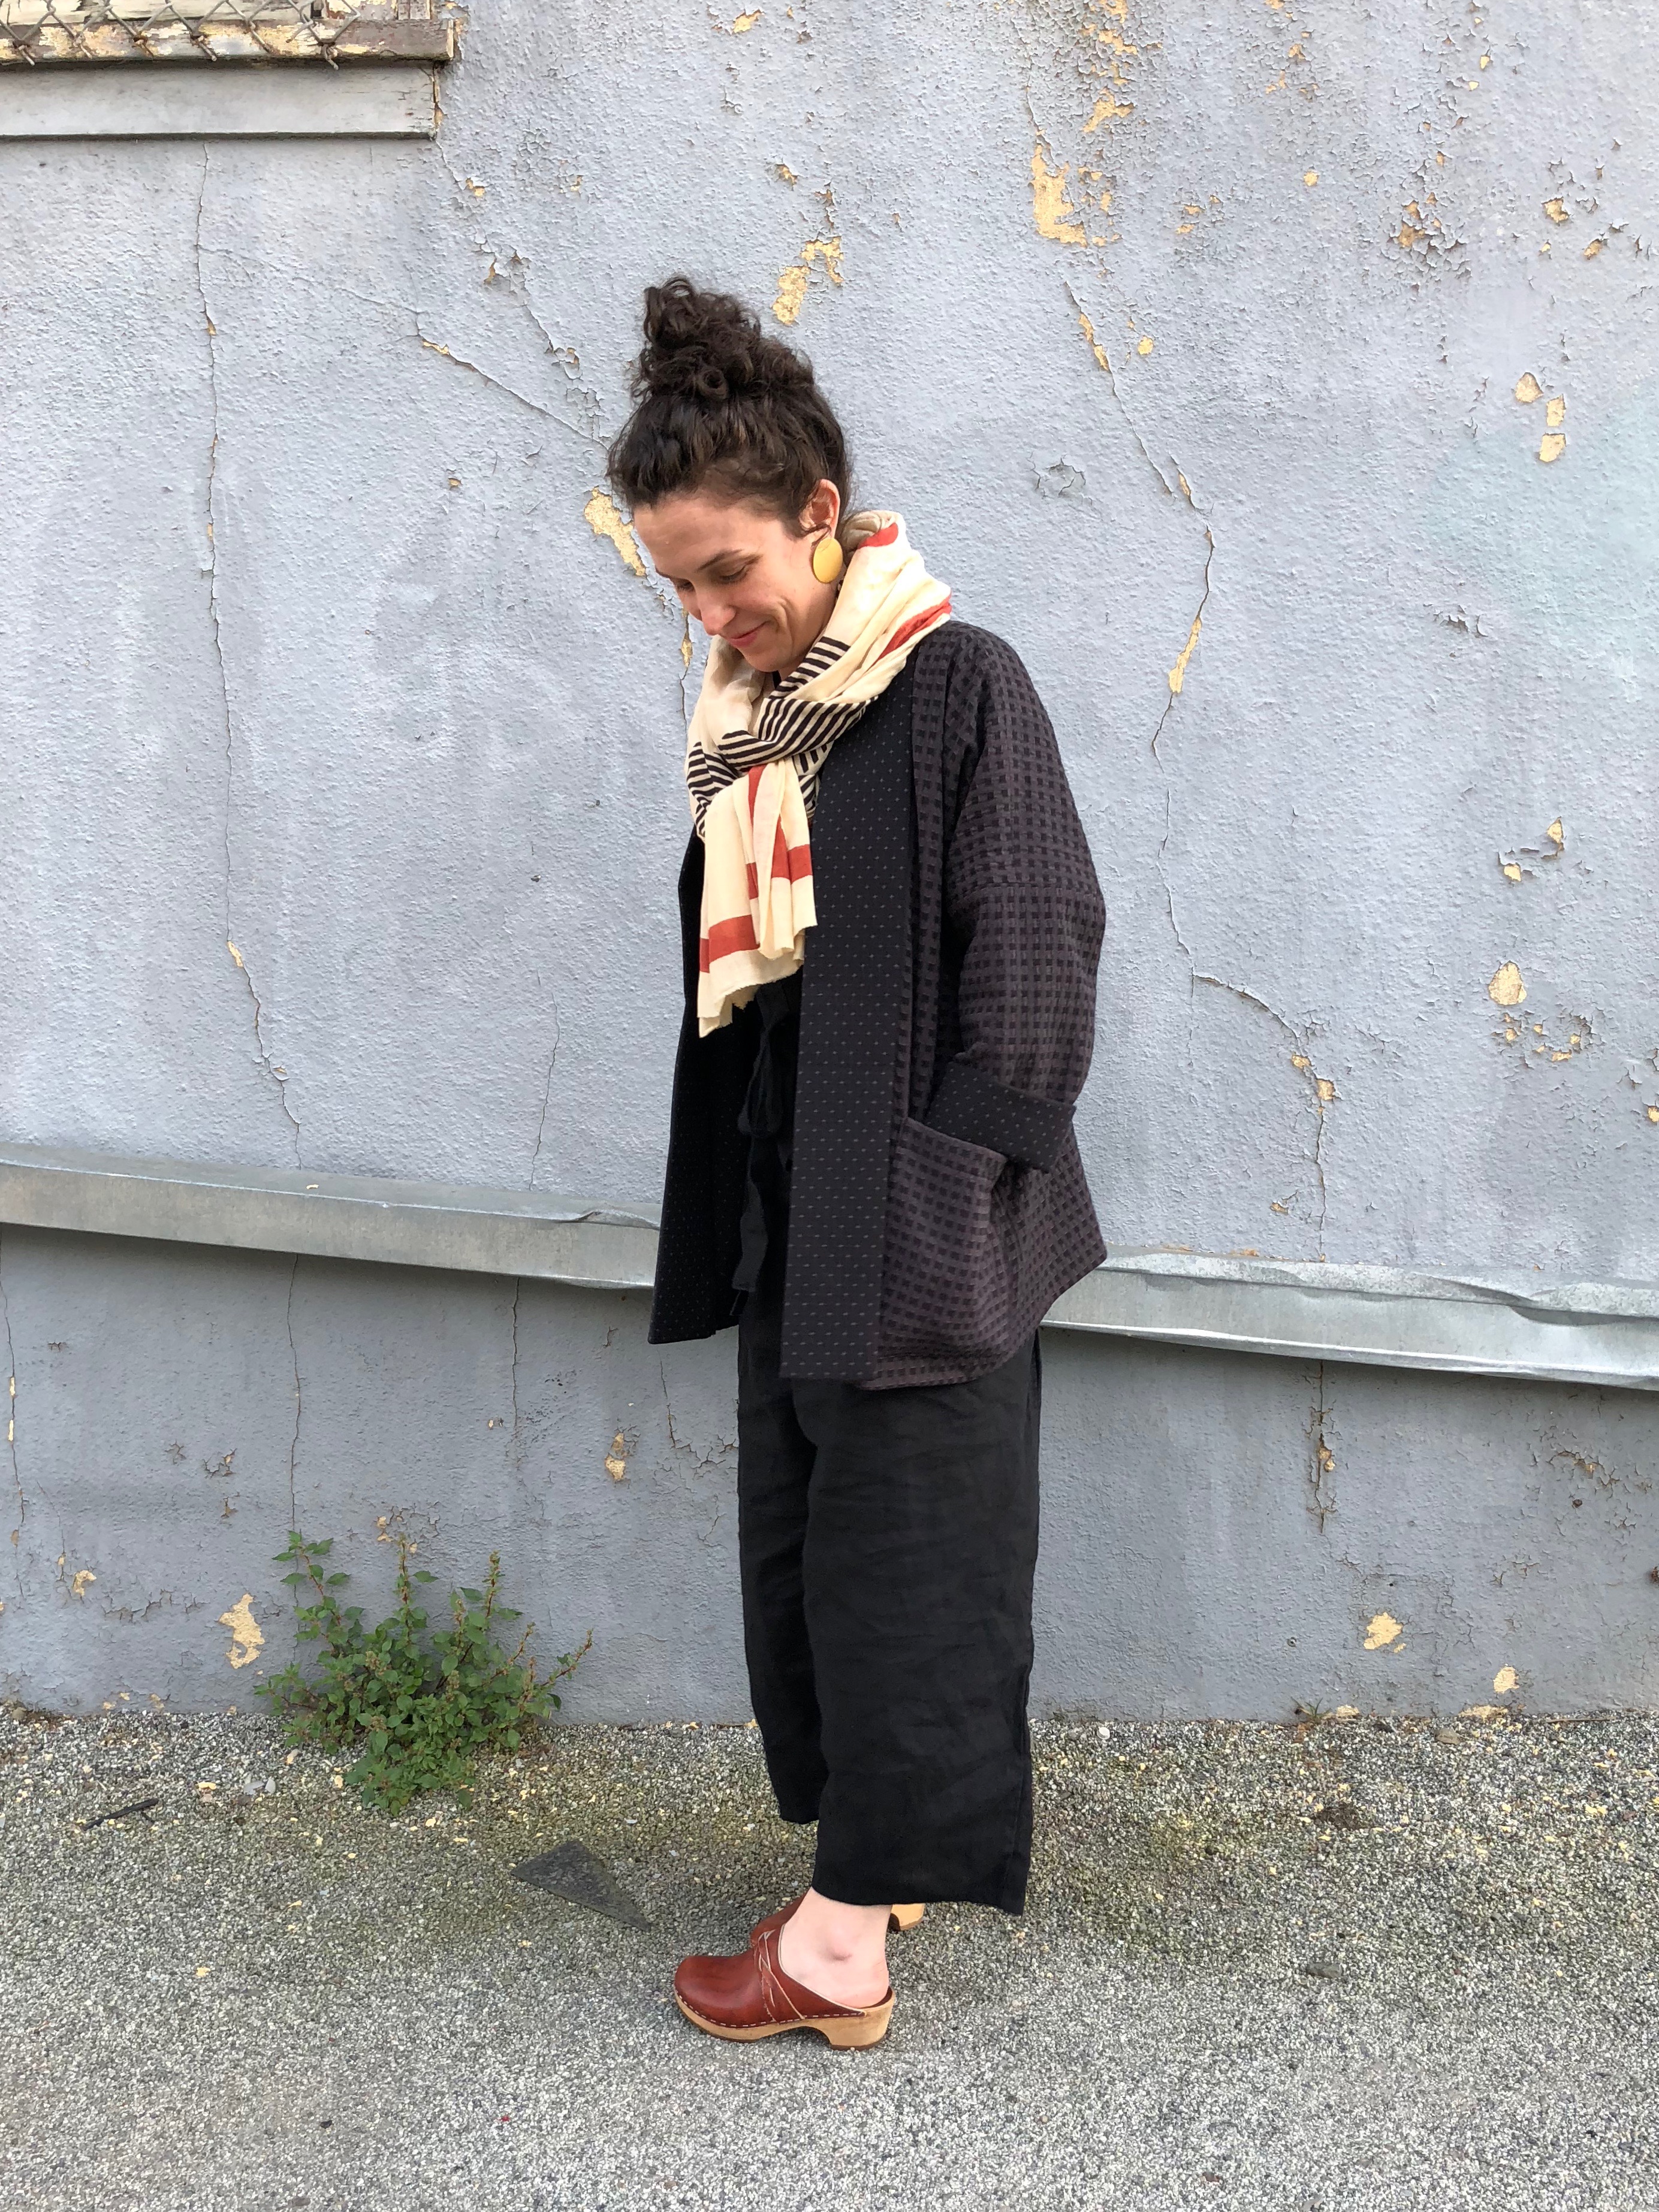
I’m glad I was able to add this to my me-made wardrobe as it’s been one of only three outerwear pieces I’ve had for #MMMay18.

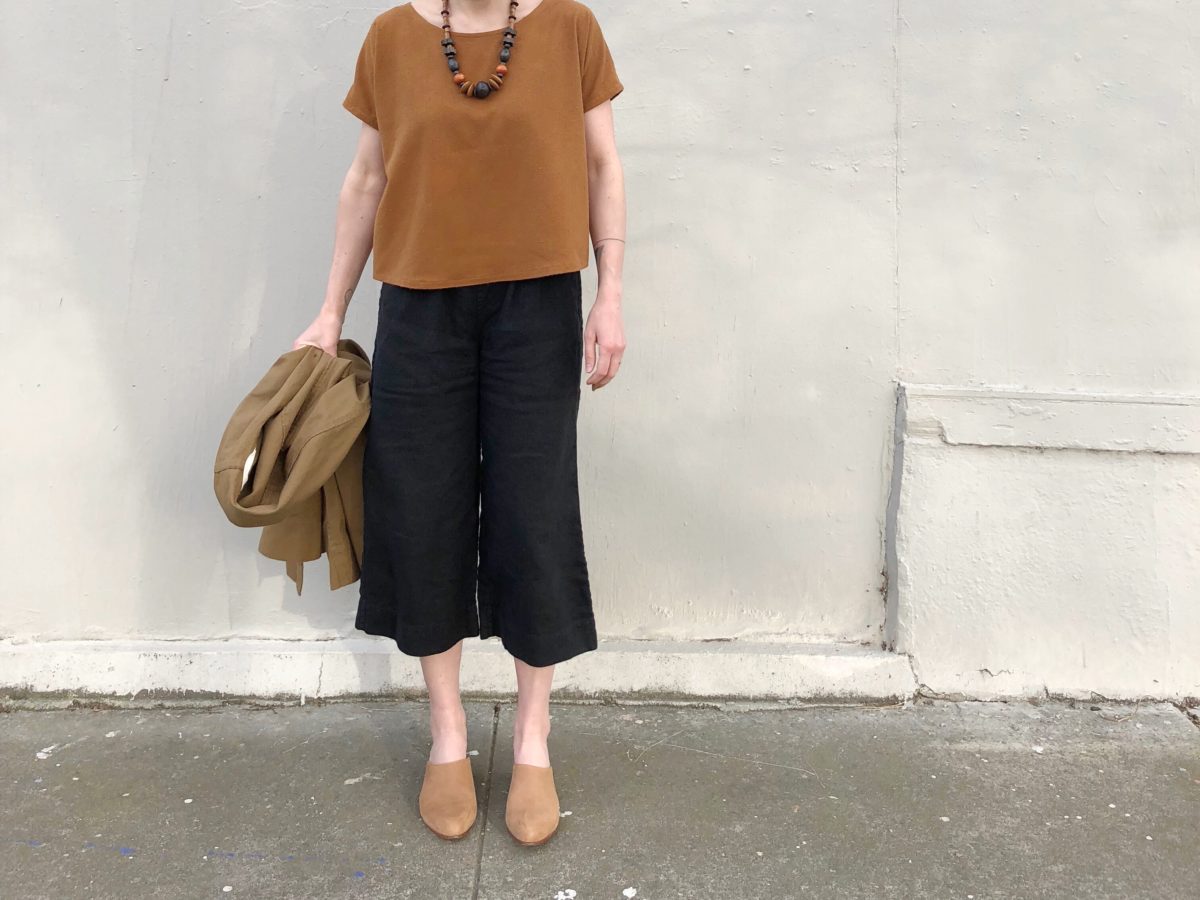
Speaking of Me Made Made I haven’t been anywhere near as productive as I was last year. I only just finished a silk noil Hemlock Tee (21 days in to the challenge), which had mostly been made last month and two Kalle shirts have been all cut out and waiting on my ironing board.

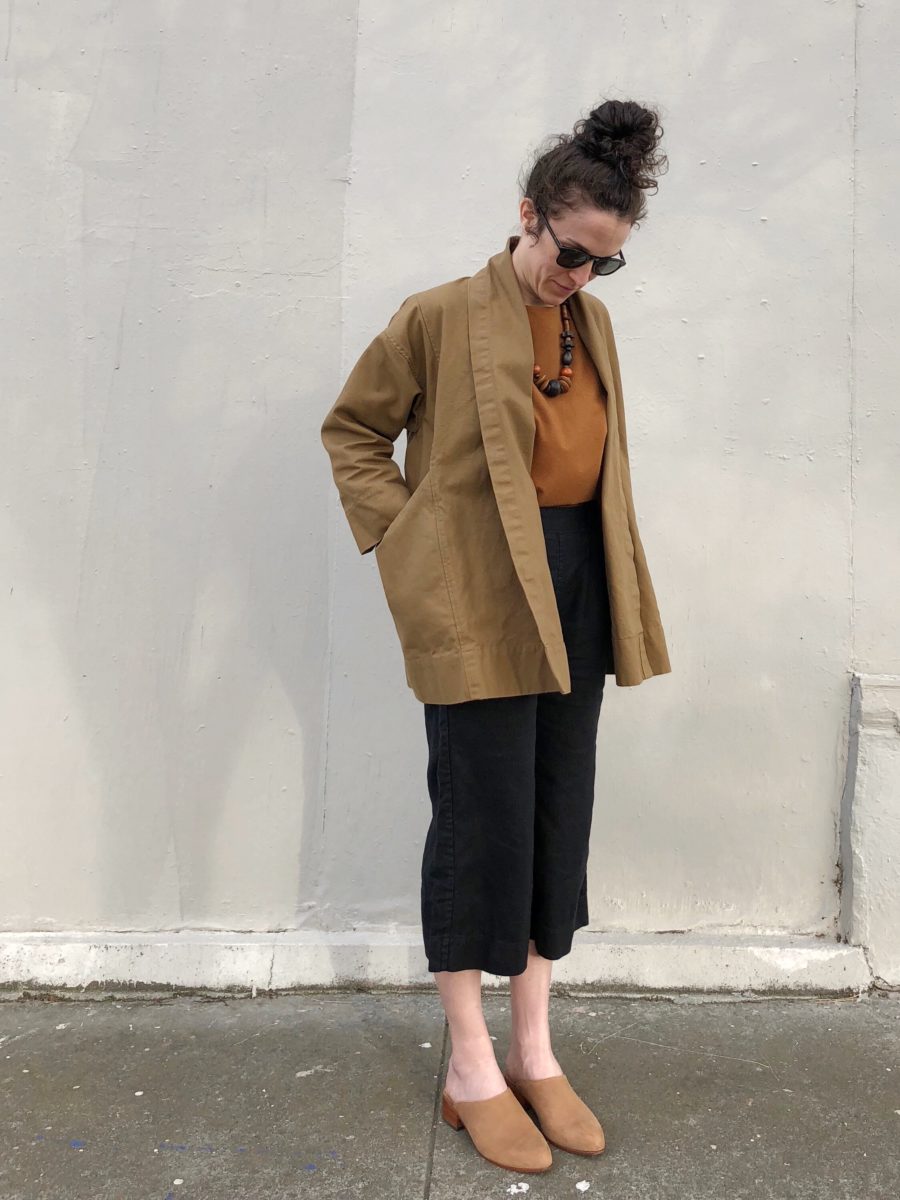
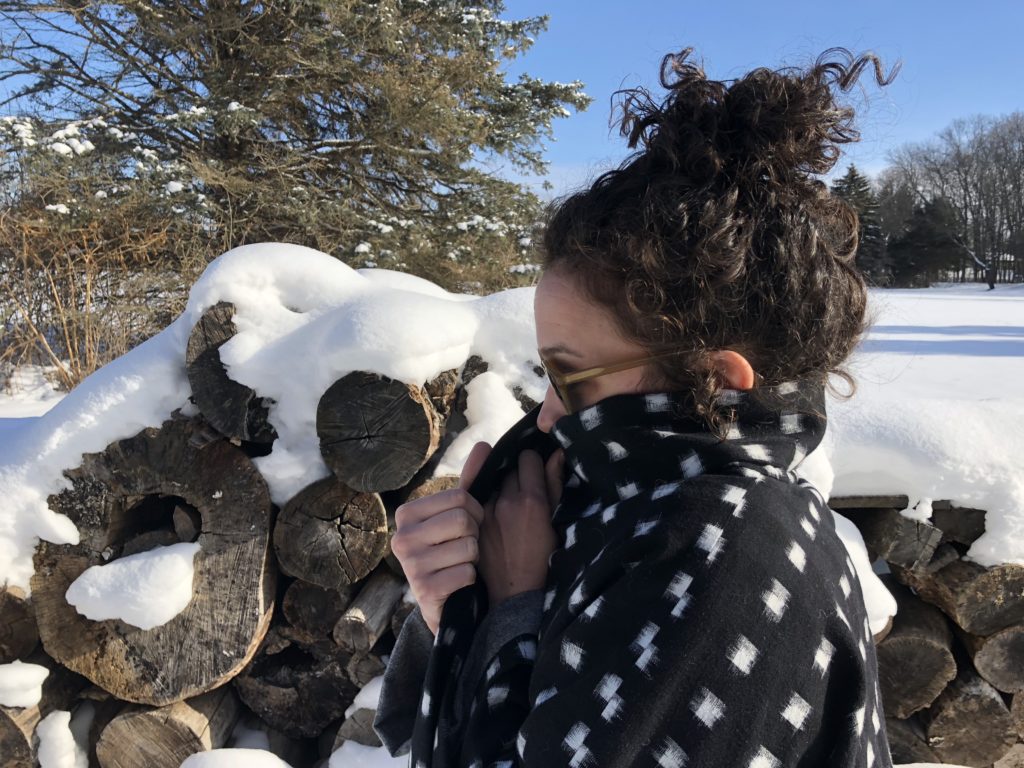
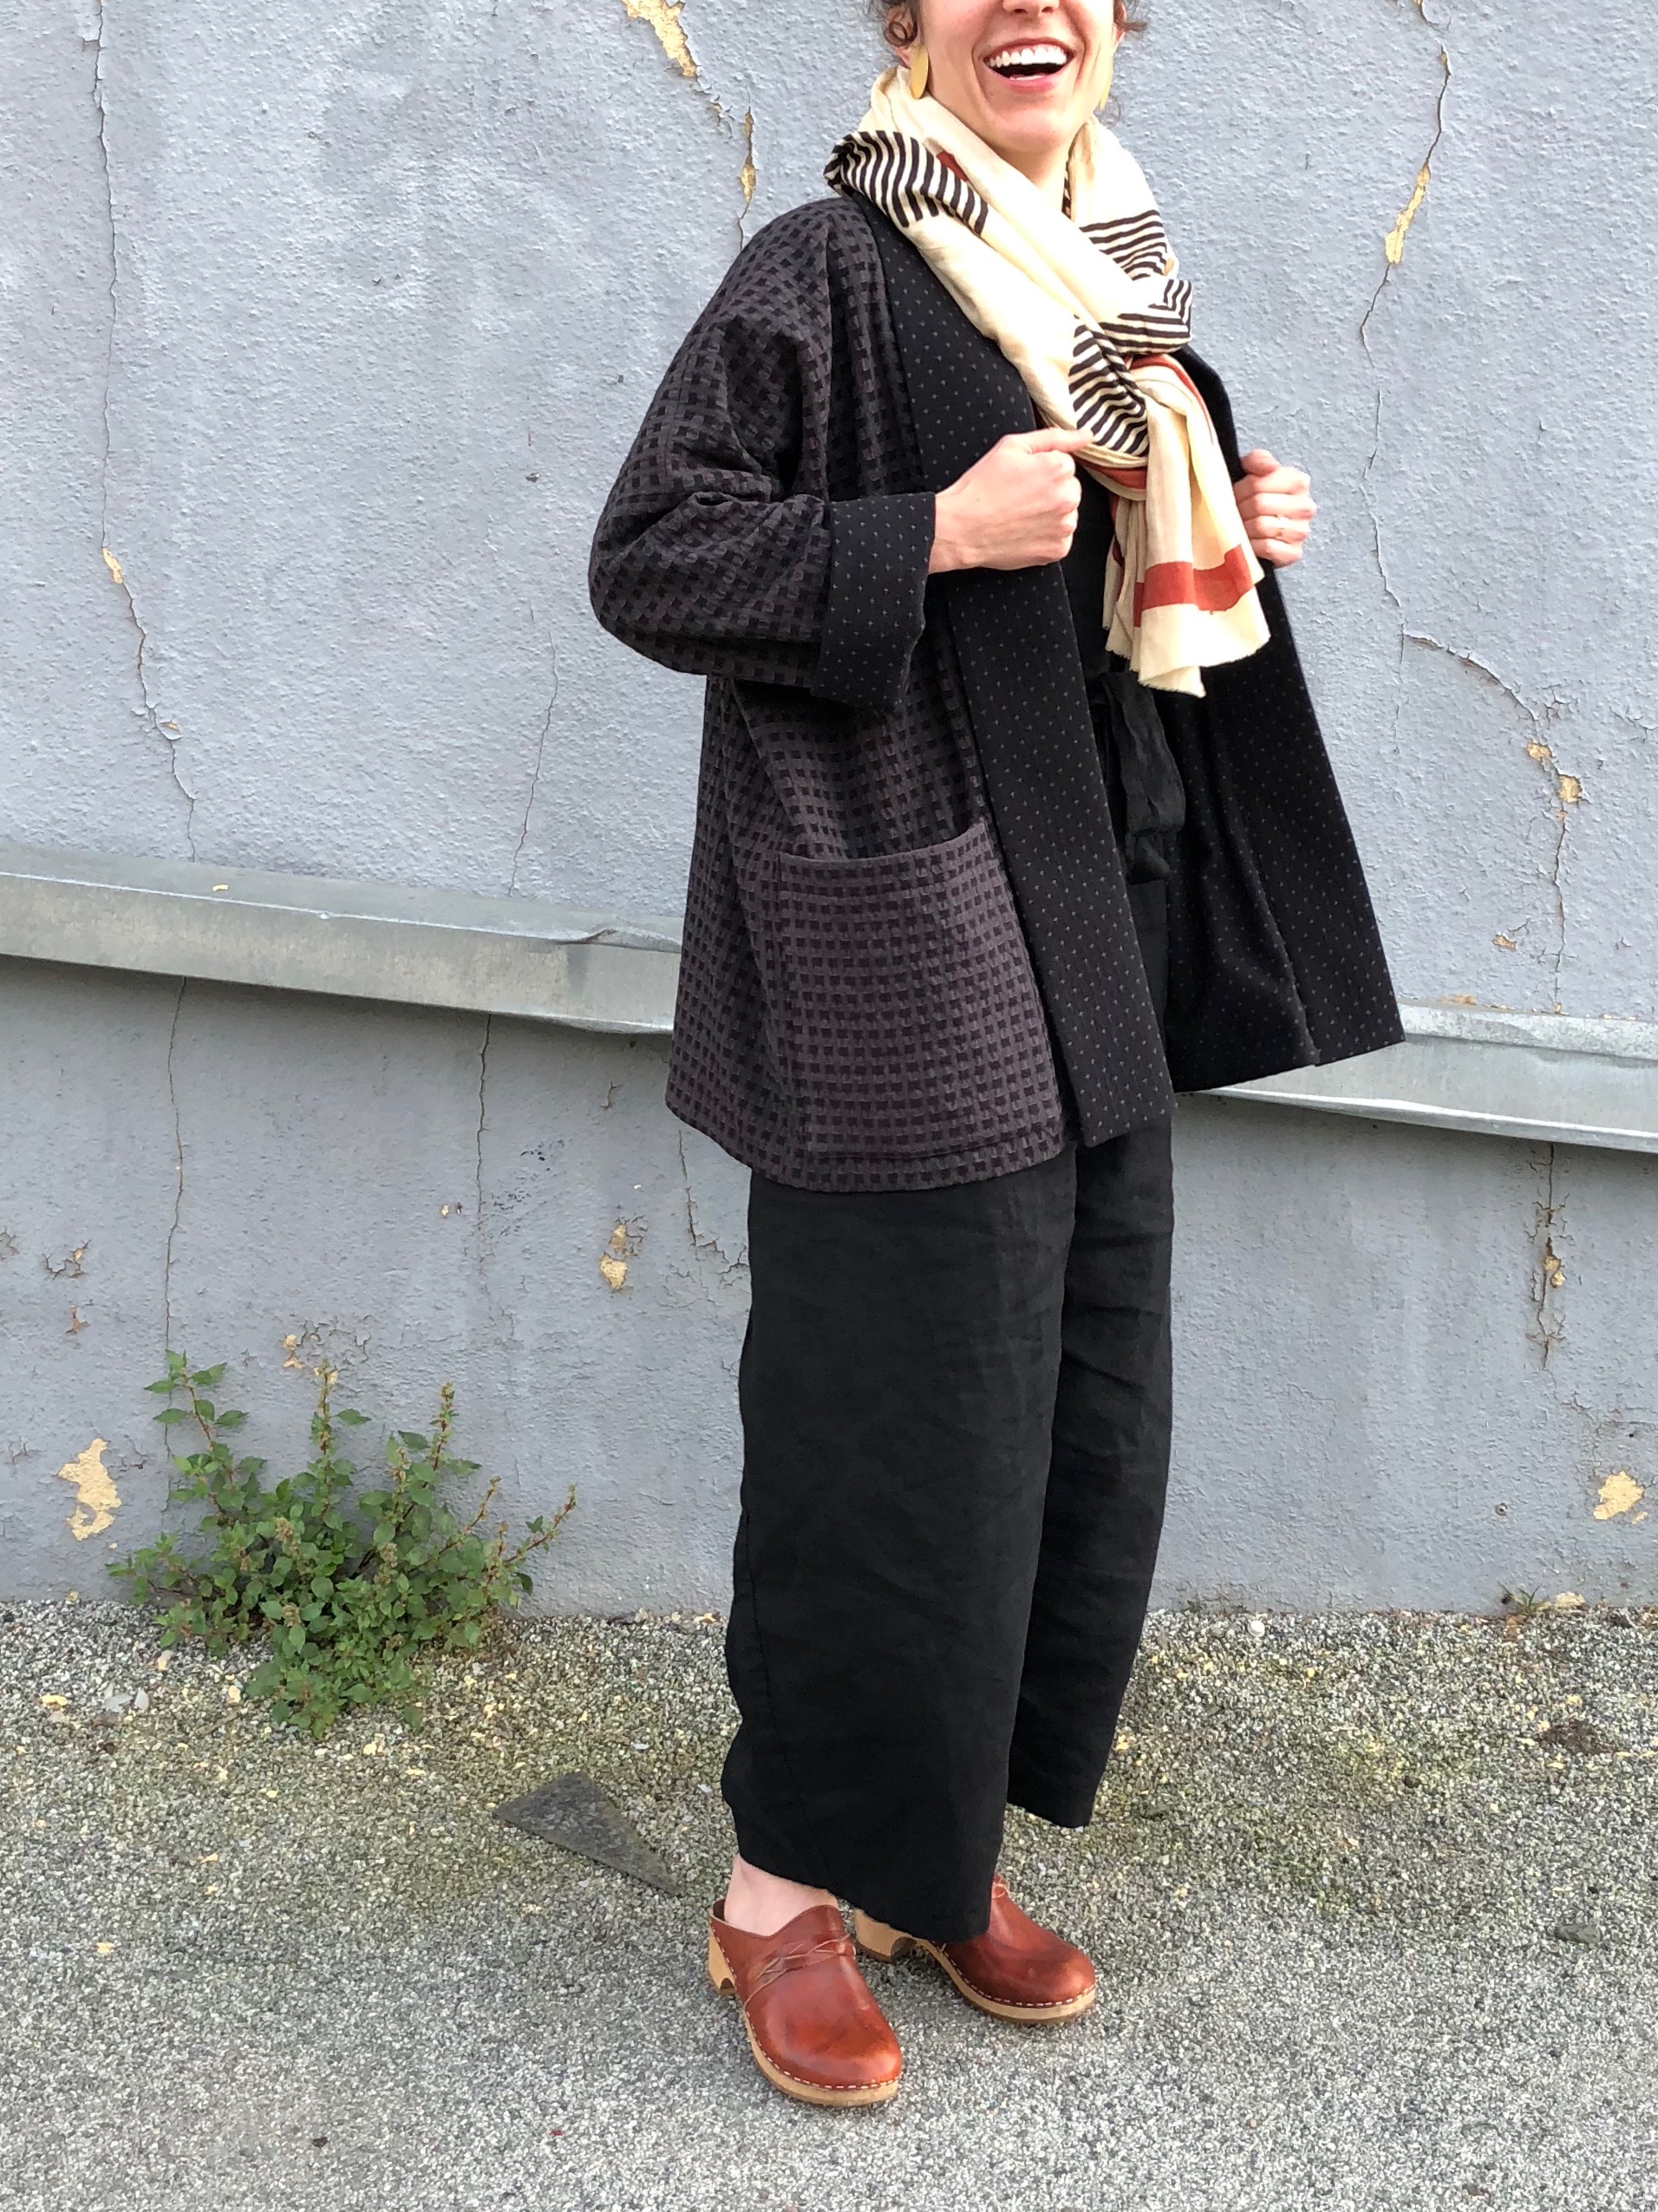
Then, after a particularly long commute home, I just auto piloted through this jacket. It’s been unseasonable chilly in the Bay Area and I yearned for another layering piece.

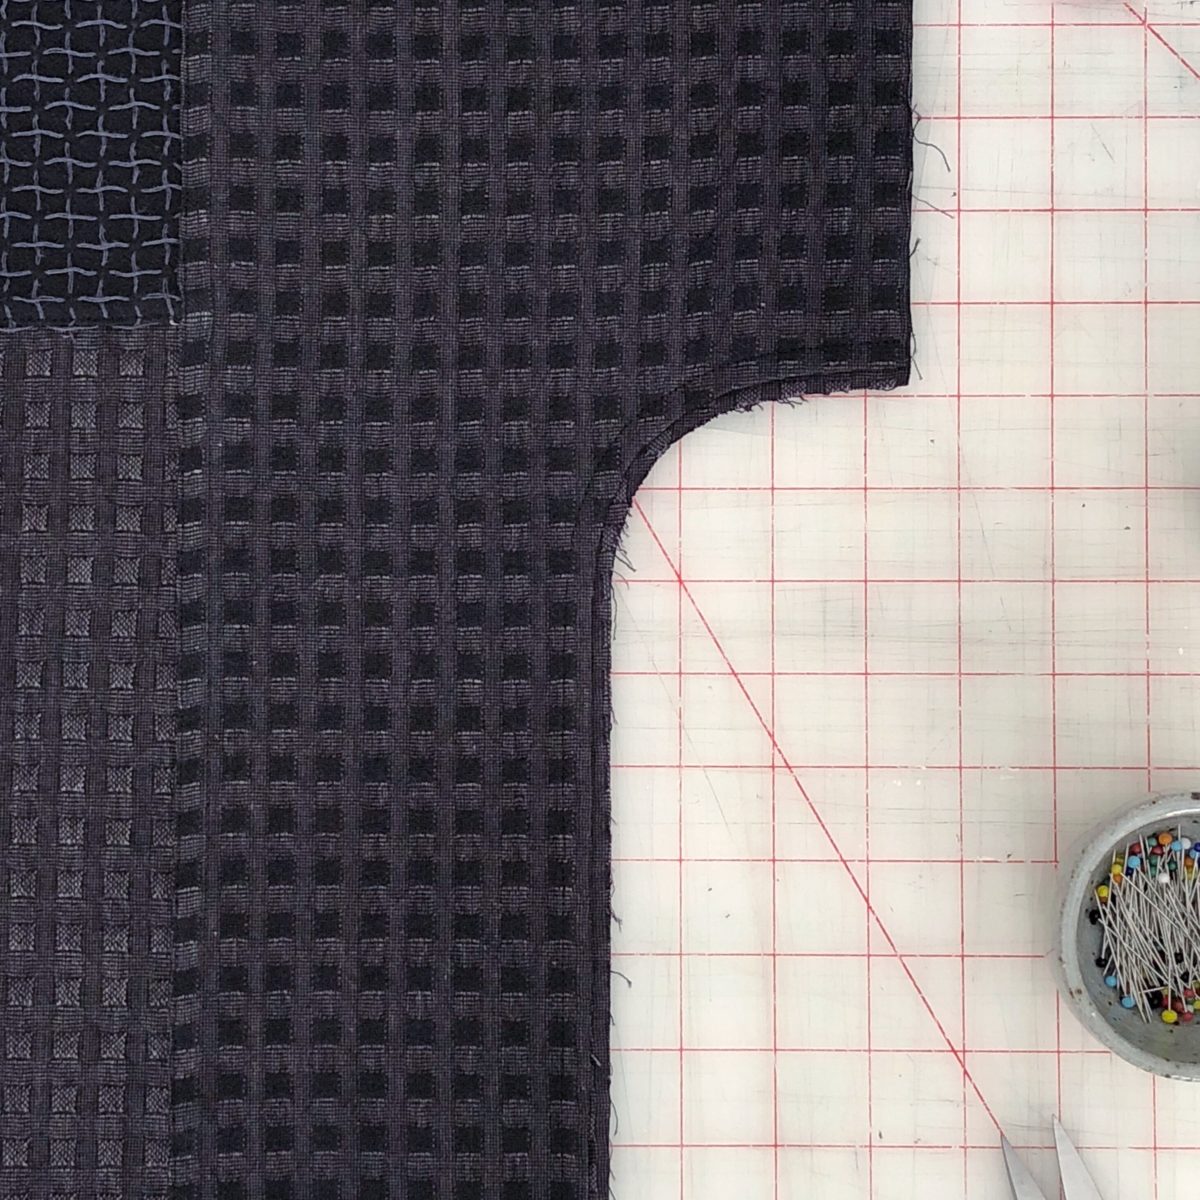
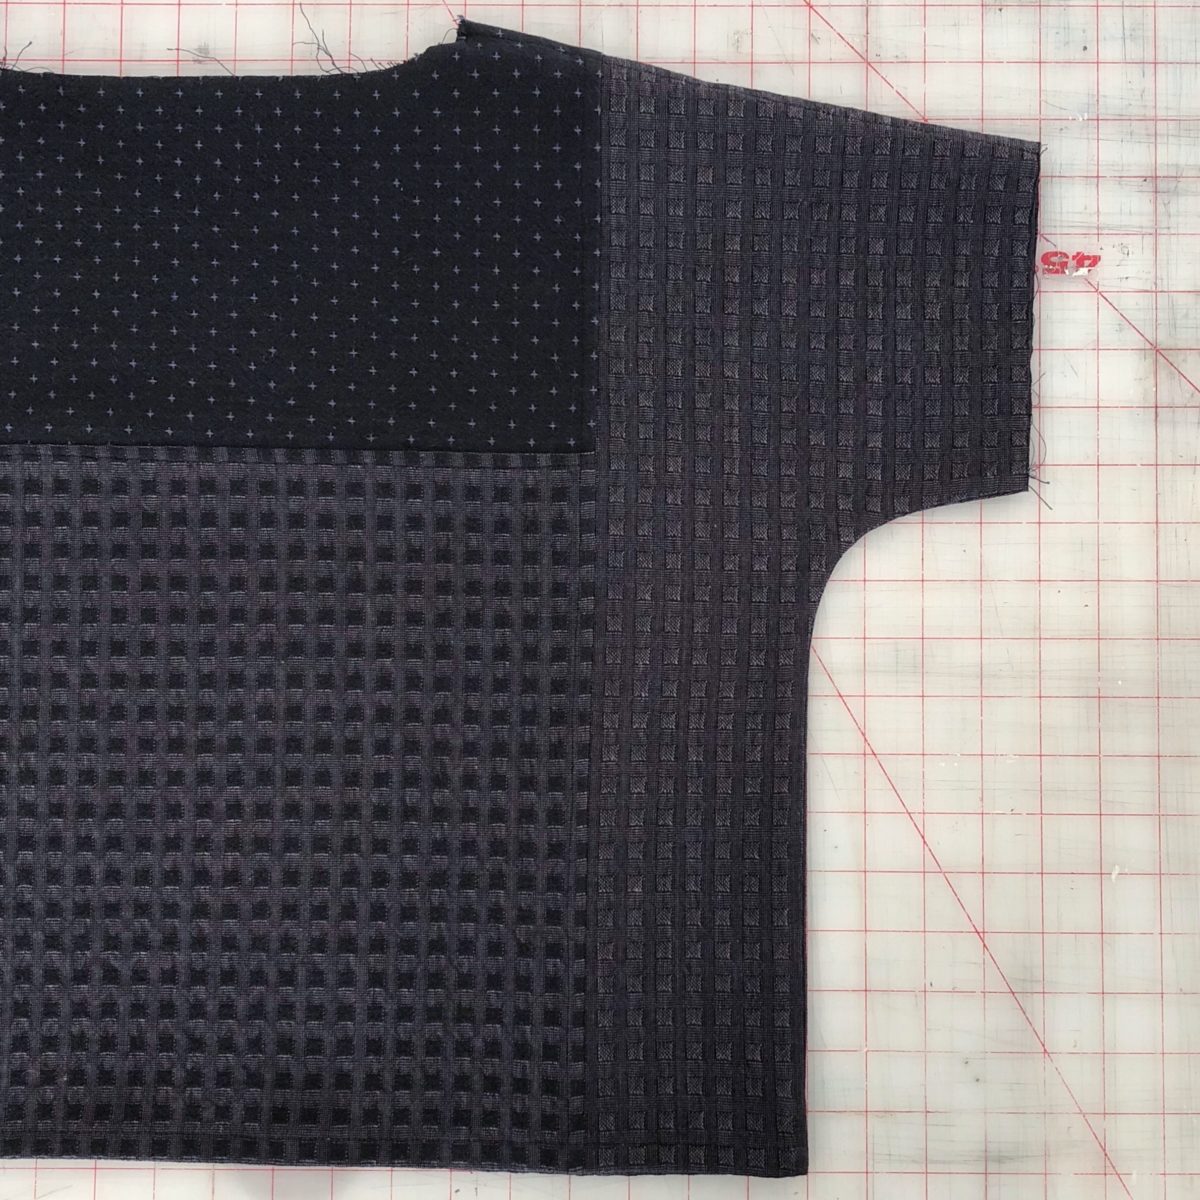
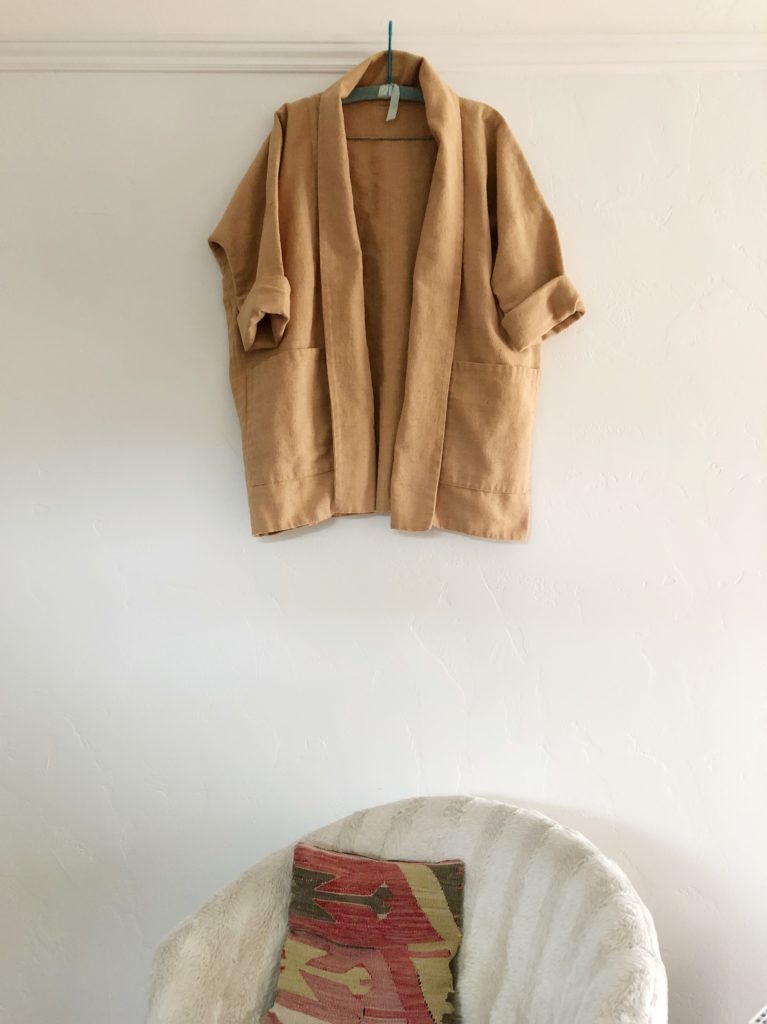
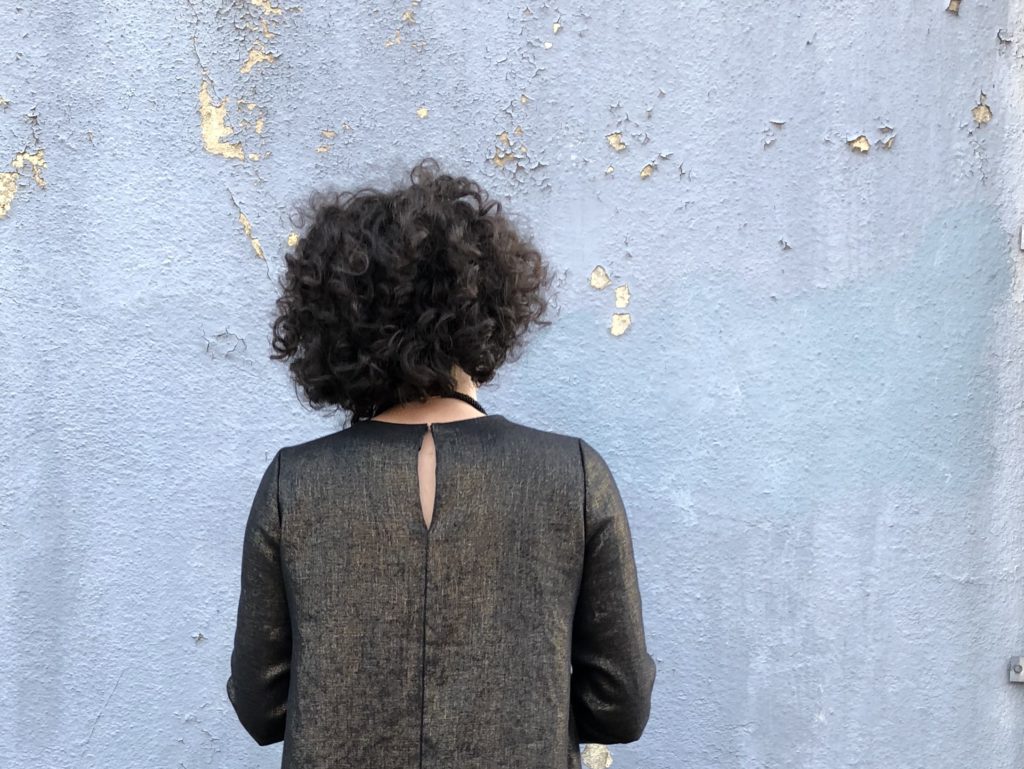
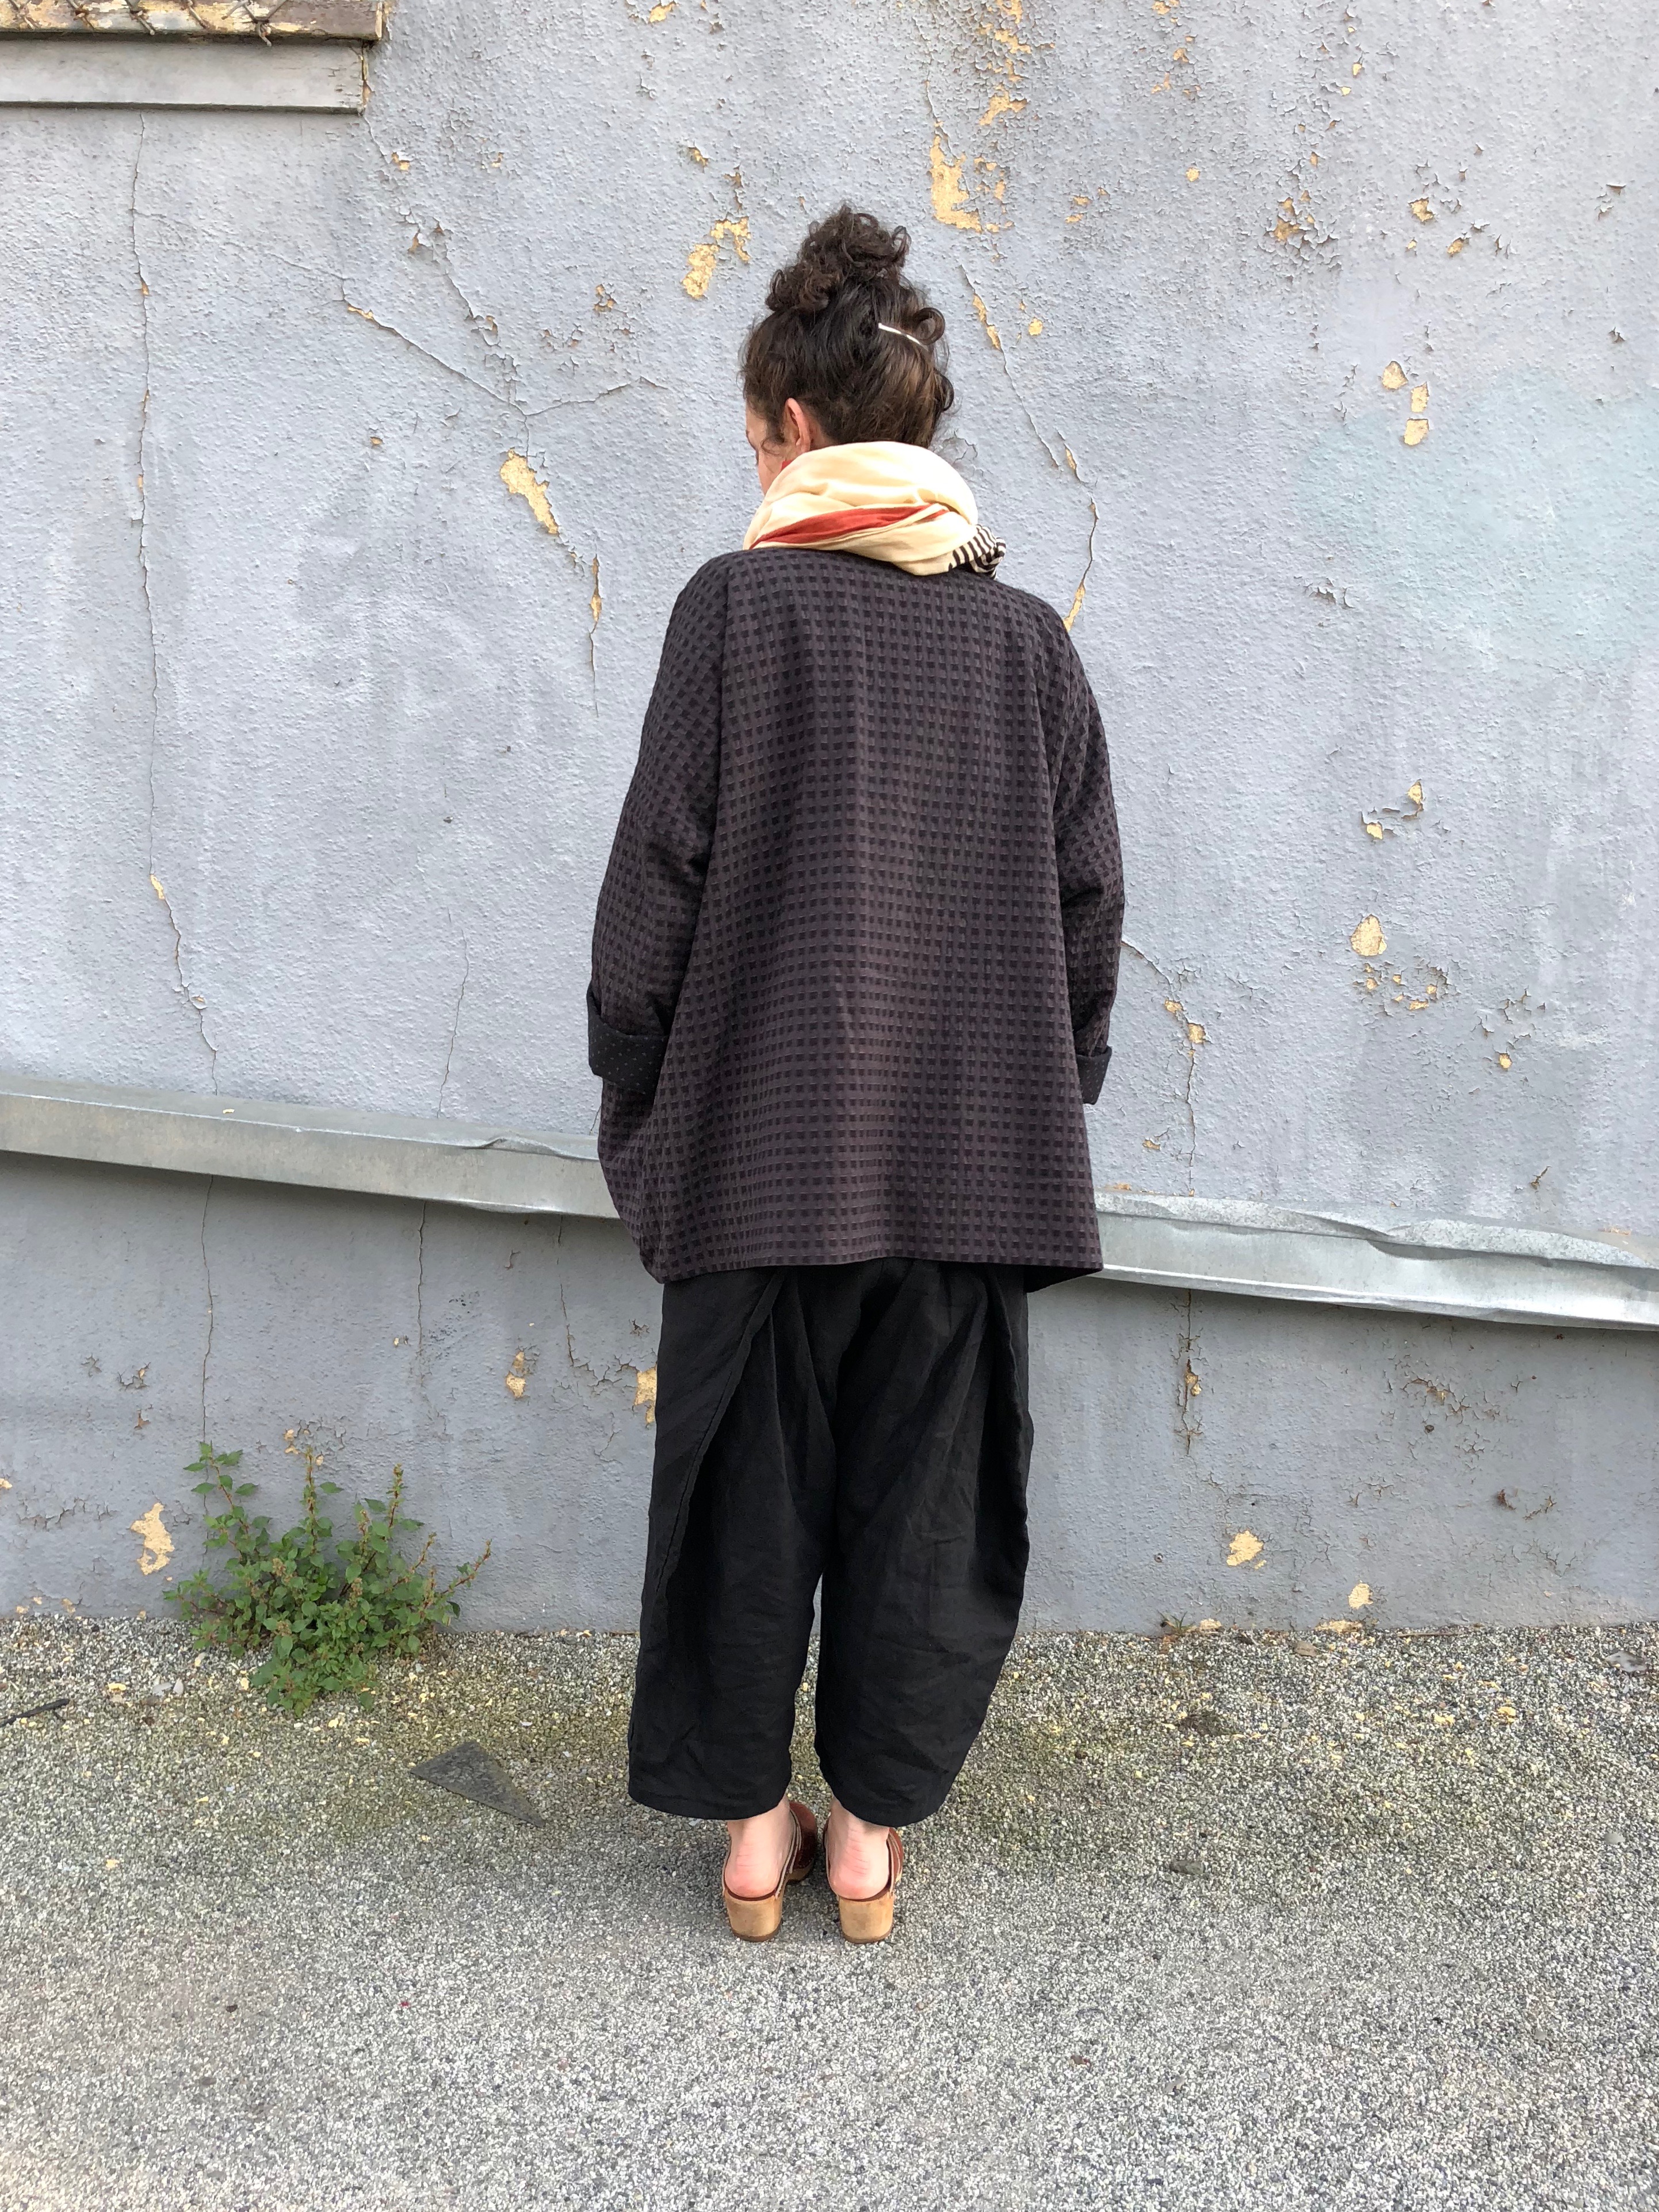
I cut and hacked this together without much of a plan and feel quite relived it worked out. One side even has some magical unplanned pattern matching on the shoulders!

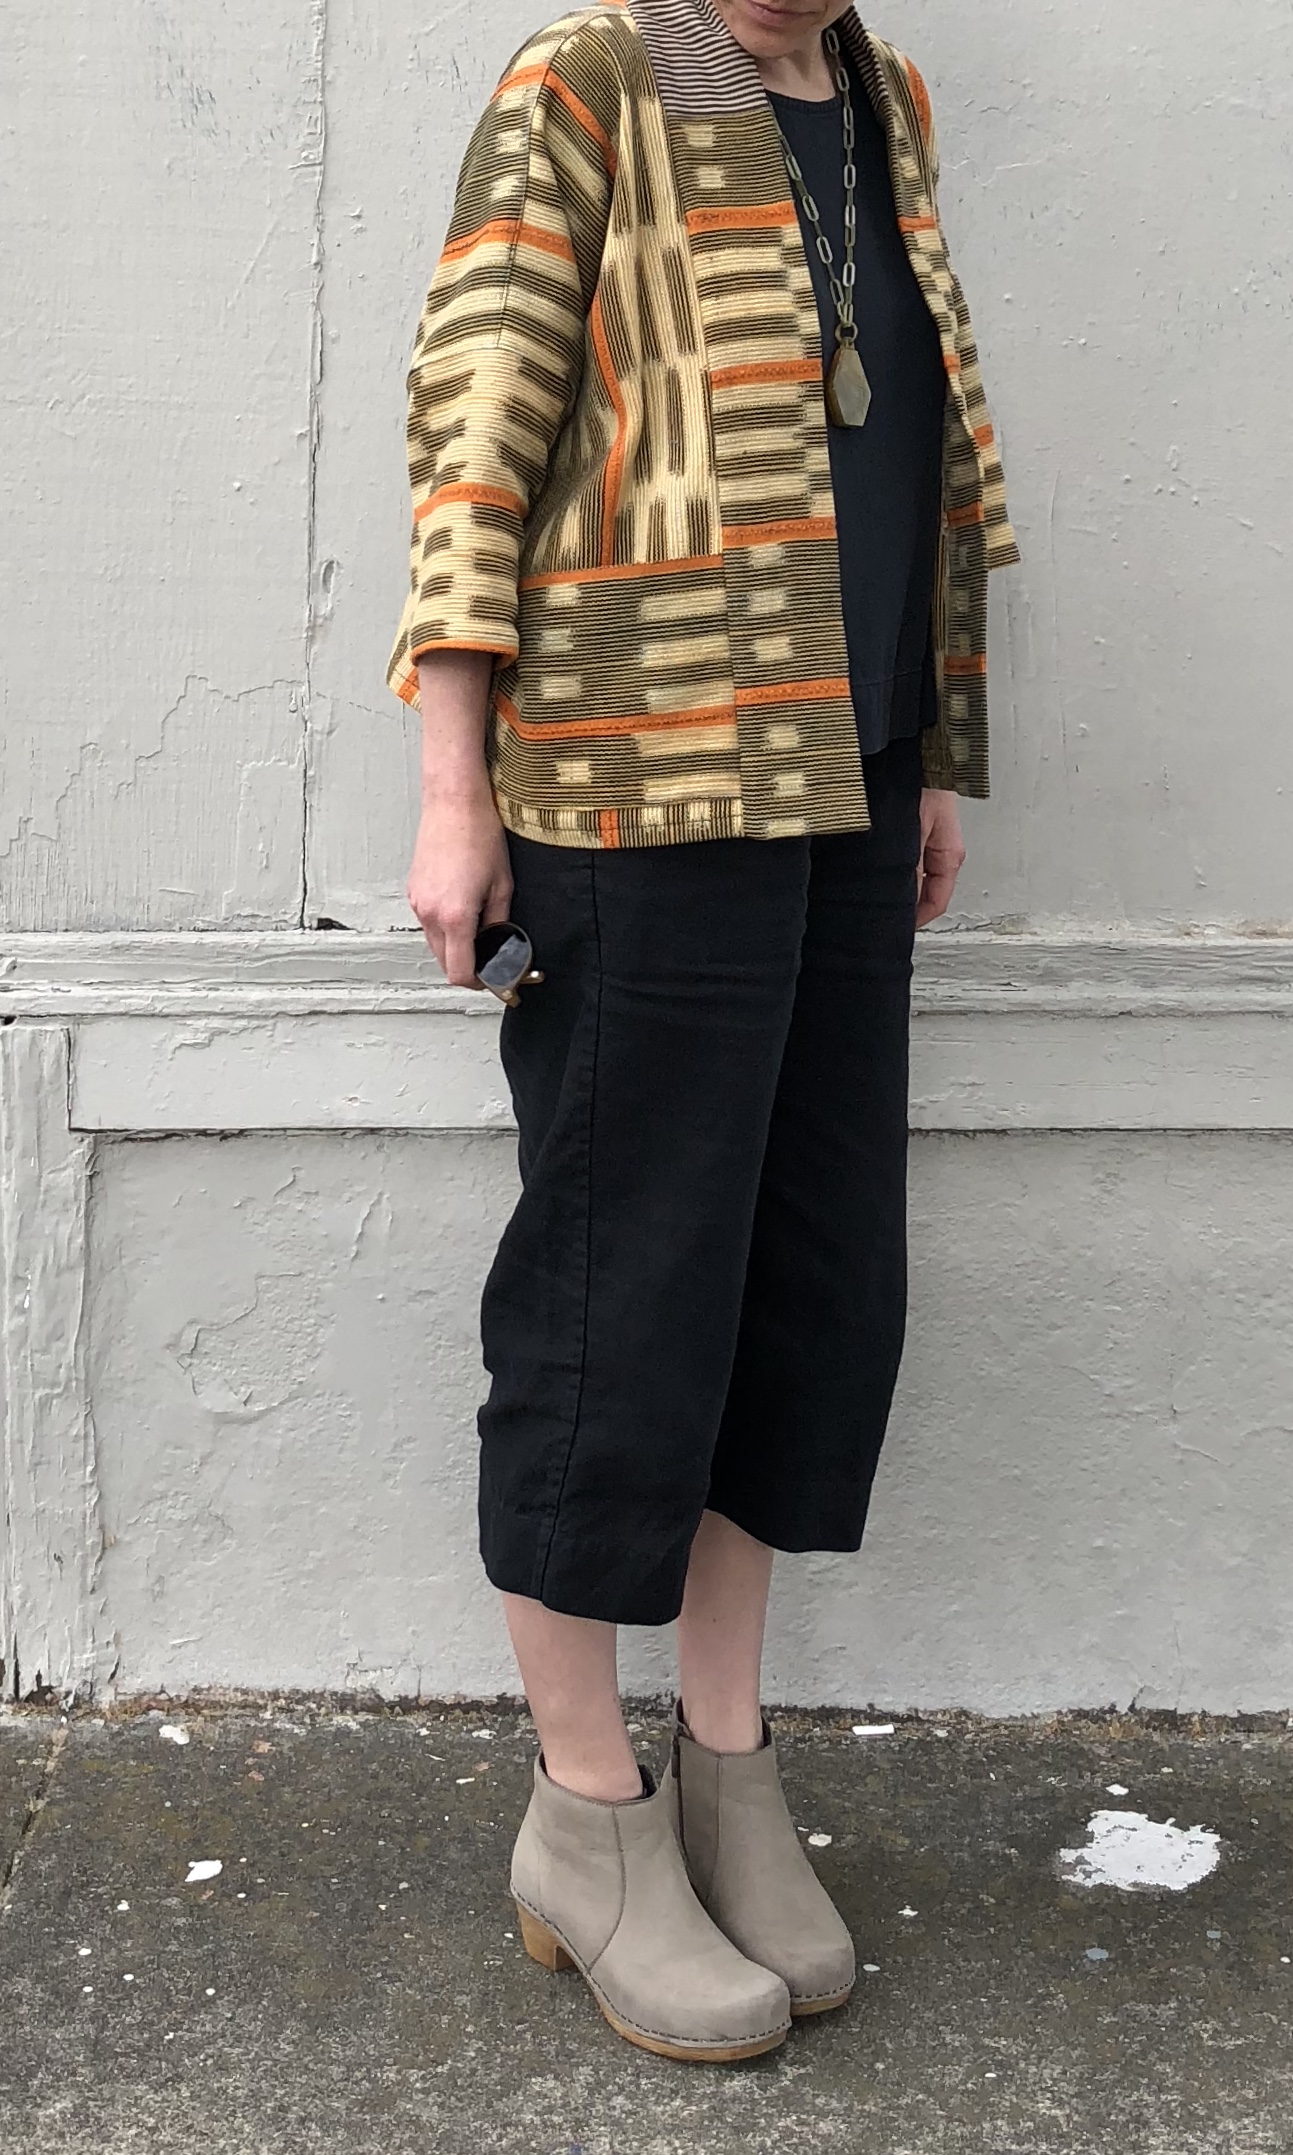
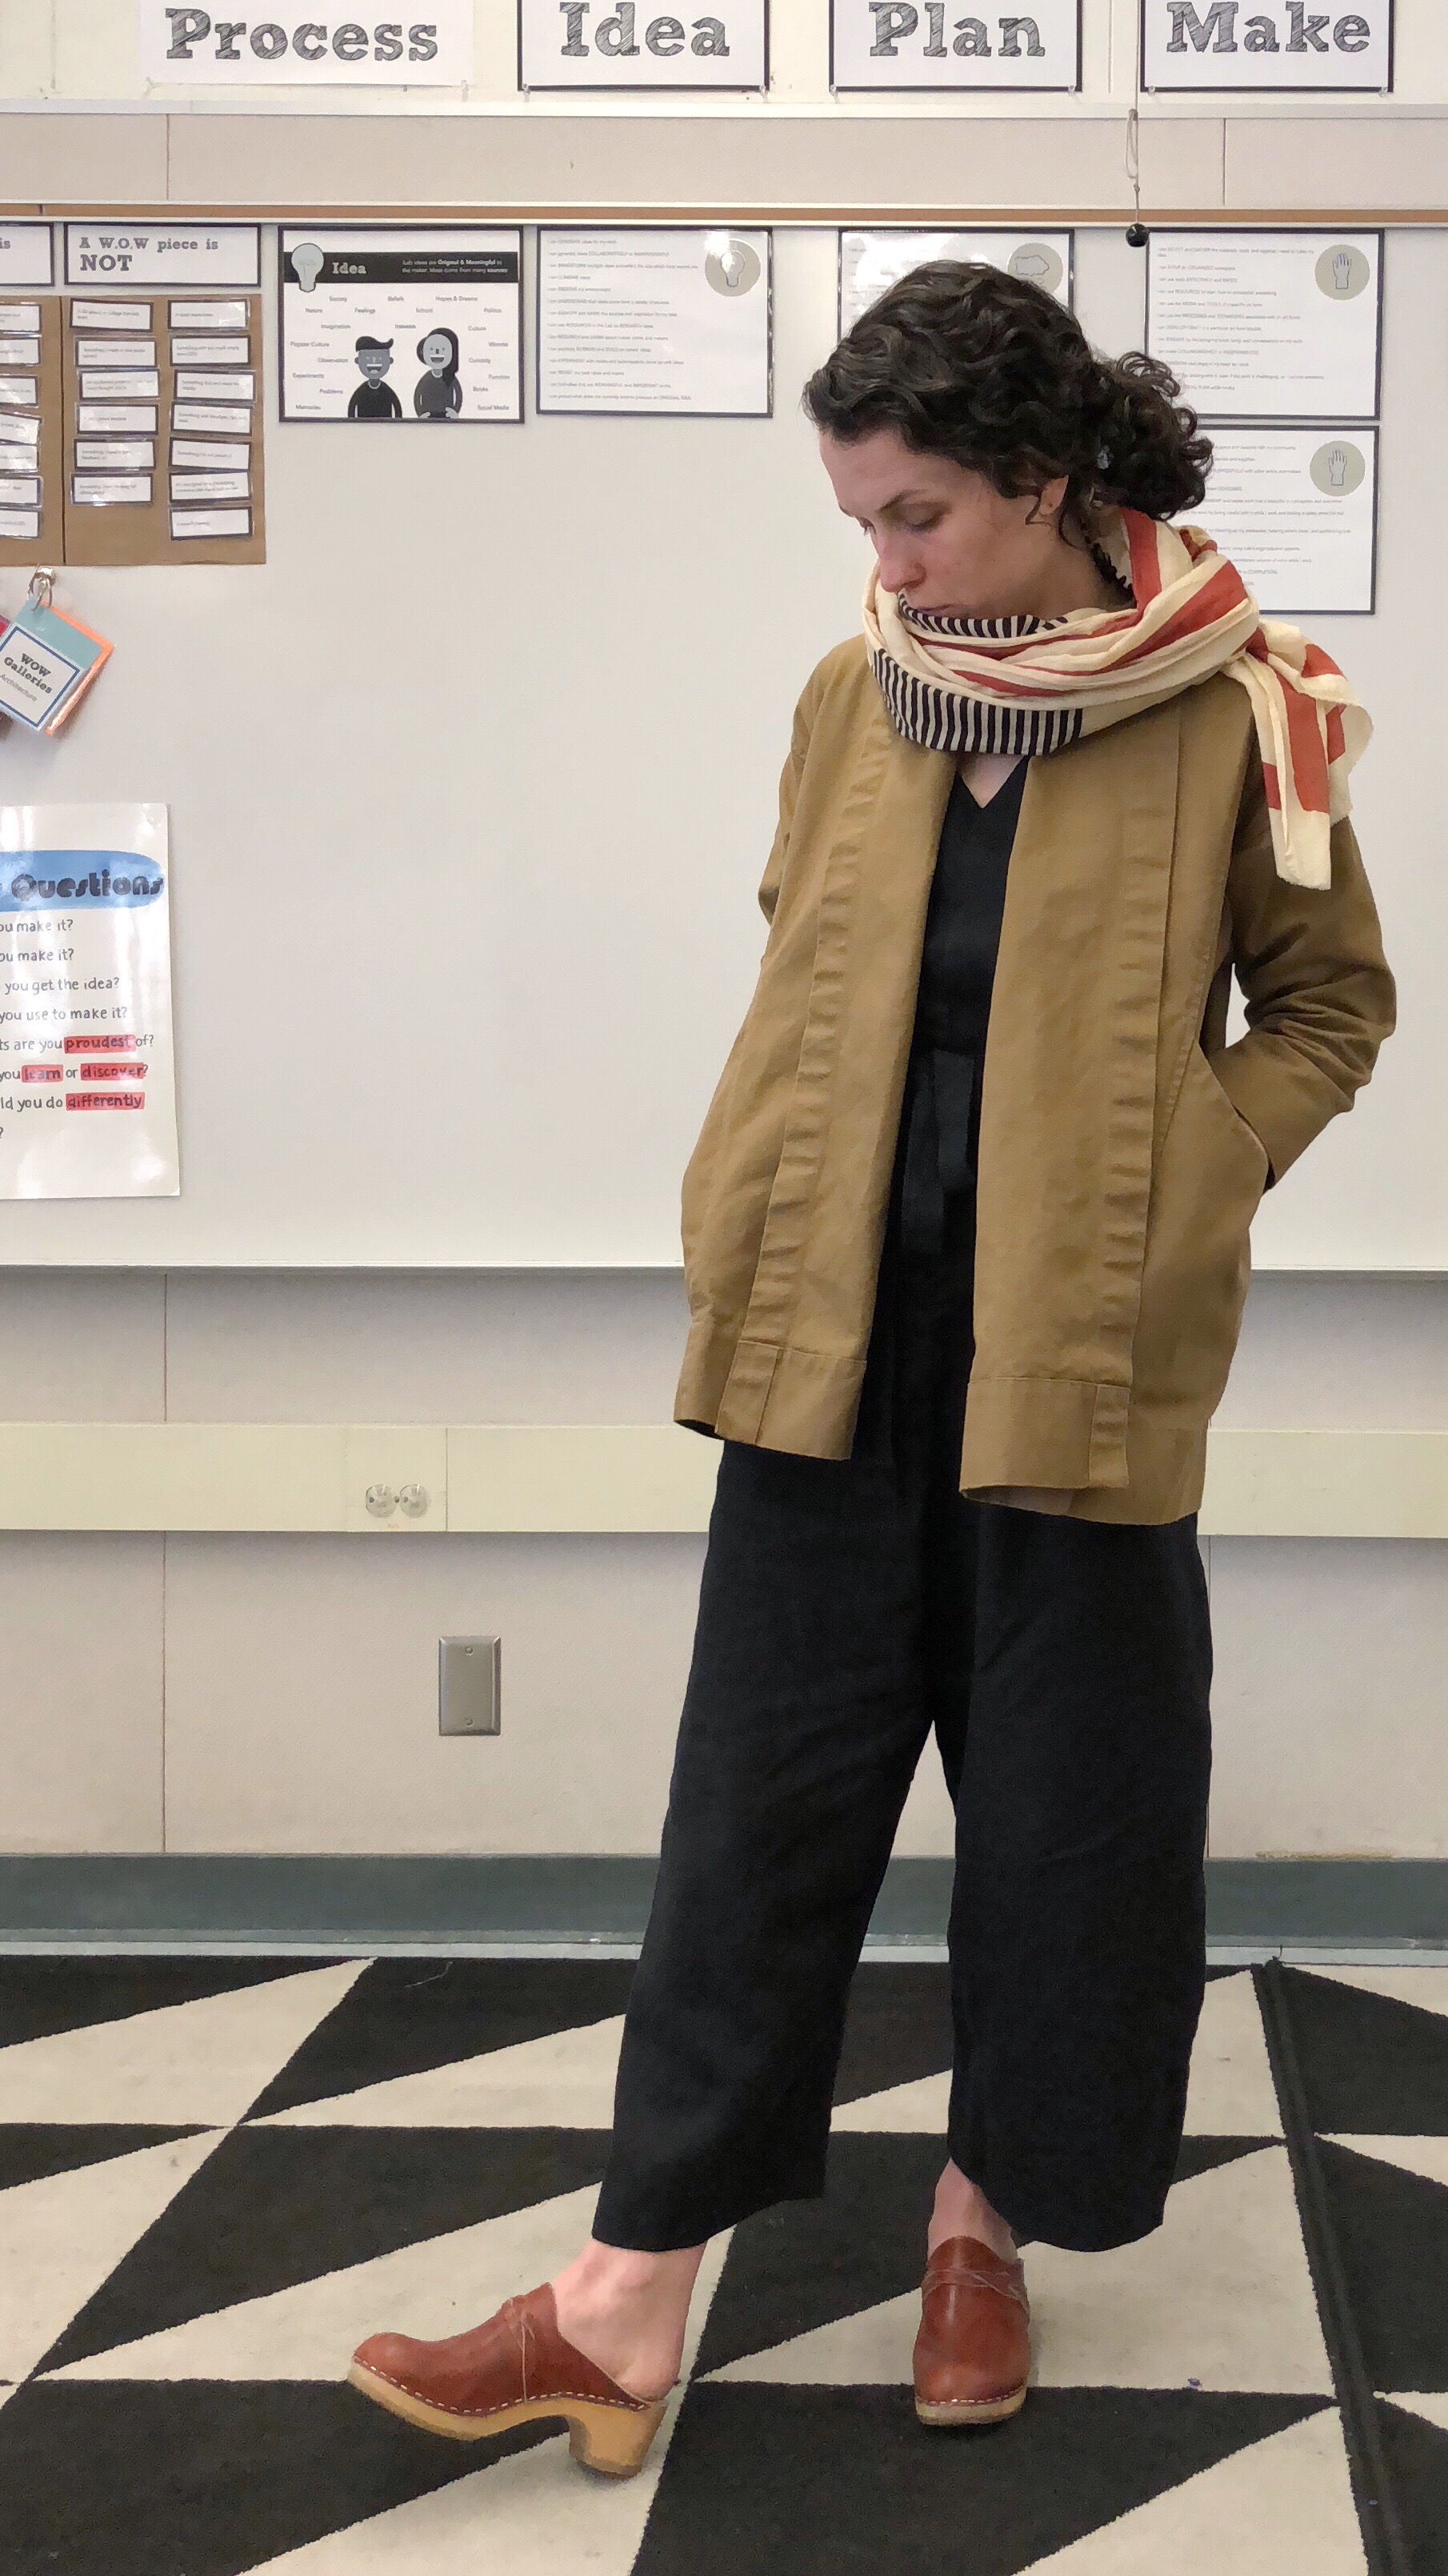
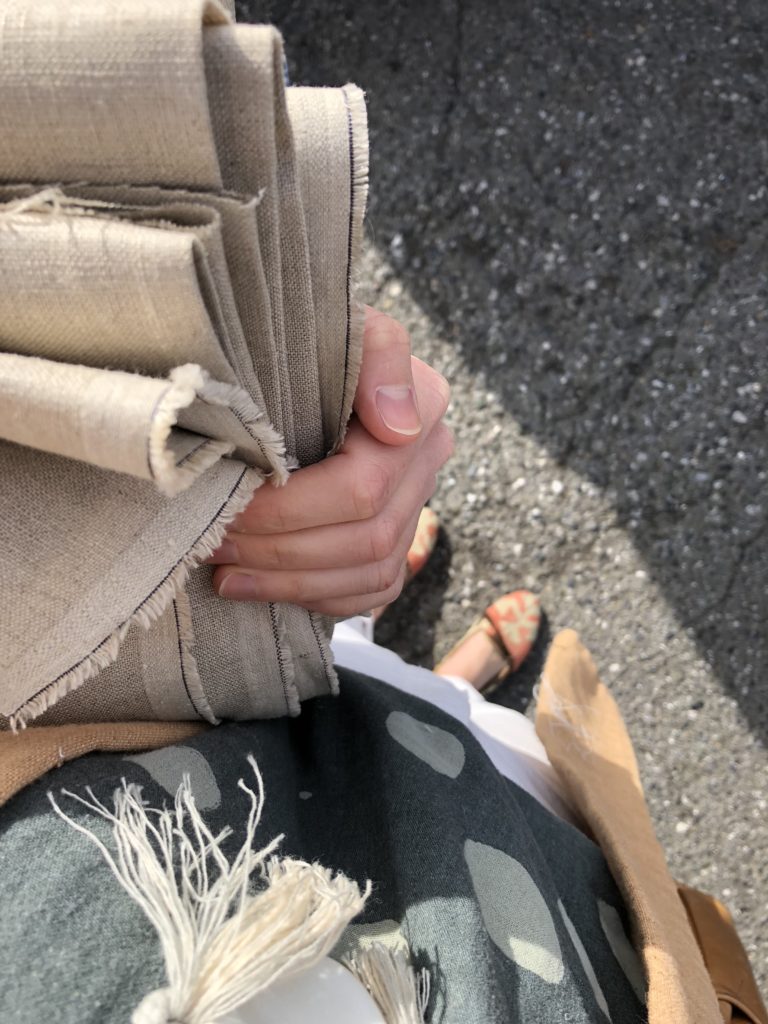
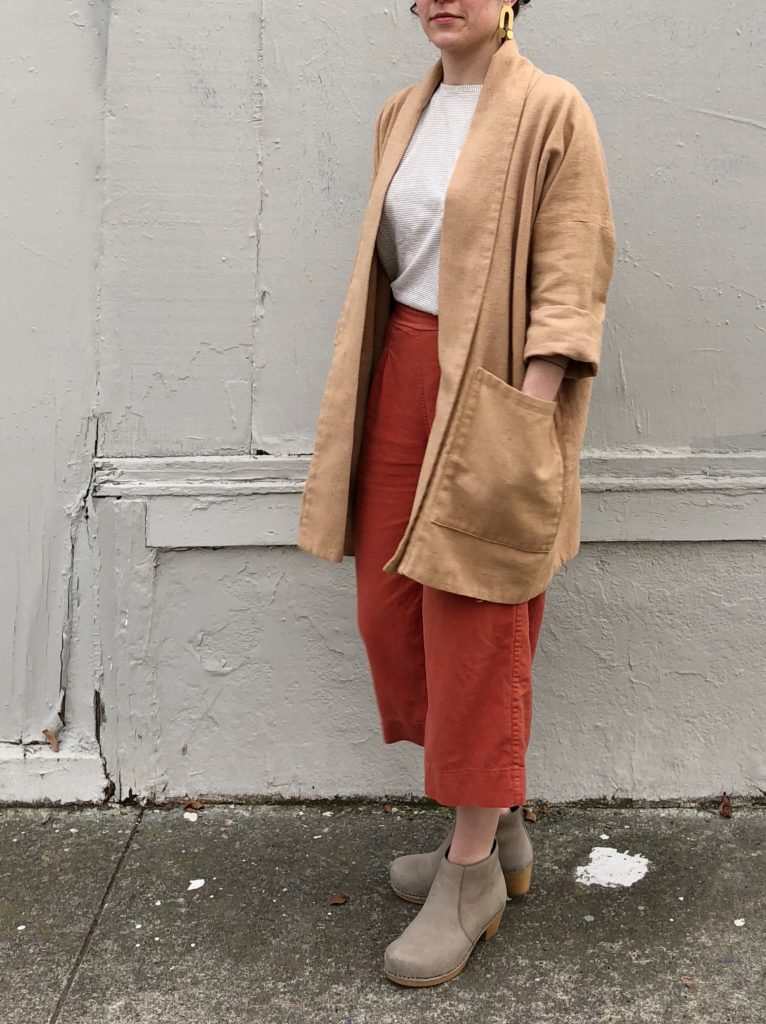
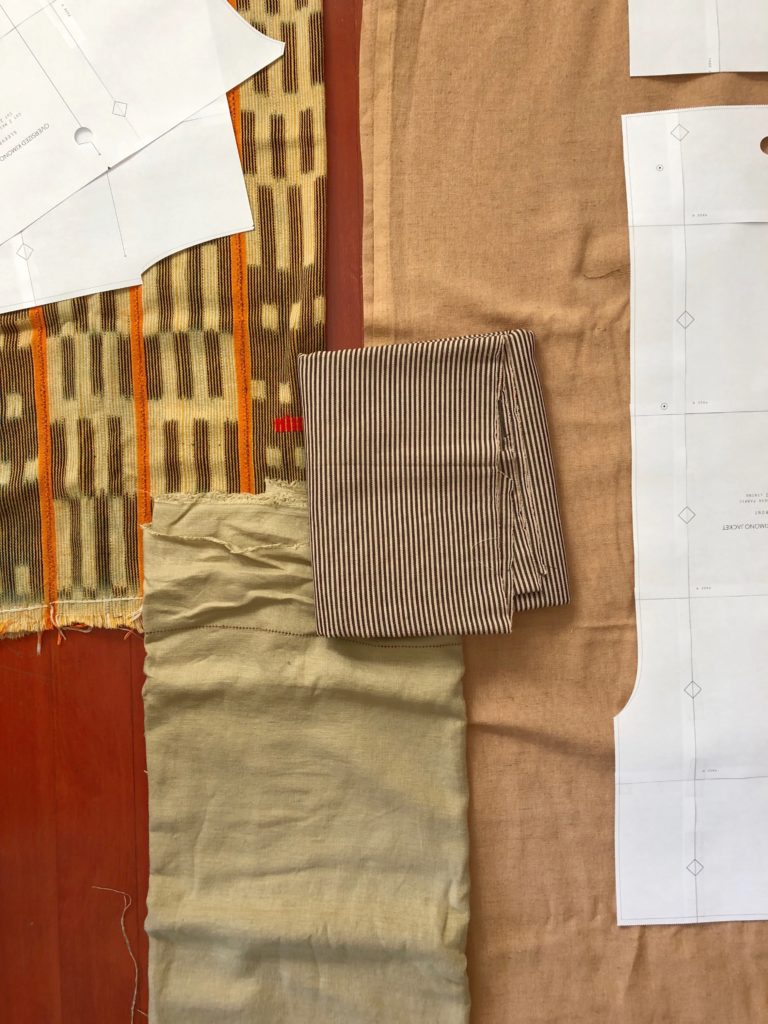
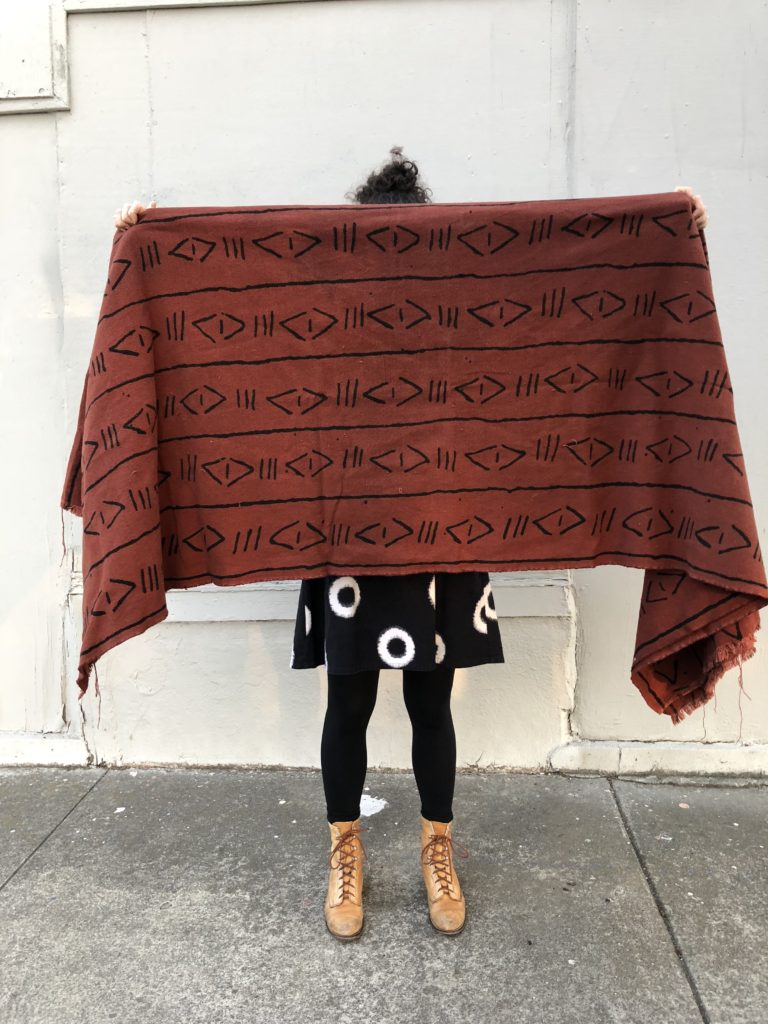
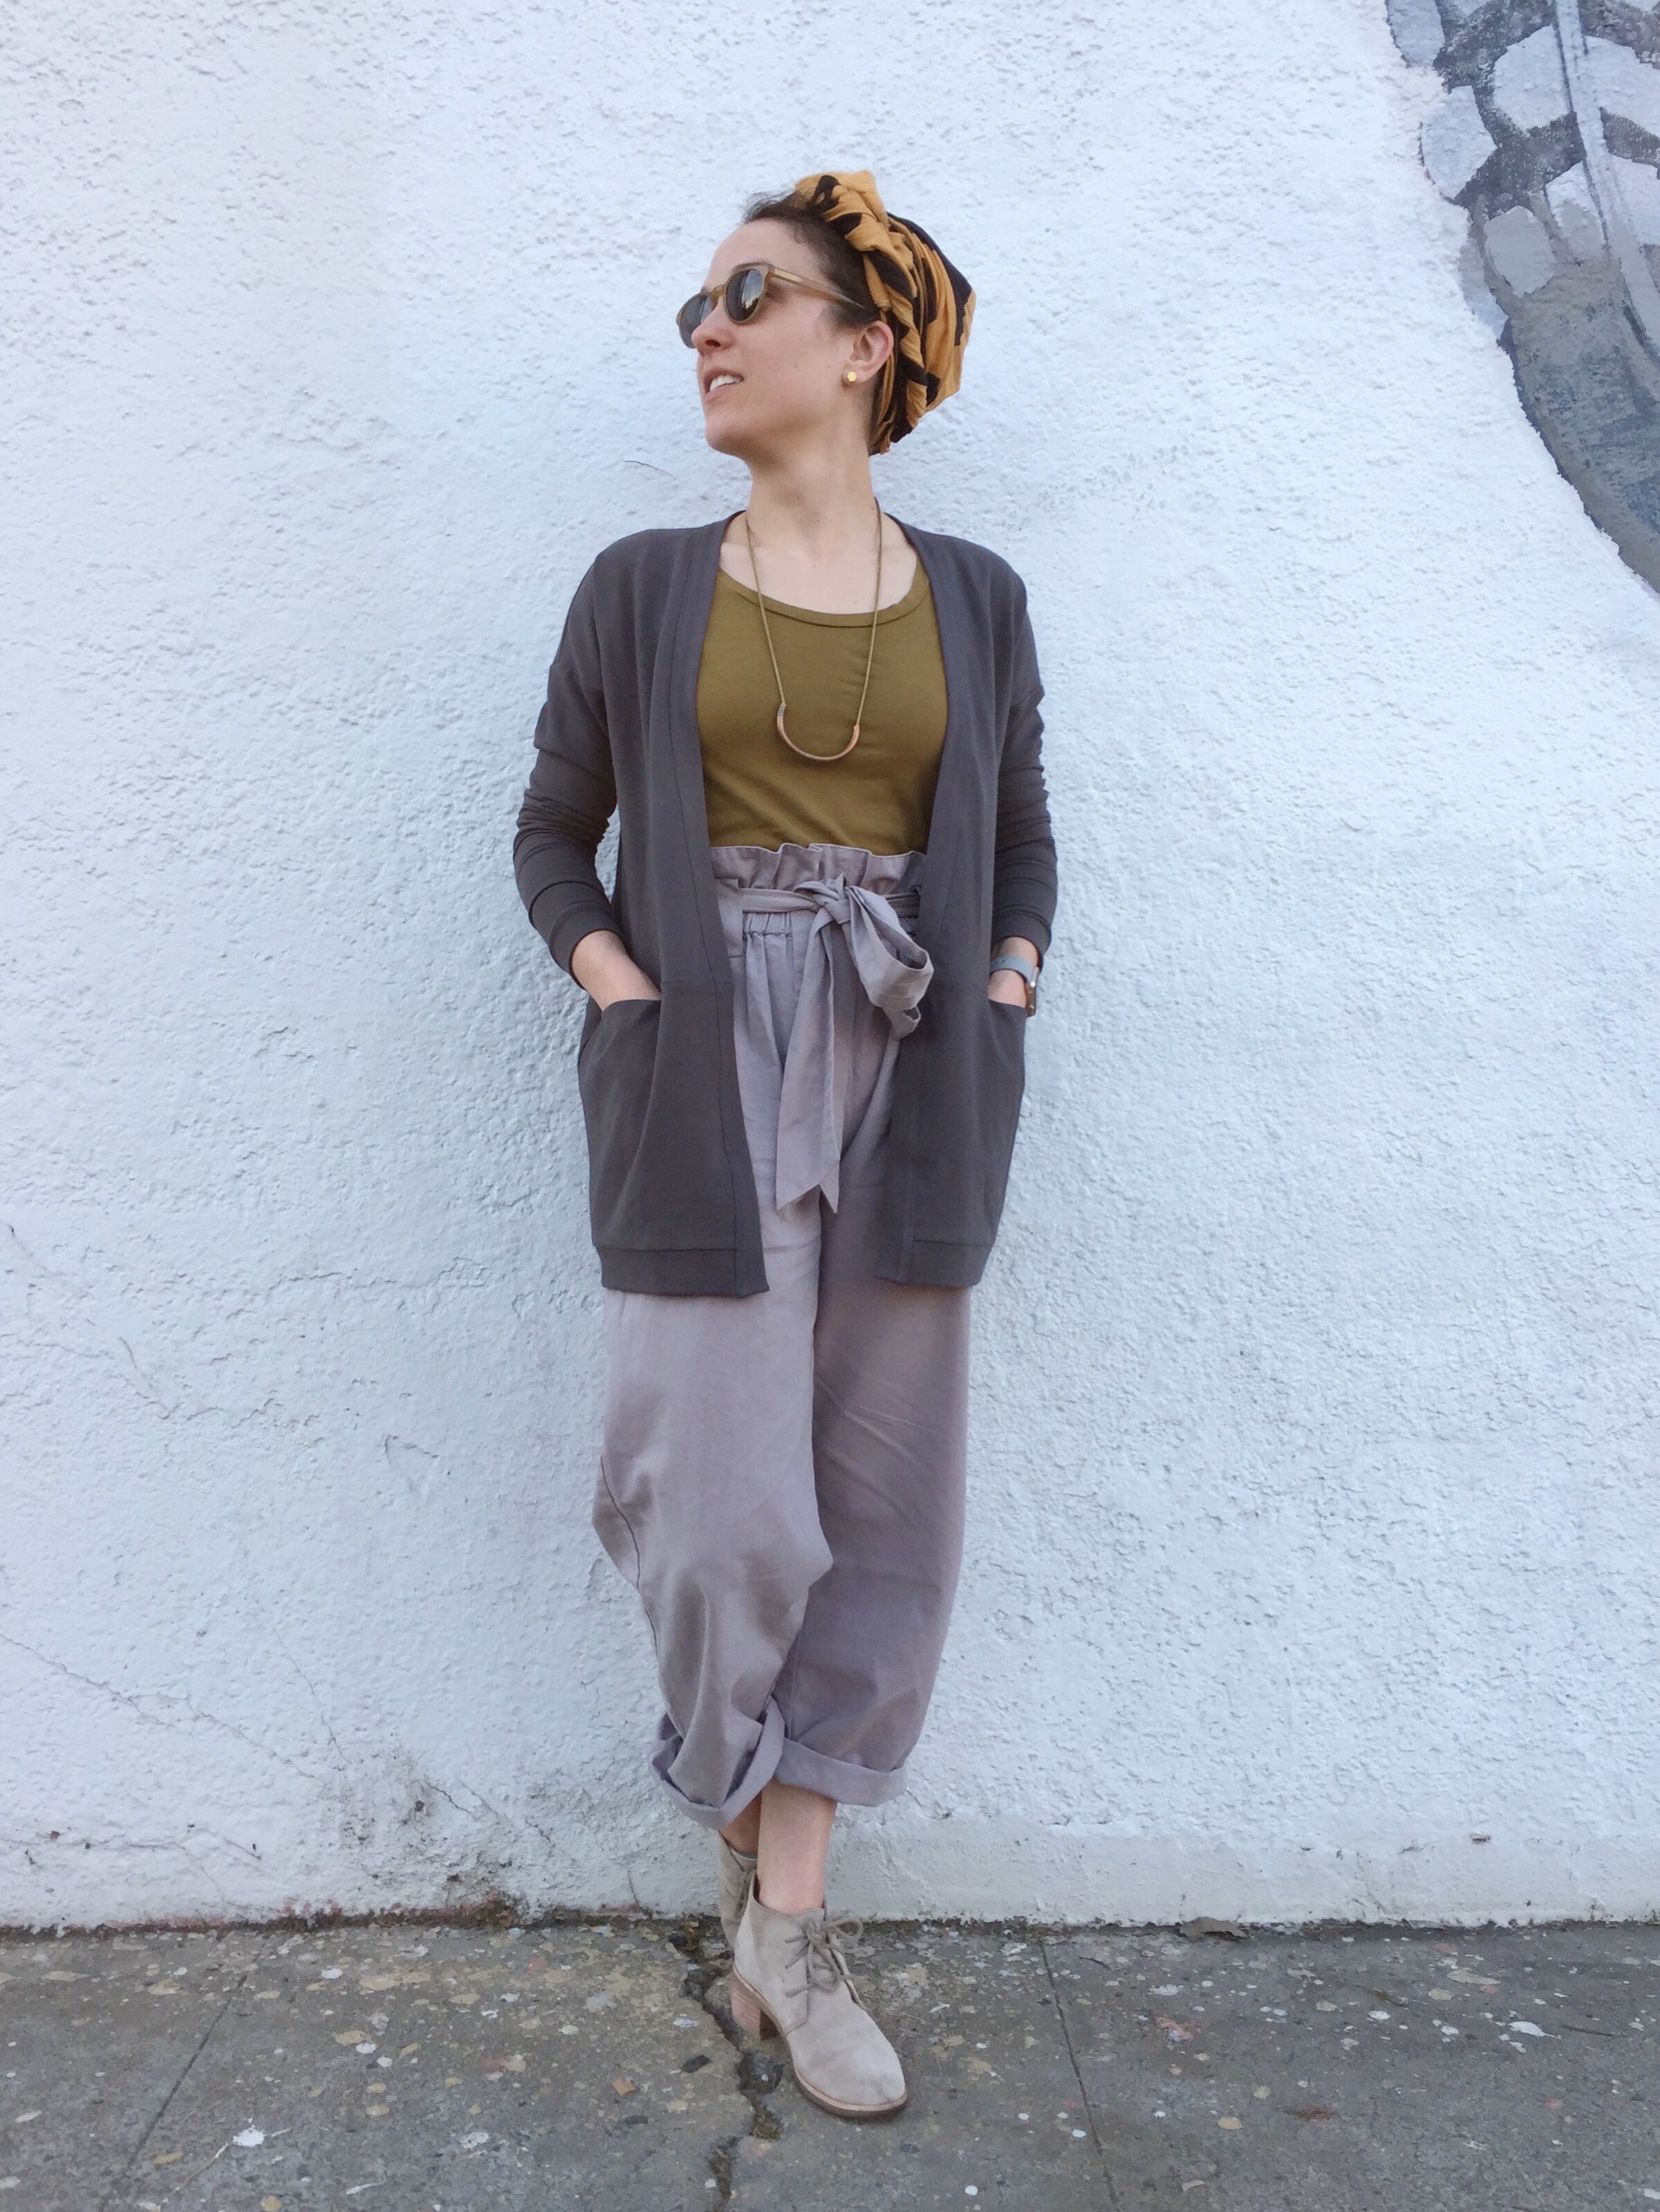
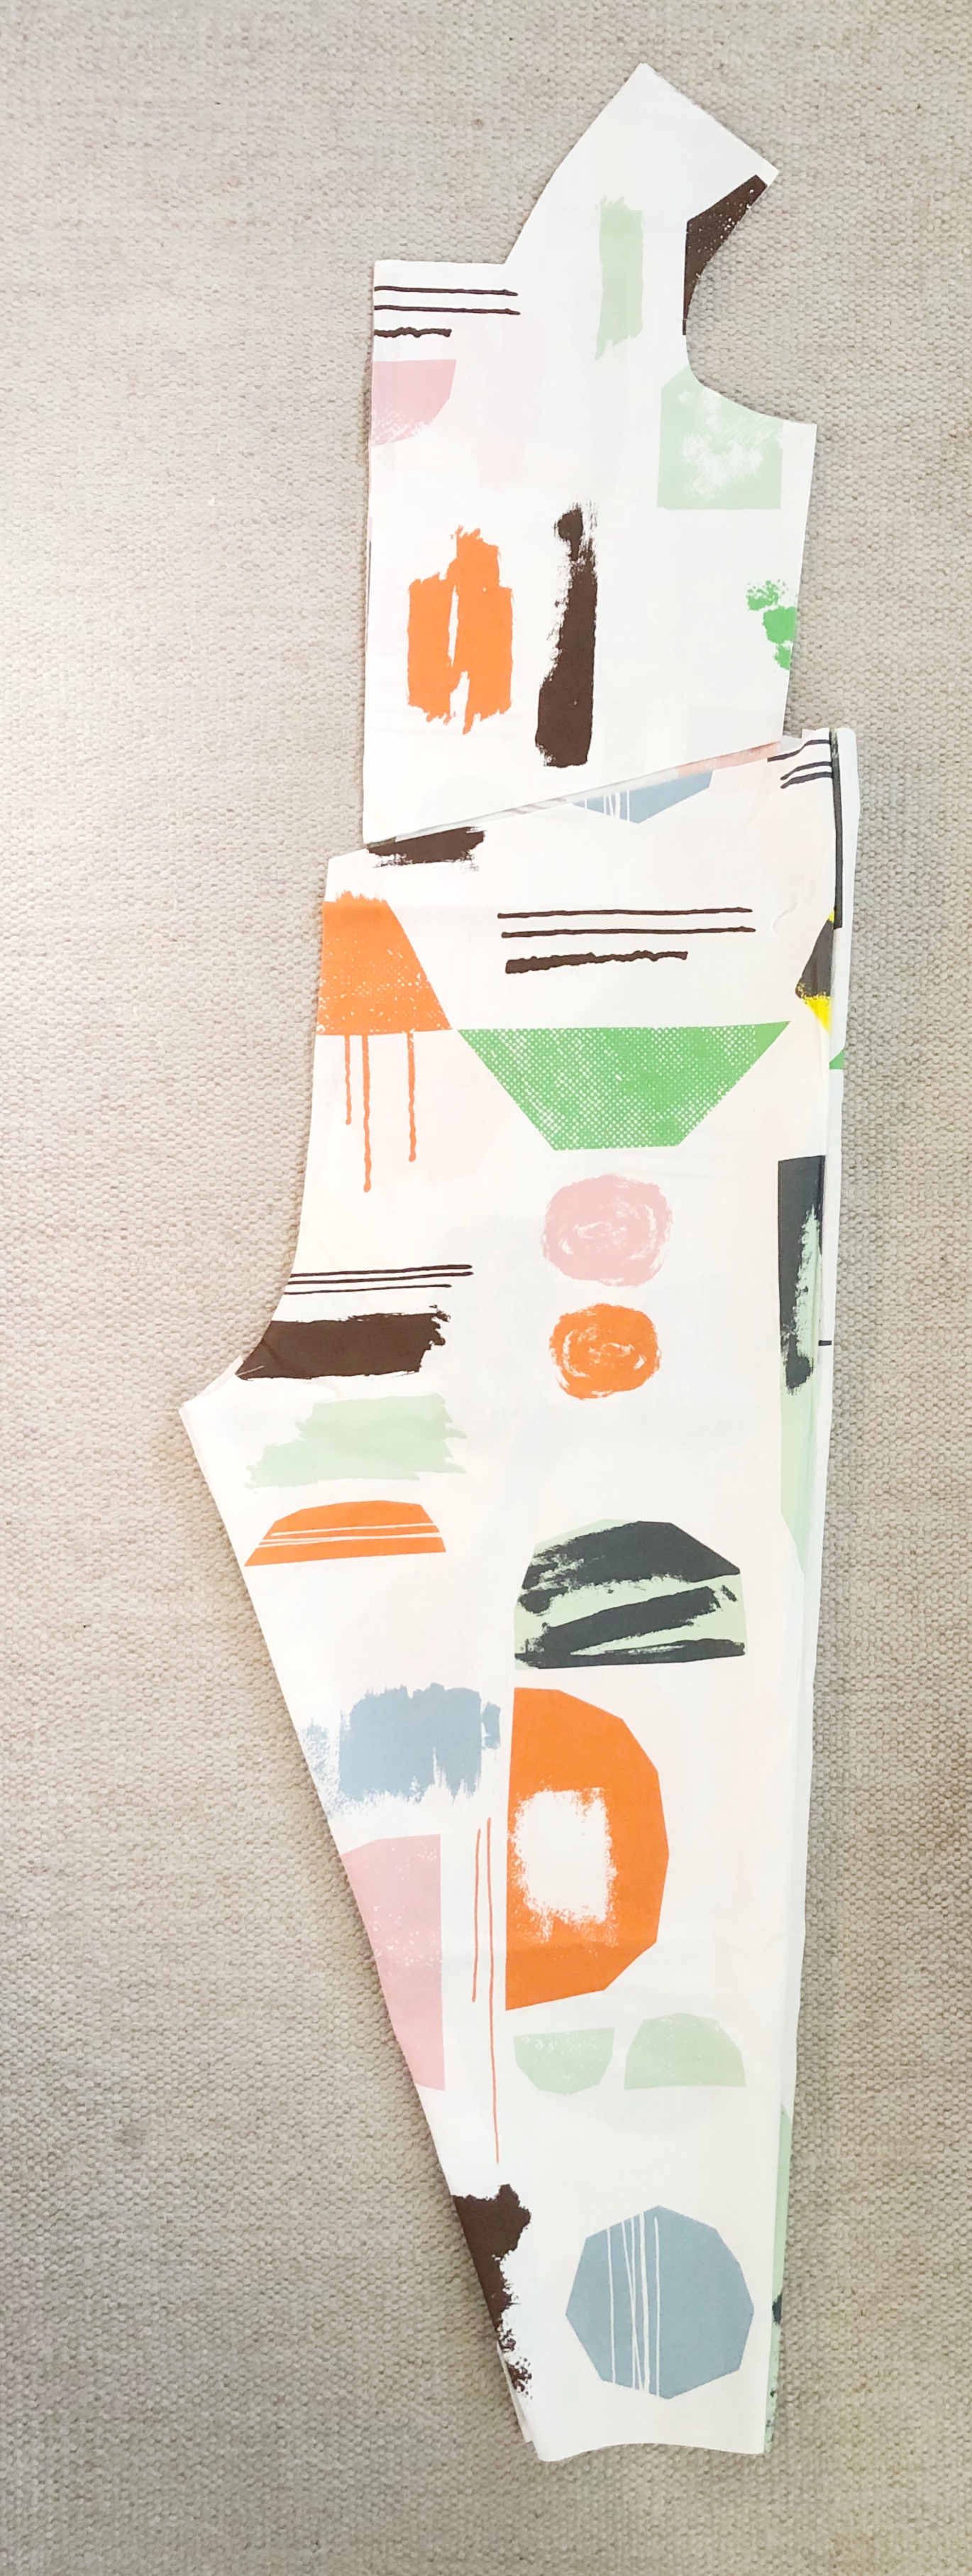
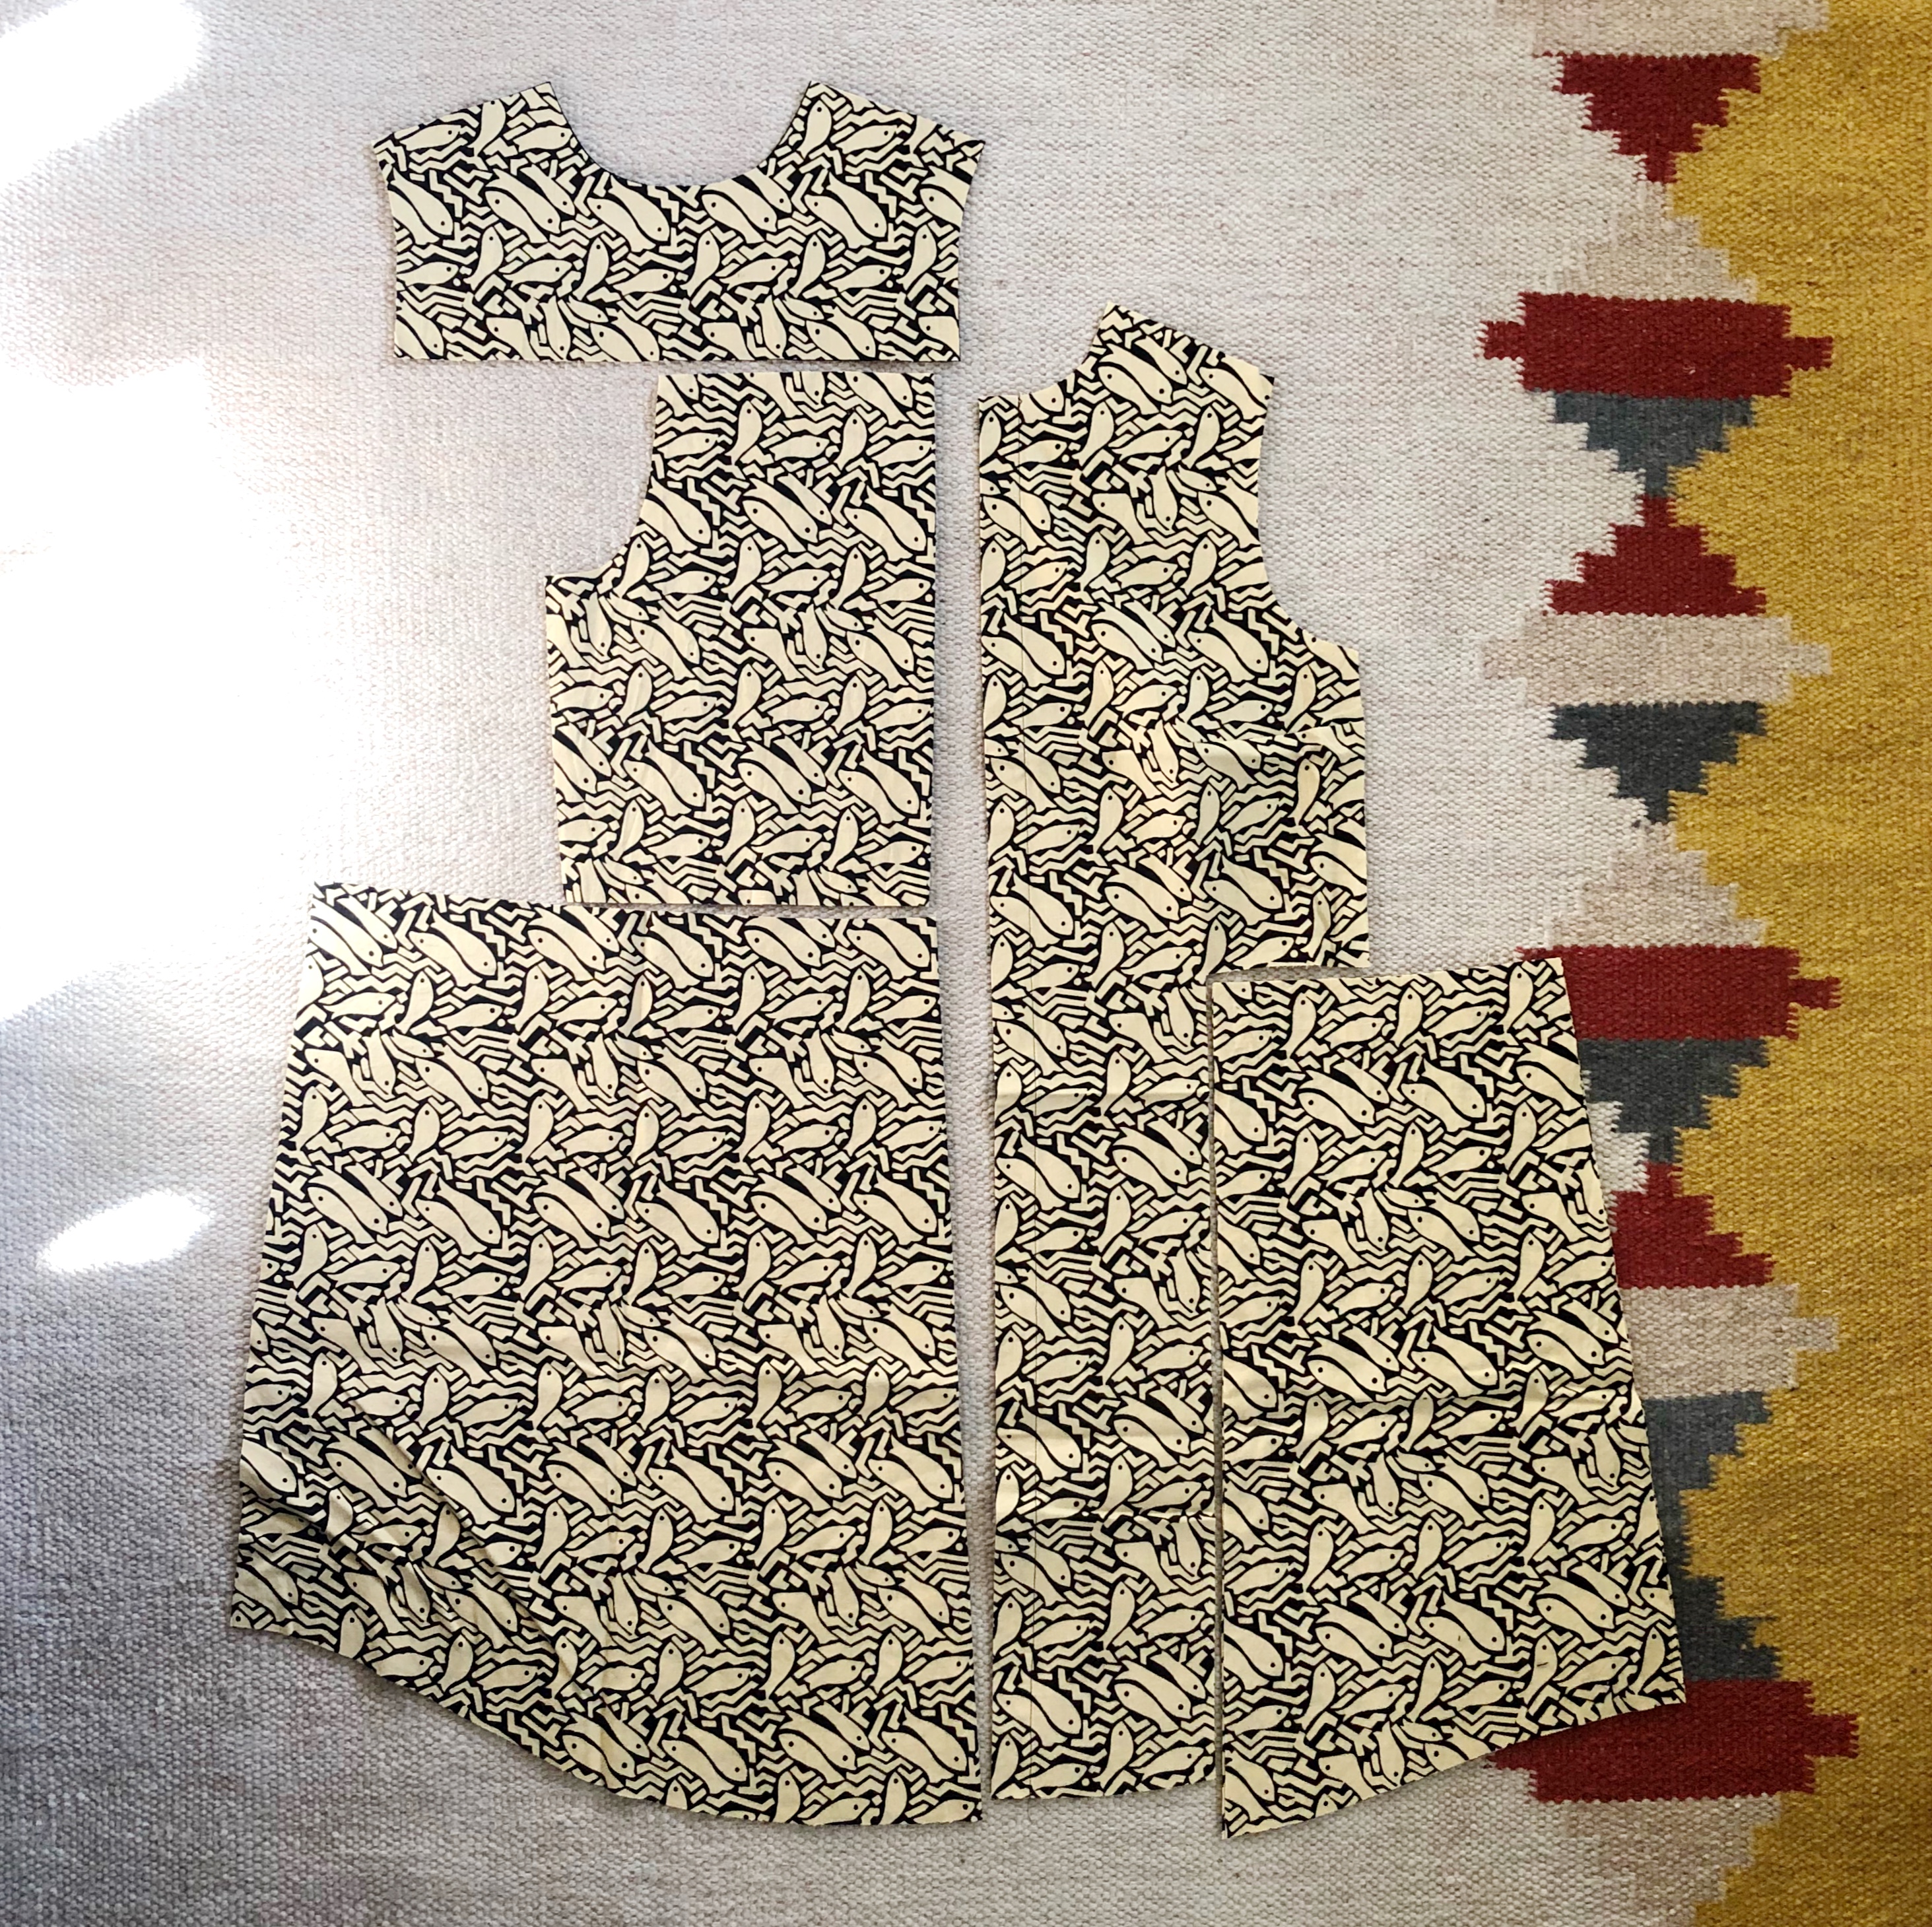
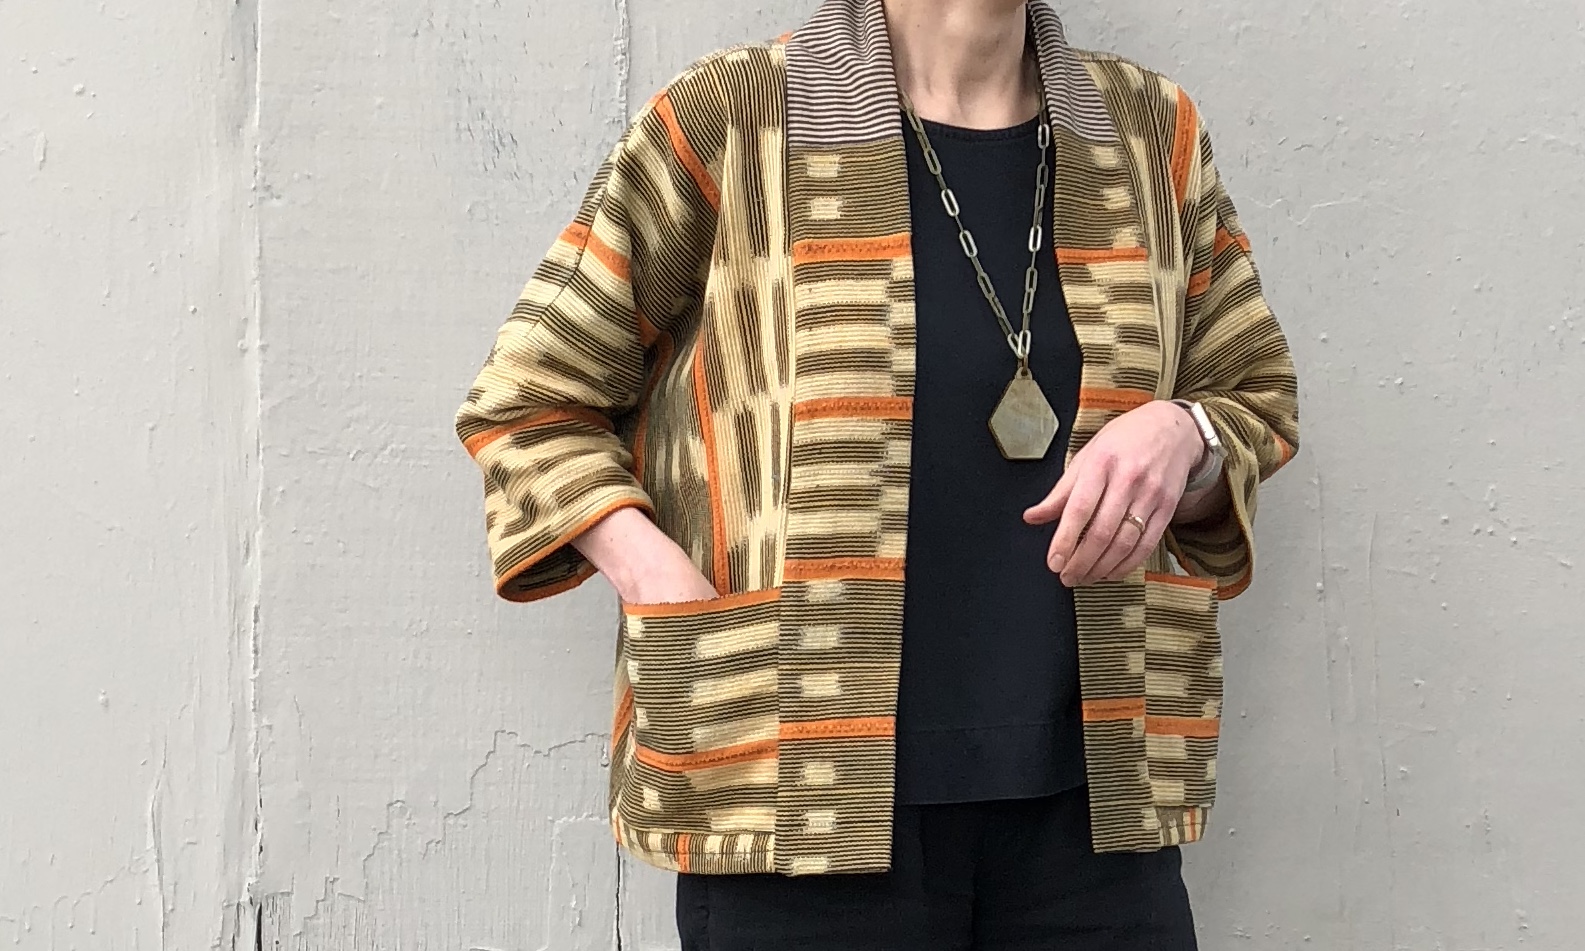
I’ve had this Baule cloth for over a year, all the while knowing it was destined to be an Ace & Jig-esque jacket. I bought it at the Alameda Antiques Fair and discovered a piece of gum mashed into the fringe as I was cutting it up. At least it’s washed gum.

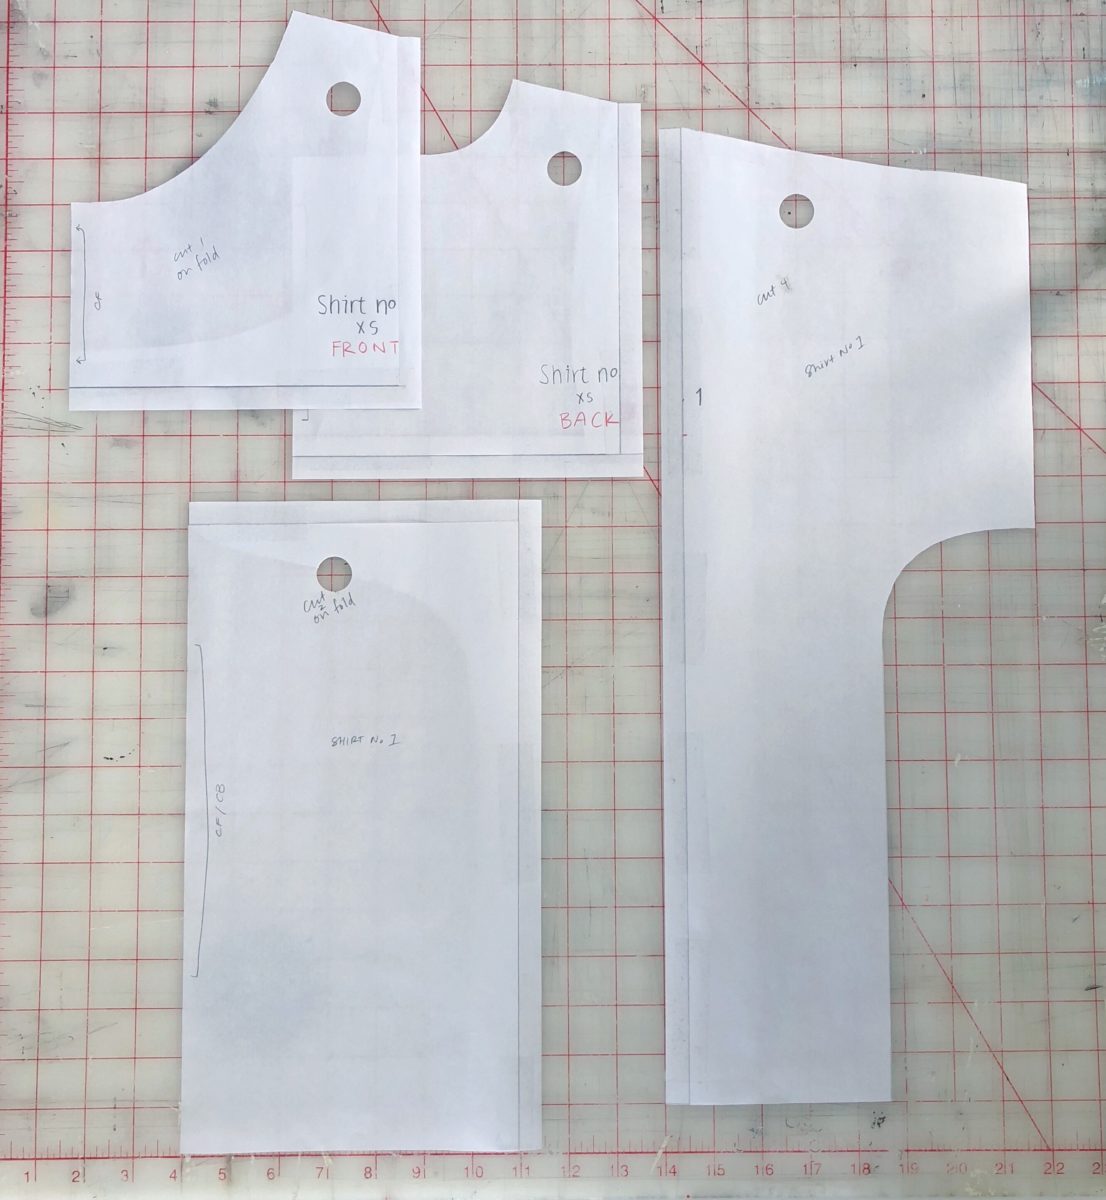
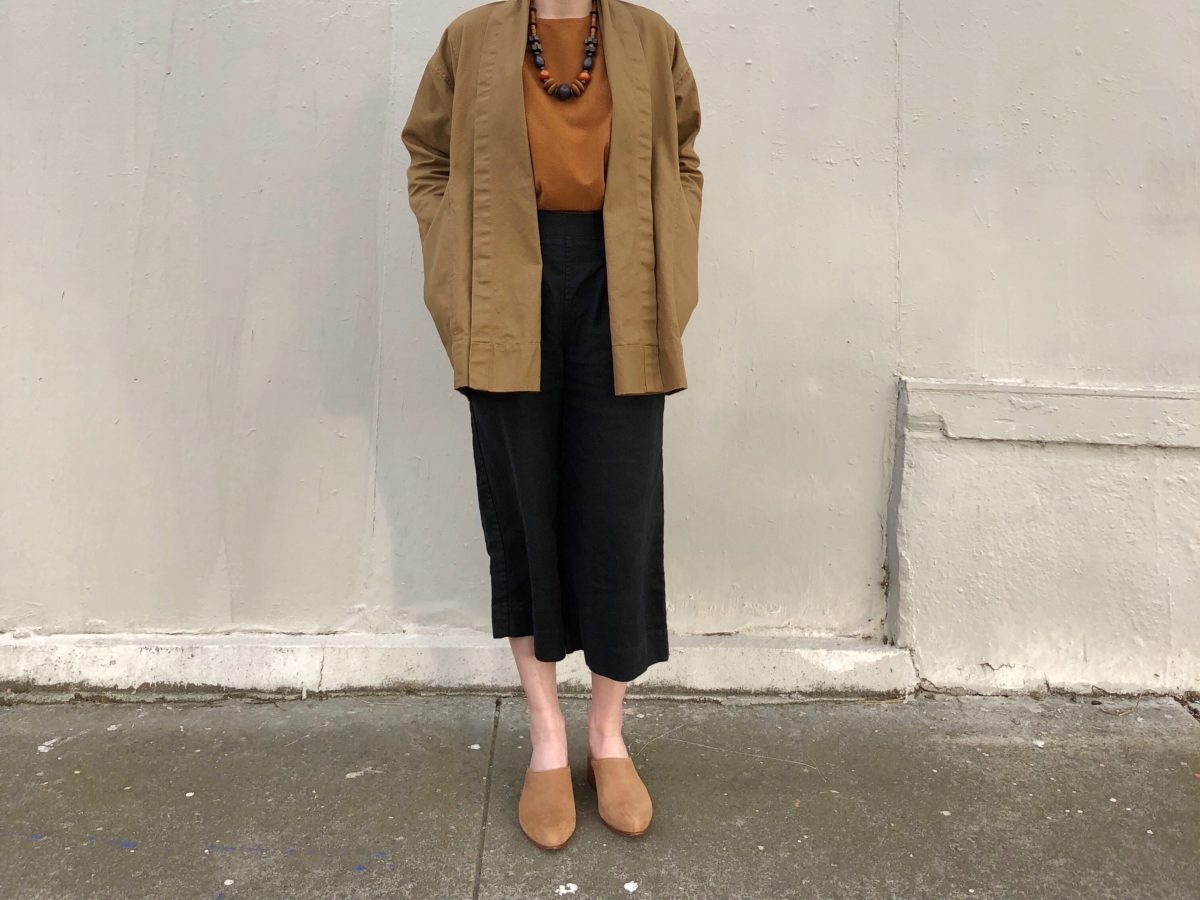
The textile is only about 54 by 36 inches which posed a cutting layout puzzle. I made an XXS, hacked off quite a bit of sleeve to make it fit, made a half collar, and added a coordinating stripe fabric to the collar piece, which I think is my favorite detail. It’s also unlined.

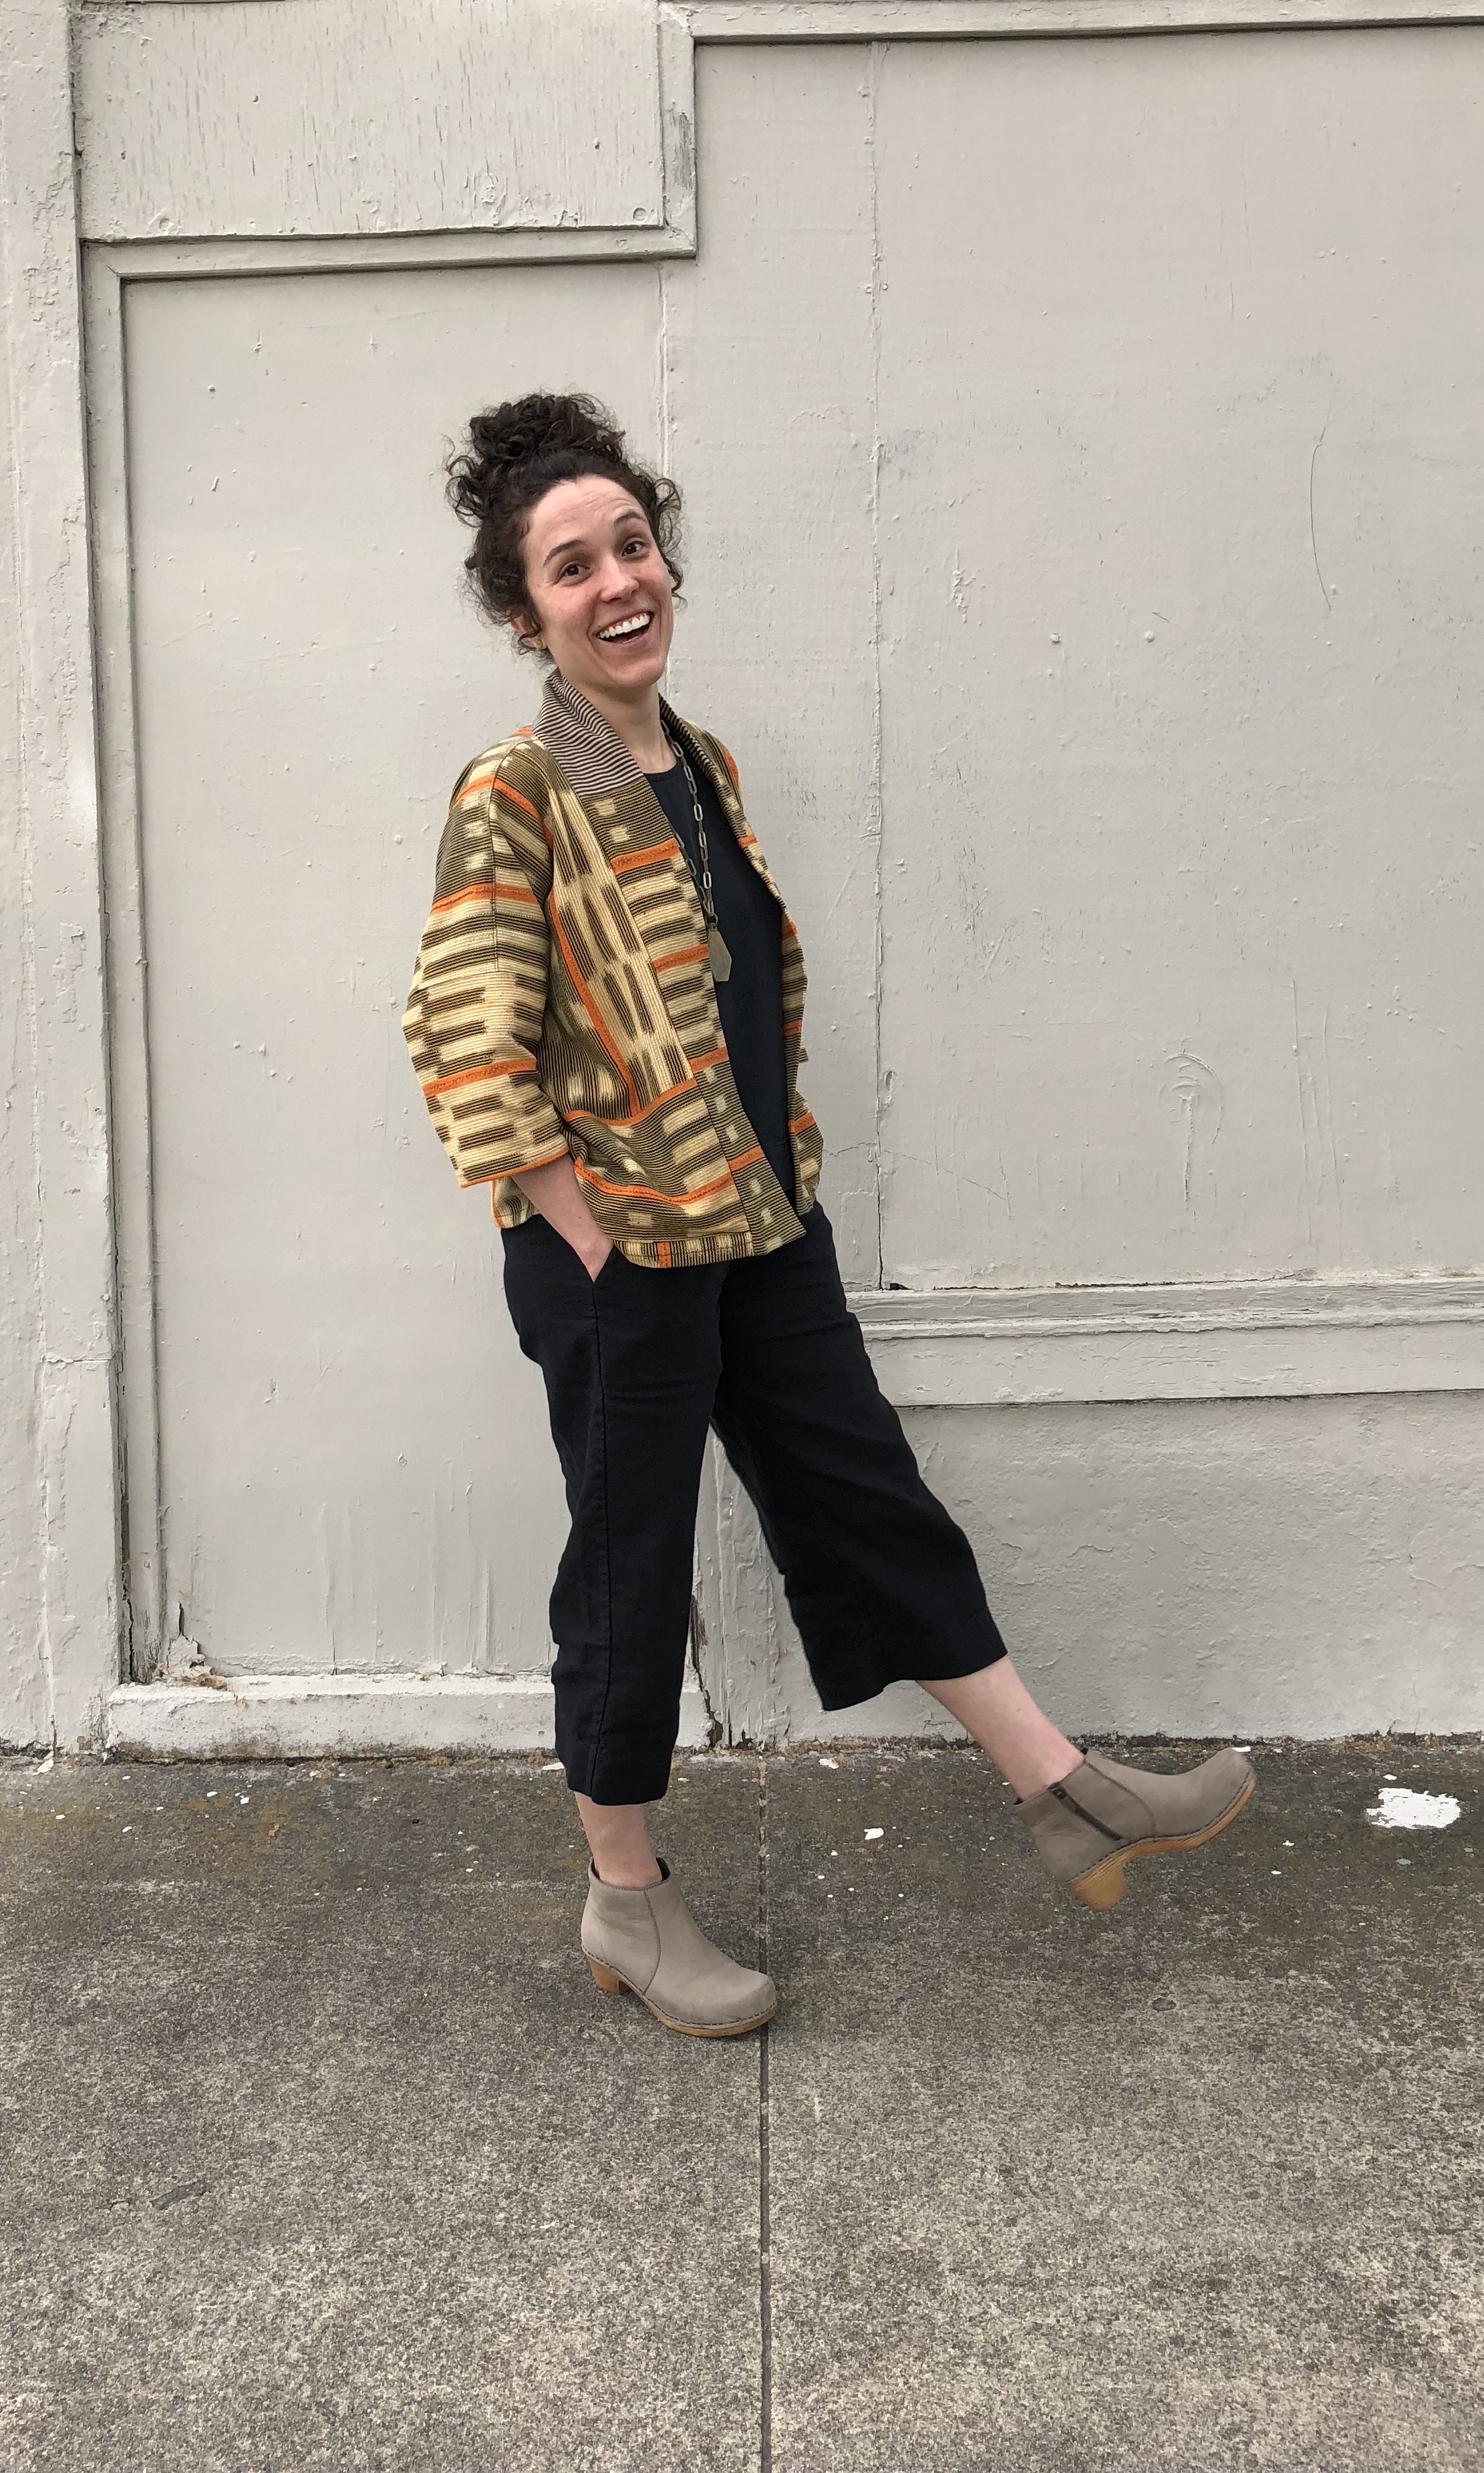
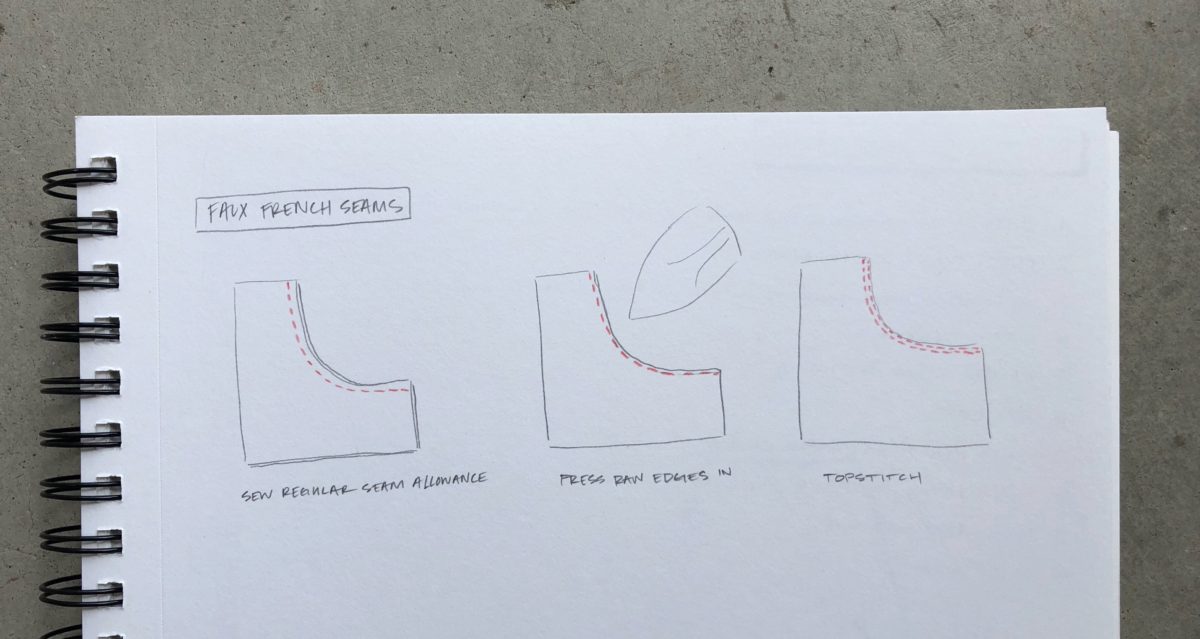
As it’s unlined, I had intended to flat fell / faux French the seams to fully encase all of the raw edges, but the thickness of the fabric and 3/8″ seam allowances made that impossible. Planning would have been helpful here. The shoulder seams are kind of a mess as I worked out this kink in construction and the side seams just ended up being serged. Another last minute decision was to topstitch the shoulder and sleeve seams with my new Bernina edgestitch foot. While I’m super impressed with the foot, the topstitching doesn’t really work well with this woven fabric. The burrito method was used to apply the half collar.

I’ve now made four of these jackets. Too many? Nah.

Faux-French Seams for Curves + Another Shirt No. 1

6 Comments

I love a French seam. I’ll French any seam I can. Even curves. But, French seams don’t really work well with curves. They look great on the inside but are bunchy as heck when you turn the garment right side out. Enter the Faux-French seam!

Step 1 Sew a regular seam (right sides together).

Step 2 Press raw edges in. Above shows one side pressed.

Step 4 Topstitch as close to the edge as you can.

Voila! Encased edges without the bunching! Here’s the top right side out and it’s almost perfectly smooth.

Here are the steps in drawn form since the black fabric makes it a little hard to see what’s going on.

Shirt No 1 Hack I’ve been on a big Shirt No. 1 kick. It’s a simple sew and lends itself to so many fabrics. After making two (one solid, one in a print), I knew it would be the perfect pattern to achieve all of my Ace & Jig desires. This hack is a great option if you have a bunch of smaller fabric pieces.

First draw in the desired seam lines and cut. Add seam allowance where the pieces will join together (any side you cut along will need added seam allowance). I taped additional paper directly onto the pattern pieces so that I could use my rotary cutter and reuse this pattern again later. Square the seam allowance if pieces join on a diagonal line like it did along the shoulder seam. Squaring will help the pieces come together without extra fabric sticking out. I also squared off the hem and side seams. That’s pretty much it!

Shirt No. 1 in Silk Noil

10 Comments

I recently did a pretty sizable closet clean out. We rent an old house (built in 1925) and although it’s had a fair share of updates, the closets are just tiny. I decided to take on this task for multiple reasons –  1. I LOVE organizing, 2. space was feeling very limited, and 3. I knew I wasn’t wearing everything I owned.

I donated over five bags of clothes, sold some shoes and purses, and found new homes for my vintage items I can’t part with yet. My closet feels really good now and the process allowed me to identify the types and styles of garments I wear most often, AND what I should focus on making this year.

Even though I’ve only been sewing for three years and some change, I never went through that phase of making fancy dresses, or using exciting novelty fabrics. I always went into a project knowing that I wanted whatever I was making to be worn often and to speak to my overall aesthetic of neutrals and geometric patterns. I don’t want my garments to look handmade and I want items to mix and match easily.

Enter simple tops! Part of my 2018 making plans is to use patterns such as Shirt No. 1, Lou Box Top, and the Maya Top to build a collection of coordinating shirts out of silk noil, linen, and ikat. These patterns are also a great canvas for block printing.

Pattern: Shirt No. 1 by 100 Acts of Sewing

Fabric:  Silk Noil in Caramel from Stonemountain

Size: XS

Mods: None

Last weekend I was able to finish the first top for this goal. I decided to use the smallest size even though my bust measurement put me in between a S and M. I was hoping the XS would achieve a slightly more fitted look but still maintain the pattern’s relaxed silhouette.

The size choice overall feels good, but there is some slight pulling on the shoulder seams that I’d like to get rid of on the next one. I’m not entirely sure how I’ll accomplish that.

I had a brief moment when I first started sewing where I wanted to achieve an entirely me-made closet. I don’t want that. I do want to have mostly me-made and secondhand, with a dash of investment pieces from boss women makers, like Elizabeth Suzann, and ethical companies like Nisolo.

My new Shirt No. 1 pairs nicely with my ES Clyde Jacket in clay cotton canvas, no?

Pattern Test: Mitchell Jumpsuit

Leave a comment

Pattern: Mitchell Jumpsuit

Fabric: Black linen from Joanns

Size: M

Mods: None

Way back in late 2016 I pattern tested the Mitchell Jumpsuit by Paddle Boat Studios (Hannah Miley). It was really exciting and I’m hoping that in the future my job allows me to say “yes” to more pattern testing opportunities.

The jumpsuit sews up quickly and the pattern allows for some play with the tie lengths and widths, which is fun. As I was under a deadline, I didn’t have the time to make a muslin and learned I’m SUPER SHORT. If I were to make this again, I would significantly shorten the legs (probably by about 5″ or more).

The pattern includes both the jumpsuit and dress pattern!

Pattern: Mitchell Dress

Fabric: Gold Hopscotch by Merchant & Mills

Size: M

Mods: Shortened sleeve length by 8″, finished the dress with mitered corners.

After laying my eyes on Merchant & Mills’ Gold Hopscotch fabric, I knew the Mitchell Dress would be the perfect pattern to showcase the fabric’s four different prints.

As usual, I planned everything out in my sketchbook and began patiently waiting for the yardage to cross the pond. I bought about 4 yards of it since it has a large repeat and I wanted to get them ALL. There’s enough leftover that I’ve been thinking about making a cropped Willow Tank, or Maya Top.

I initially didn’t change the sleeves, but after trying the dress on, they were just too long for the lightweight fabric. I hacked 8″ off and never looked back. Since the sides of the dress are open and wrap to close, I thought it would be wise to miter the corners for a clean, less-bulky finish.

Sadly, I don’t wear either of these makes very much. I don’t reach for the jumpsuit because the legs are too long and with both the ties and the back zipper, it’s just a little too complicated for this teacher’s bladder.

I’m shortening the the jumpsuit’s legs right after I hit ‘publish’ and I’m bringing the dress to the front of my closet!

UPDATE: I shortened the jumpsuit legs by 5″ and they are the perfect cropped length now. I wore both the dress and the jumpsuit this week!

Wedding “Dress” Separates

3 Comments

In July of 2017 I got married. It was the most un-fussy wedding; we only invited our immediate families, had the ceremony at city hall, and then hung out at the beach all weekend. I highly recommend this route if the idea of planning a wedding makes you panic, like it did me. Also, holy crap do traditional weddings cost a lot.

But let’s get down to the essence of this post: what I wore. Initially, I planned to wear a vintage dress and shoes I thrifted in Tulsa, OK. After declaring this was the outfit, I began to rethink things in momentary bride-like fashion. Vintage didn’t feel like the current me and I had no desire to make a traditional dress I’d wear for less than a day. Making a traditional dress felt wasteful in both time and materials, but the making part felt true to me.

Enter wedding “dress” separates. I had recently made an Named dress and decided the cropped tee would pair nicely with a gathered skirt. This clean silhouette would allow me to wear a sweet statement necklace AND, most importantly both pieces could integrate into my everyday wardrobe. It also gave me an excuse to purchase my minimal accessories from two bad-ass women.

The much coveted Bryr clogs were acquired by pure luck. Normally, the studio has at least a 30 day waiting period, but this pair was in stock and I ran up to SF to claim them. If you’re a clog gal, this brand is worth every penny. They’re surprisingly comfortable and made in San Francisco.

I have been a long-time admirer of Fanny Penny‘s work and was also lucky enough to grab this necklace for the brief period it was in her online shop.

The top came together quickly but the skirt really tested my patience. I had my failing Brother machine serviced in the middle of making and it got dirty oil all over everything. Thankfully silk noil is pretty resilient and it came out/blended in with a wash.

The skirt shape I had in my head didn’t match any indie patterns, but it seemed simple enough to wing it. Boy, did I run in to a lot of problems. It was smooth sailing until the gathers, which took forever, then I sewed on the waistband and it was all messed up. I can’t remember the specifics due to blacking it out, but I do know I had already taken out all of the basting stitches before realizing everything needed to be redone. I think I may have even needed to recut the waistband… Anyway, it was a mess and I was running out of time and fabric. Once the waistband was finally attached, my machine couldn’t make it through the layers, so I had to abandon the pretty button plans. Then of course, after sewing on the hook and eye, I realized the inseam pockets I added to the sides weren’t evenly spaced. Oh well.

Even though the skirt proved to be challenging, I’m quite pleased I made the somewhat last-minute decision to make my “dress.” I’ve worn the top a few times, but would wear it more if I sewed the facing to the shirt or changed it to bias binding. I never grab a garment if it needs ironing and the facing ALWAYS flips up (probably because I didn’t interface it). The skirt hasn’t been worn at all since, but I’m blaming that on the weather.

Three Day Weekend

2 Comments

This weekend was a good weekend to reflect. I took some time to make some long term plans (moved this lil blog over to my swanky new domain name), did some deep cleaning and organizing (purged our closets), and started a new book: The Hate You Give. I’m still trying to read mainly women authors and this particular book feels very relevant to where we are as a country. Hoping we can drive out some of the darkness soon.

I did make what I was hoping would be a quick trip to Joann’s. It was packed and took close to an hour to get this linen and lightweight denim cut, but the coupons more than made up for it. I’m planning to use these fabrics to make the FINAL version of my culottes.

The Patternmaking & Design certificate program I’m pursuing is split into sections, the first being skirts. At the end of each section, students are required to design, draft, muslin, and sew two designs in fashion fabric.

I’m not a huge wearer of skirts so I was thrilled that my teacher allowed me to draft culottes as one of my final designs. The pockets are heavily influenced by the iconic Clyde pockets of Elizabeth Suzann. I wanted to see if I could take what I’ve learned and puzzle out their construction.

The first draft’s pockets (pictured above) were a little too droopy so I decided to hike them up in the final production pattern (I didn’t like having to bend over to reach the pocket bottom!). My goal is to finish both the production pattern AND sew them in fashion fabric this week before class next Saturday. Putting those words out in to the world to hold myself accountable!

Another thing I reflected on this weekend is how slowly I’m moving through the PM&D program. I really need to buckle down and figure out a system for completing the homework throughout the work week. I think documenting my progress and what I’m learning here will help.

First Finish of 2018

1 Comment

Pattern: Unfolding Jacket by @shopwiksten for Making Magazine vol. 4. I’ve heard that it will be released by Jenny as a stand alone pattern in late Spring. The magazine is totally worth buying though. It has SO. MANY. GREAT. PROJECTS.

Fabric: Main & Lining is a thrifted loose weave fabric. Unsure of the content, but guessing it’s a linen/cotton blend. I’ve had it for years and I’m glad I finally found the perfect pattern to pair it with.

Size: XS

Mods: None, other than forgetting to interface the collar, which I don’t recommend.

IMG_1278

I started my second Unfolding Jacket in late December right after returning from an unsuccessful trip to the airport. Many delays and future missed connections meant surprise extra sewing time. I was able to finish everything but the collar before leaving.

As mentioned in the last post, I left the black and cream cotton ikat version of this jacket with my mom making me VERY motivated to finish this one when we returned home.

Normally, I have better habits and interface all necessary pieces before moving on to sewing. My extreme excitement to finish and the time away from it caused me to forget this step. I think it’s not as disastrous as I initially thought, but you can see that the collar doesn’t quite have enough structure to fully roll in the picture above.

After making the first version with the modified pockets (set into side and collar seams), I intended to make the same changes on this one. However, the pieces were already cut out (I’m trying to batch cut things on weekends) and since the lining is from the same fabric there just wasn’t enough to re-cut all 4 pocket pieces.

Even with my new Bernina my topstitching skills are a little wonky (hoping to buy a new foot for this soon), so I was a little worried about needing to do the patch pockets. No pockets was not an option so I pushed forward, learned how to do bartacks, and think they look great!

I’m really enamored with this color combination. I paired the jacket with a pair of Emerson Crop Pants (pattern by True Bias) and a knit Lou Box Top (pattern by Sew DIY). The earrings are my new favorite pair by Baleen which I picked up at Dear Golden while in Ann Arbor.

IMG_1325

Last Make of 2017

2 Comments

Pattern: Jacket by @shopwiksten for Making Magazine.

Fabric: Main fabric Dakota Square Ikat – Cream on Black from Stonemountain. Lining is a thrifted linen duvet cover.

Size: XS

Mods: Set pockets into side and collar seams.

The minute I saw Jenny Gordy’s Instagram post about the oversized jacket back in September, I was in love. It was right around the time Elizabeth Suzann had updated its Signature Collection and I had jackets on the brain. The Wiksten Unfolding Jacket had just the right amount of box and it seemed like the design would also lend itself to modifications.

After ordering the magazine, I pulled out any fabric I had a lot of (the pattern requires six yards of fabric) and began playing with color and texture combos.

I really wanted to have enough of the two textiles above for an Ace & Jig-esque jacket, but couldn’t get it to work. The light green textile has two giant stains I didn’t notice until after washing and heat setting them in the dryer.

This yummy rust mud cloth was also contender, but remains a throw since mud cloth is an absolute pain to sew and I’m having a hard time deciding on a lining.

I finally settled on a simple black and white ikat I’d had in my stash and paired it with a charcoal linen I also had an abundance of.

I originally cut out a size small, but the fit is so oversized I decided I could probably get away with extra small. I’m glad I sized down!

I changed up the pocket design partially because I’m so dang bad at matching patterns (the first set of patch pockets I cut and sewed were so off it was laughable) and I thought it was a little sleeker (plus I really want that ES Clyde Jacket).

Once all the pieces are cut out it’s a pretty quick sew. Our flight to my hometown was delayed by a day and I got all but the collar done on a second one.

I did attach the collar backwards in I’m-almost-done-I-totally-know-the-last-step excitement and the interfaced side is on the outside. It makes the fold a little more intense than the design intended but the pattern of the fabric kinda hides it.

IMG_1043

I’m leaving this jacket in Michigan since my mom took a liking to it and I’ll take any excuse to buy more ikat fabric.

#SewMyStyle

3 Comments

Around this time last year, I decided to join #sewmystyle hosted by @alexbartholomew_. The project was designed to bring awareness to the #slowfashion movement and to encourage folks to take on sewing a capsule wardrobe. After reviewing the 12 Sew My Style patterns, I decided that purchasing new patterns wasn’t really in keeping with the Slow Fashion movement, especially when I already had at least 12 patterns that I had yet to make. So I selected a similar pattern for each month, drew it in my sketchbook, and shared them on Instagram for some accountability. 

fullsizeoutput_2964

Despite making myself finish a quilt before diving into January’s plan, the month proved quite successful! I was able to make both versions of Blueprints for Sewing’s Geodesic.

IMG_0460

I made Version 2 – Long first out of a thrifted black mystery knit. Version 1 – Short was made out of a thrifted men’s XXL sweatshirt. I can credit Version 1 with making me want to wear all things cropped.

IMG_0453

February also proved quite successful as I was able to make two Driftless Cardigans by Grainline Studio. The first version’s fabric is an Alabama Chanin knit and the second is a yummy Soy French Terry from Fancy Tiger Crafts.

March is the month I lost steam and began going out of order. My car was totaled, work was killing my soul, and I was super indecisive about fabric choices. I ended up not making the Seamwork Moji Pants until May and they were a full-on disaster. But this project reminded me how important it is to make a muslin and to analyze the finished garment’s measurements before selecting a size.

IMG_0480

I made April’s plan in March and it really tested my pattern matching abilities. I had to cut out the dress twice to get the squares to line up at the side seams and I definitely attached the sleeve cuffs wrong ¯\_(ツ)_/¯. The fabric is a beautiful ikat from Stonemountain. The Inari Tee Dress made it in to my sketchbook again (because with pockets it’d be PERFECTION) and it ended up being part of my “wedding separates.”

May’s plan remains a WIP. It’s a pattern I drafted from my mom’s beloved 1980’s jumpsuit. I’m making the muslin out of an IKEA duvet cover and will hopefully find the inspiration to finish it.

IMG_0542

I made the Mercer Tunics in March and April in Indian Block Print Voile from Stonemountain. The Alder Shirt Dress remains a WIP, partially because my introductory sewing machine started to poop out in May. The fabric is a thrifted cotton fish print that will, if I ever complete it, be great for the summer months.

IMG_0567

The Kelly Anorak, which I actually finished in May is what caused all of my sewing machine issues. Issues that made sewing really frustrating. In addition to my machine being on its last legs, I started the Patternmaking & Design certificate program at Apparel Art and all of my free time was blown to bits. My Anorak was made with sienna cotton stretch twill from Indiesew.

I did, however, have one glorious weekend of extreme productivity and was able to get a lot of the Archer done. It’s still waiting on my dress form though… The flannel is another thrifted bed sheet.

IMG_0578

The Ginger Jeans are the only project I haven’t started. I think it still just feels too challenging for my current skill set, which I realize I need to get over. That and my only pair of jeans are getting pretty threadbare.

Inevitably one of the plans changed completely. I swapped the Anna Dress (the only planned pattern I had already made) for the Farrow Dress. The Farrow is much more aligned with the silhouettes I’m most comfortable in.

IMG_0852

I made two Watson panties using leftover fabric from a Linden but have yet to venture into bra making. The panties are super comfortable and I really like the idea of being able to use scraps to make them. However, it’s really hard for me to find the motivation to make undergarments. I need to accept that buying RTW underwear and bras is okay.

Overall I made a LOT outside of the planned monthly makes, not including my patternmaking work. Next year, I think I’ll pare down plans to 9 since one project per month seemed to be too constraining. Sometime you just don’t want to make a thing.

Metallic Linen Farrow Dress

7 Comments

WOOT! I finally finished something that’s been in my brain for a long while: a metallic linen dress with geometric goodness. The idea for said dress sprang from Purl Soho’s Mineral Linen collection release however many years ago and the need for a somewhat fancy dress for holiday times.

srLa+WFATkiivy91Mw1LRw

Initially, I thought I’d pair the Mineral Linen with By Hand London’s Anna Dress and do a geometric triangle thing on the skirt panels (think half rectangle triangle). But after reading the fabric is dry clean only and the realization that I almost never wear the one Anna Dress I’ve made, the whole idea kinda fell apart.

6BQp2GM8SHaOryyImWA

Then in walk’s Grainline Studio’s Farrow Dress, satisfying all my clothing wants and desires: pockets, sack shape, and geometric lines.

fullsizeoutput_3469

In true Sienna form, it took me a long-ass time to make it. Partially because I was still searching for right fabric that could withstand regular washing and a hot iron. Partially because there aren’t enough hours in the day.

Thankfully, my favorite semi-local fabric store, Stonemountain & Daughter Fabric, started carrying metallic linens. I scooped up the necessary yardage and followed the tip of ironing it with the hottest dry iron possible (to set its wrinkle-less finish) followed by  washing and drying at the highest temperatures possible. It has the yummiest linen wrinkles now.

I cut a straight size 4, which seems to be my near perfect Grainline Studio size. If I were to do it all over again I would definitely shorten the sleeves by ~2″ as I’d like for the sleeve to hit a little lower than 3/4 length. As you can see in the picture above, I’ve awkwardly folded the sleeve up.

vDO2m2FQR8ey%vgucG9UYQ

It all came together relatively quickly, despite one sleeve facing being a big turd (it still has an imperfection and I’m pretending I’m fine with it) and the disappointing fact that I just couldn’t finish it in time for a fall wedding a week ago.

In addition to the dress, I envisioned some sort of statement jewelry for the whole look. I found a kit and tutorial from Beadaholique that looked fun to make and would coordinate with my fabric choice.